Why Is My RV AC Dripping Water Inside and How to Stop It
Waking up to find water dripping from your RV ceiling can quickly ruin a peaceful morning. The steady drip from the air conditioner isn’t just annoying; it can stain furniture, damage insulation, and create the perfect environment for mold growth.
For many RV owners, this is one of those problems that appears suddenly and worsens fast if left untreated.
If you’ve ever asked yourself why is my RV AC dripping water inside, you’re not alone. Thousands of RV owners face this same issue each season, often assuming it’s due to rain or humidity.
In reality, most leaks come from clogged drain lines, worn gaskets, or airflow problems that prevent proper condensation drainage.
According to RV maintenance experts, more than 40% of indoor AC leaks in motorhomes are caused by blocked condensate drains or poor gasket seals.
Ignoring the problem can lead to expensive repairs. Even a small internal leak can cause wood rot, electrical short circuits, or mold contamination that spreads through ventilation ducts.
Fixing it early, on the other hand, usually takes only a few simple steps and prevents long-term water damage.
What Does “Why Is My RV AC Dripping Water Inside” Really Mean?

When you notice water dripping from your RV air conditioner, it’s a clear sign that condensation isn’t draining where it should.
The AC system is designed to pull moisture from warm air and release it outside through a condensate drain line. When that process fails, the water has nowhere to go but inside your living space.
Understanding why is my RV AC dripping water inside starts with recognizing that this isn’t a one-time issue. It’s a signal that something in the system is blocked, misaligned, or worn out. The most common culprits are clogged drain tubes, damaged gaskets, or mis-leveled RVs that stop water from flowing out properly.
Each drop of water is a warning that the system’s drainage or insulation balance is off. If ignored, this moisture can collect in ceiling panels, soak into furniture, and even cause mold to develop in hidden areas. The longer it persists, the more expensive the repair becomes.
What does dripping water from the AC mean in an RV?
It usually indicates the condensate drain line is blocked or the drain pan is overflowing.
Is this the same as a roof leak?
No. Roof leaks happen from rainwater intrusion, while AC drips come from internal condensation buildup.
Can a small amount of dripping be normal?
Occasional dripping outdoors is normal, but water inside the RV always signals a problem.
Why does condensation form in the first place?
Moist air meets the cold evaporator coil, creating water that must be drained outside.
Can this issue happen even when the AC is new?
Yes. Poor installation, leveling issues, or manufacturing defects can cause leaks even in new units.
Why Dripping Happens — Common Causes of RV AC Indoor Leaks
If your RV air conditioner is dripping water inside, the issue usually comes down to a few key causes. Each one affects how condensation forms, drains, and exits your AC system.
Identifying the root cause early helps prevent costly interior damage and ensures your unit runs efficiently through every camping season.
The most common reason is a clogged condensate drain line. Dirt, debris, or even small insects can block the drainage path, forcing water to overflow into the RV instead of exiting through the roof.
Another frequent culprit is a faulty or flattened drain pan that no longer channels water correctly, allowing it to spill indoors instead of outside.
Improper leveling is another silent cause. When your RV isn’t perfectly level, the drain pan tilts slightly, and water can’t flow toward the outlet. Over time, that small imbalance leads to puddles forming around the air intake.
A damaged or compressed gasket between the AC unit and roof can also let condensation or rainwater seep through. Gaskets naturally wear down from heat, vibration, and weather exposure, which means they should be inspected at least once a year.
Lastly, restricted airflow from a dirty air filter or blocked vent can cause the evaporator coils to freeze. When the ice melts, the system produces more water than the drain can handle—resulting in an indoor drip.
Is a clogged drain the main reason for dripping?
Yes. More than 40% of leaks occur due to blocked condensate lines or pans.
Can a tilted RV cause water leaks?
Absolutely. Even a slight incline can redirect water back toward the interior.
How does poor airflow cause dripping?
Restricted air makes coils freeze, and melting ice floods the drain pan.
Does gasket wear affect the seal?
Yes. A worn gasket lets water bypass the drainage system and leak inside.
Can external humidity make the problem worse?
Yes. High humidity increases condensation, putting extra strain on the drainage system.
Step-by-Step: How to Stop Your RV AC from Dripping Water Inside
Fixing a leaking RV air conditioner doesn’t have to be complicated. With a few simple steps, you can locate the problem, clear the drainage system, and make sure water flows outside where it belongs. Follow this process carefully to restore your AC’s performance and prevent future leaks.
Step 1 – Power Off and Inspect the Unit Safely
Before touching anything, switch off the AC and disconnect all power sources. Water and electricity are a dangerous mix, so safety comes first. Once the power is off, remove the interior cover and look for signs of pooling water, dirt buildup, or loose connections around the drip pan.
Why should the AC be turned off first?
It prevents electrical hazards and allows for a safe inspection.
Can inspection be done from inside the RV?
Yes. Most issues can be checked from the interior access panel.
Should the RV be leveled before starting?
Yes. A level RV ensures accurate water drainage during testing.
What tools are needed?
A screwdriver, flashlight, and cleaning cloth are typically enough.
How long does inspection take?
Usually less than 20 minutes for a thorough visual check.
Step 2 – Clear the Condensate Drain Line and Pan
A clogged drain line or dirty drip pan is the number one cause of leaks. Remove debris, dust, or algae buildup using a small flexible brush or compressed air. Make sure the drain outlet on the roof is open and water can flow freely.
What if the drain line is blocked with mold or dirt?
Use a mixture of water and mild vinegar to clean it completely.
Can air pressure be used to clear the tube?
Yes, but apply gentle pressure to avoid damaging the tubing.
Should the drip pan hold water?
No. It should be dry after a full drainage cycle.
Can this cleaning be done without removing the AC?
Yes. Most drain lines can be accessed from the interior housing.
How often should this step be repeated?
At least once every season or before long trips.
Step 3 – Check and Tighten Mounting Bolts and Gaskets
Loose mounting bolts or a deteriorated gasket can let water escape around the edges. Gently tighten the bolts holding the AC to the roof, ensuring even pressure without overtightening. Inspect the rubber gasket for cracks, flattening, or gaps. If damaged, replace it immediately.
How tight should the mounting bolts be?
They should be snug, not forced—overtightening can crush the gasket.
What does a bad gasket look like?
It may appear dry, cracked, or flattened from years of pressure.
Can rainwater enter through a bad gasket?
Yes. It’s one of the most overlooked sources of leaks.
Is gasket replacement expensive?
No. Most cost under $30 and can be replaced in under an hour.
Does tightening the bolts always stop the leak?
Only if the gasket is still in good shape; otherwise, replacement is necessary.
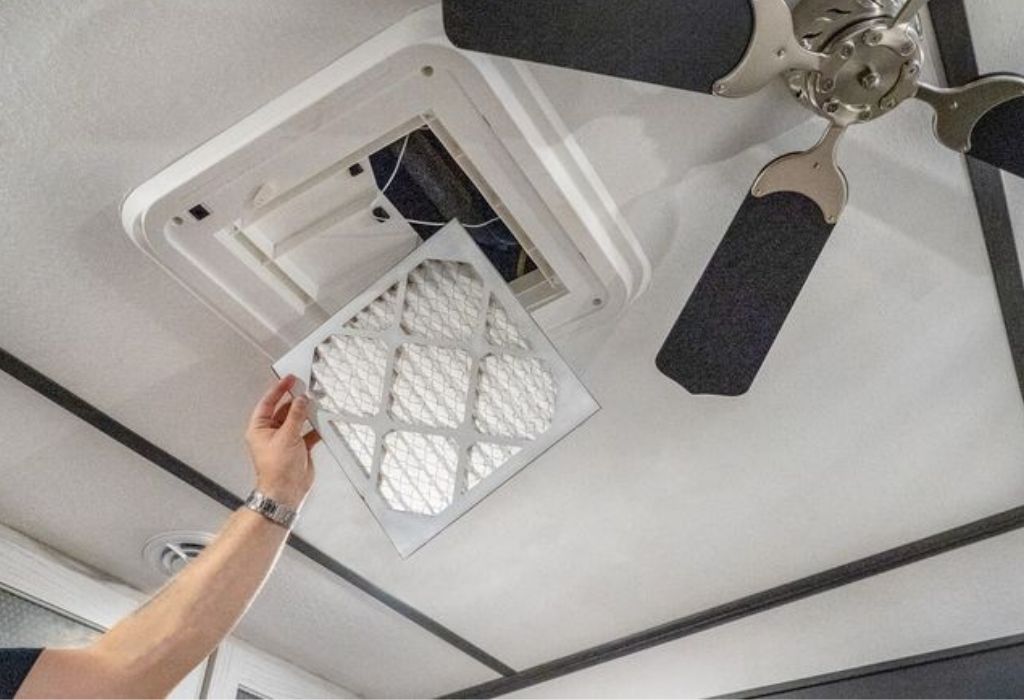
Step 4 – Clean or Replace the Air Filter
Restricted airflow is a major contributor to excess condensation. Remove the filter, wash it with mild soap and water, and let it dry completely before reinstalling. If the filter looks brittle or stained, replace it.
How often should RV AC filters be cleaned?
Every 30 to 60 days during regular use.
Can dirty filters cause coil freezing?
Yes. Low airflow leads to ice buildup that melts and floods the drain pan.
Are reusable filters reliable?
Yes, if cleaned frequently and kept dust-free.
Should the fan be set to “High” or “Auto”?
“High” is better for airflow and helps reduce condensation.
Does a clean filter improve cooling efficiency?
Absolutely. It allows better airflow, faster cooling, and less strain on the system.
Step 5 – Test for Proper Drainage and Airflow
After reassembling everything, power the AC back on and let it run for at least 20 minutes. Check for water dripping indoors and verify that condensation is draining outside properly. Watch for steady airflow and listen for any unusual sounds.
How can you tell if the problem is fixed?
No indoor dripping, consistent cooling, and visible water dripping outside indicate success.
What if water still appears inside?
Reinspect the drain line and gasket for small blockages or misalignment.
Should water come out of the roof drain?
Yes, a steady drip outside is normal and shows proper function.
Can a small amount of moisture remain near vents?
Yes, but it should dry quickly after the cooling cycle.
When is it time to call a professional?
If leaks persist after all cleaning and tightening steps, or if electrical issues are found.
Alternative Configurations and When to Use Them
Not all RV air conditioners operate the same way. The way your system handles condensation and airflow depends on its type and configuration.
Understanding these variations helps you identify unique causes of dripping and choose the right repair method for your setup.
Standard Roof-Mounted AC Units are the most common type in travel trailers and motorhomes.
These systems rely on a rooftop evaporator coil and an internal drain pan that channels water to the roof. When the RV isn’t level or the gasket compresses unevenly, water flows inward instead of out.
Ducted AC Systems distribute air through vents in the ceiling, which means water leaks may appear far from the actual source.
In these setups, blocked ducts or condensation inside air channels can cause dripping from vents or light fixtures. Regular duct cleaning and ensuring proper insulation prevent this issue.
Non-Ducted or Portable AC Units are easier to maintain but can leak if their drip trays overflow or if exhaust hoses are poorly sealed. These systems usually require manual drainage, so it’s important to empty the collection tray often during humid weather.
Tankless or Mini-Split Systems are newer in modern RVs. They use external condensate pumps that push moisture outside. If the pump fails or the line gets kinked, water backs up quickly into the unit.
Is the solution the same for all RV AC types?
No. Drainage design and airflow paths differ depending on the unit style.
Can ducted systems hide leaks?
Yes. Water can travel through ceiling ducts before dripping inside.
Do portable units need frequent draining?
Yes. They produce more moisture and often require manual emptying.
Are mini-split ACs better for moisture control?
Yes, but they need regular pump inspection to prevent internal leaks.
Should different configurations be leveled differently?
All should be level, but roof-mounted units are most sensitive to tilt.
Maintenance and Best Practices to Prevent Future Leaks
Preventing water leaks inside your RV starts with consistent maintenance. Small, regular checks can save you from major water damage, electrical issues, and mold growth later on.
A clean and well-maintained air conditioner runs more efficiently, produces less condensation, and drains water exactly where it should.
Begin by cleaning or replacing air filters every 30 to 60 days. Dust and dirt restrict airflow, which increases condensation and puts extra strain on the evaporator coil. For frequent travelers, check filters more often during hot or humid weather when the AC runs longer.
Next, inspect the drain line and drip pan every season. Use compressed air or a soft brush to clear buildup and keep the line free of algae or insects. Ensure the drip pan is clean, dry, and slightly sloped toward the outlet to encourage proper flow.
Always check roof gaskets and mounting bolts twice a year. A worn or flattened gasket is one of the most common reasons for leaks. Tighten bolts gently and replace the gasket if it shows cracks, sagging, or dry rot.
Finally, keep your RV level whenever it’s parked. Even a few degrees of tilt can cause water to collect inside the unit instead of draining out. Use leveling blocks or your onboard leveling system before running the AC.
How often should you service the RV AC unit?
At least once or twice a year, preferably before summer travel.
Should you flush the drain system regularly?
Yes, especially before long trips or after storage.
Is it okay to leave the AC on all night?
Yes, if drainage and airflow are good—it can even help control humidity.
Can using “High Fan” mode help prevent leaks?
Yes. It maintains strong airflow and reduces moisture buildup.
What’s the most overlooked maintenance task?
Ignoring the gasket and drain line—these two cause the majority of indoor leaks.
Conclusion
Dealing with water dripping from your RV air conditioner can be frustrating, but once you understand why is my RV AC dripping water inside, solving it becomes simple.
The issue almost always comes down to drainage, airflow, or sealing problems that can be fixed with a few careful inspections and cleanings.
A well-functioning AC should remove heat and moisture efficiently—never leak it into your living space. By keeping the drain line clear, tightening mounting bolts, maintaining clean air filters, and replacing worn gaskets, you can ensure the system stays leak-free all season long.
Ignoring small drips can lead to major damage over time. Water seeping into ceilings or vents can ruin insulation, warp wood panels, and promote mold growth that spreads unseen. Taking preventive action today saves you costly repairs later.
Remember: a steady outdoor drip is normal, but indoor water is a warning. Stay proactive with seasonal maintenance and always verify your RV is level before running the AC.
When you know how to identify and stop the problem, you’ll enjoy cool, dry air on every trip—without the worry of puddles forming inside your home on wheels.
I’m David R. Coleman, the founder, lead writer, and lifelong tool enthusiast behind GarageToolPro.com. With years of experience in automotive repair, woodworking, and home DIY projects, I created this platform to share practical tips, detailed tool reviews, and step-by-step guides that help mechanics, hobbyists, and homeowners get the job done right the first time.