DIY Guide: Test RV Water Heater Thermostat Safely
You step into your RV after a long drive, ready for a hot shower, but notice the water heater is behaving inconsistently. Sometimes the water heats properly, other times it remains lukewarm, and the heater seems to run continuously without shutting off.
The thermostat in your RV water heater controls the temperature by regulating the heating element or gas flow. A malfunctioning thermostat can cause inconsistent water temperature, overheating, or energy wastage, and may stress other components.
Ignoring a faulty thermostat can lead to long-term damage, electrical issues, or unsafe operation. Early testing and maintenance ensure consistent performance and prevent costly repairs.
Fortunately, testing the thermostat is a manageable DIY task with the proper tools and safety precautions. Knowing how to test it accurately allows you to determine whether it is functioning correctly or needs replacement.
This guide covers signs of a failing thermostat, required tools, step-by-step testing procedures, result interpretation, and preventive measures. Proper maintenance extends the lifespan of the water heater and keeps your system safe and efficient.
By following this guide, you can maintain consistent hot water supply, prevent damage, and ensure comfort on every RV trip. Proactive care and timely testing save time, money, and stress.
Signs Your RV Water Heater Thermostat May Be Faulty
One of the most noticeable signs is fluctuating water temperature. Your water may heat too slowly or fail to reach the set temperature consistently.
The water heater may cycle continuously without shutting off. This indicates the thermostat is not properly signaling the heater to stop heating.
Pilot light or heating element failures may also point to thermostat issues. The heater may not maintain the correct operating temperature due to faulty control.
Tripped breakers or blown fuses are a warning sign. Electrical issues may result from short circuits or excessive draw caused by a malfunctioning thermostat.
A burning smell near the heater suggests overheating. Faulty thermostats can allow the water to overheat, damaging components.
Visible corrosion or burn marks on thermostat terminals indicate stress or electrical failure. Immediate testing or replacement is recommended.
Frequent need to reset the heater or manual intervention signals a problem. Timely testing prevents further damage and ensures safe operation.
Tools and Materials Needed
A multimeter is essential for testing continuity, voltage, and resistance on the thermostat terminals.
Screwdrivers, pliers, and an adjustable wrench are needed to remove the access panel and handle connections safely.
Safety gloves and goggles protect you from electrical shocks, burns, or debris during testing.
Cleaning cloths remove dust, corrosion, or debris around the thermostat and terminals.
Optional: a replacement thermostat compatible with your RV water heater ensures you can repair immediately if testing shows a fault.
Workspace preparation is important. Disconnect power, turn off gas, and ensure the area is dry and ventilated.
Organize all tools and materials beforehand. Proper preparation ensures efficiency and reduces the chance of mistakes.
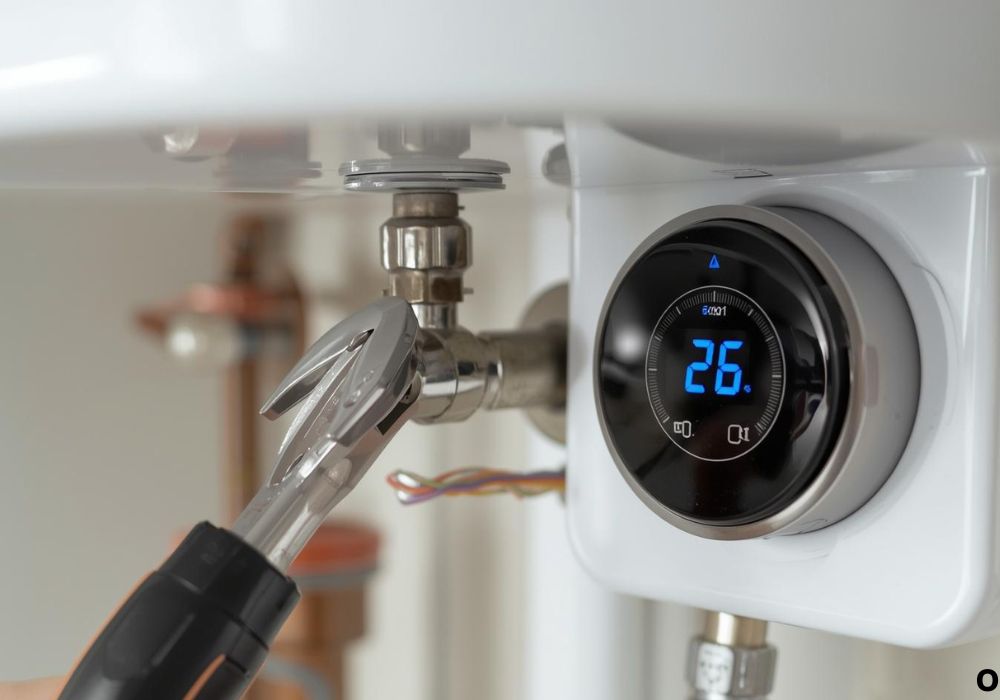
Step-by-Step Process to Test the Thermostat
Step 1: Turn off all RV power sources and disconnect shore power. Safety is critical when handling electrical components.
Step 2: Shut off the gas supply to the water heater. Ensure the heater is cool to avoid burns.
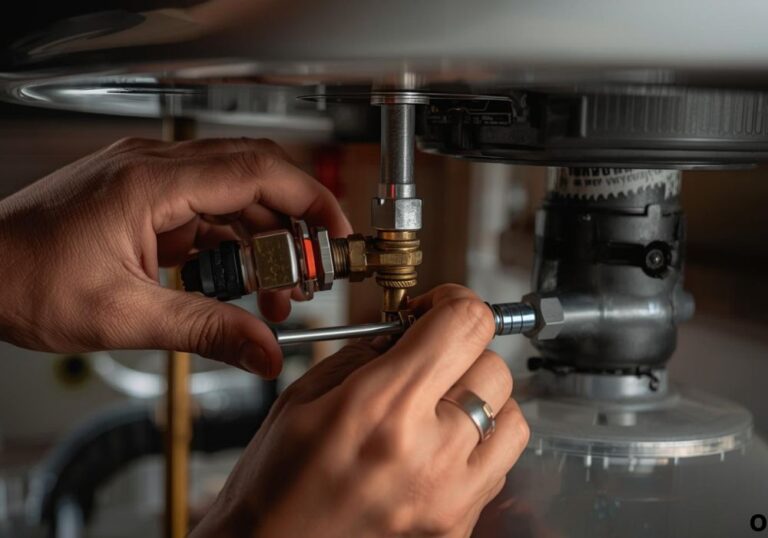
Step 3: Remove the access panel to expose the thermostat and associated wiring. Use a flashlight for better visibility.
Step 4: Visually inspect the thermostat for corrosion, burnt marks, or loose connections. Damaged terminals can affect testing accuracy.
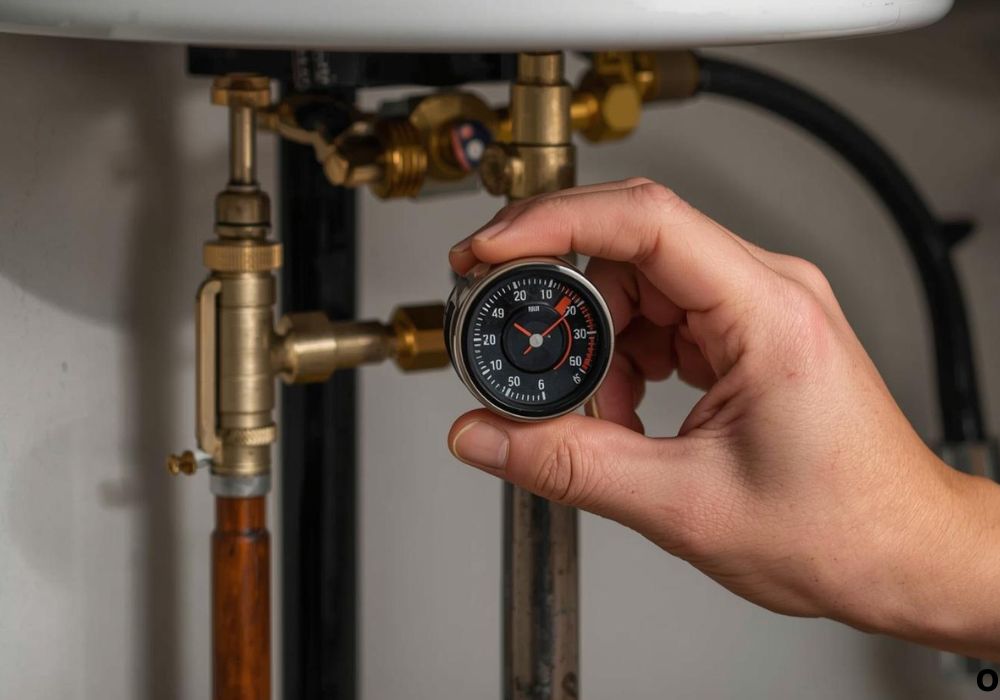
Step 5: Set the multimeter to continuity or resistance mode. Place the probes on the thermostat terminals according to manufacturer specifications.
Step 6: Test the thermostat at the specified temperature range. A working thermostat will show continuity or appropriate resistance when activated.
Step 7: Interpret the multimeter readings. If readings are outside the expected range or show an open circuit, the thermostat needs replacement.
Step 8: Reassemble the access panel, restore power and gas, and test the water heater. Verify proper temperature regulation and that the heater cycles correctly.
Extra tips: Avoid touching wiring with bare hands, use insulated tools, and take photos of wiring for proper reassembly. Careful testing ensures safety and accurate results.
Safety Tips While Testing the Thermostat
Always disconnect both electrical power and gas supply before testing.
Wear protective gloves and goggles to prevent injury from electrical contacts or debris.
Avoid touching wet surfaces while testing. Electrical components must remain dry to prevent shocks.
Use insulated tools to minimize risk.
Check multimeter functionality before testing to ensure accurate readings.
Double-check wiring and connections before restoring power. Loose wires can cause shorts or damage.
Keep a fire extinguisher nearby for emergencies when working with gas appliances.
Do not rush the testing process. Methodical steps prevent accidents and errors.
Preventing Future Thermostat Issues
Regularly inspect wiring, terminals, and connections for corrosion or damage.
Avoid moisture buildup near the thermostat, which can lead to corrosion and electrical failure.
Replace worn or faulty thermostats with high-quality, compatible parts.
Follow the manufacturer’s instructions for operation and maintenance to ensure reliable performance.
Document inspection and maintenance activities for future reference.
Periodically test the thermostat to verify proper function and water temperature regulation.
Maintain consistent power supply to avoid surges that can damage the thermostat or board.
Cost Considerations
Multimeters typically cost $10–$30 and are reusable for multiple electrical tasks.
Replacement thermostats range from $20–$50 depending on the RV water heater model.
DIY testing saves on labor costs, which may exceed $100 for professional service.
Hidden costs may include wiring damage or component failure due to neglect.
Professional inspection ensures safety and accuracy but costs more.
Investing in high-quality tools and replacement parts prevents future repairs and ensures long-term reliability.
Budgeting for both DIY and professional scenarios ensures preparedness for any situation.
Frequently Asked Questions (FAQ)
How do I know if my RV water heater thermostat is bad?
Water temperature fluctuates, heater cycles continuously, or breaker trips occur frequently.
Can I test it myself?
Yes, with proper tools, safety precautions, and step-by-step instructions.
What tools are needed?
Multimeter, screwdriver, pliers, adjustable wrench, gloves, and goggles.
Do I need a specific replacement thermostat?
Yes, ensure compatibility with your RV water heater model.
How often should I test the thermostat?
Check annually or if you notice inconsistent water temperatures.
Can corrosion affect thermostat performance?
Yes, moisture and debris can prevent proper function and reduce lifespan.
Is professional testing necessary?
Not for minor issues, but professionals are recommended for complex electrical concerns.
How do I interpret multimeter readings?
Continuity or correct resistance indicates a functioning thermostat; open circuit or incorrect readings indicate failure.
What if the heater still doesn’t work after testing?
Check wiring, connections, and consider replacing the thermostat if necessary.
Should I clean the thermostat?
Remove dust and debris, but avoid using liquids that may damage electrical contacts.
Can voltage spikes damage the thermostat?
Yes, surges can fry components or reduce operational lifespan.
Can a faulty thermostat affect the heating element or pilot?
Yes, improper regulation can cause overheating or failure to maintain proper temperature.
How do I ensure long-term reliability?
Regular inspection, high-quality replacement parts, safe electrical supply, and proper installation.
Should I flush the water heater tank regularly?
Yes, flushing removes sediment buildup, which can stress the thermostat and heating element.
What safety gear is essential?
Gloves, goggles, insulated tools, and working in a dry, ventilated area.
Conclusion
Testing your RV water heater thermostat is a straightforward DIY task with the right tools and precautions. Following step-by-step instructions ensures accurate diagnosis and prevents electrical hazards.
Regular inspection and maintenance extend the thermostat’s lifespan and ensure consistent hot water. High-quality replacement parts reduce the risk of failure and costly repairs.
Whether DIY or professional assistance is needed, timely testing ensures safe and efficient operation of your water heater. Proper care guarantees reliable hot water and peace of mind on every RV trip.
By following these instructions, your RV water heater thermostat will remain functional, safe, and reliable. Proactive maintenance prevents failures and ensures comfort throughout your travels.
I’m David R. Coleman, the founder, lead writer, and lifelong tool enthusiast behind GarageToolPro.com. With years of experience in automotive repair, woodworking, and home DIY projects, I created this platform to share practical tips, detailed tool reviews, and step-by-step guides that help mechanics, hobbyists, and homeowners get the job done right the first time.