how to troubleshoot atwood rv water heater
You arrive at your RV campsite after a long day and attempt to take a shower, but the Atwood water heater fails to ignite. The pilot light clicks repeatedly without lighting, or the water takes unusually long to heat, leaving you frustrated and uncomfortable.
The Atwood RV water heater is designed to provide reliable hot water, but like any appliance, it can encounter issues. Problems with the pilot, thermocouple, igniter, circuit board, or wiring can prevent it from functioning properly.
Ignoring these issues may lead to costly repairs, energy wastage, or even safety hazards like gas leaks or electrical shorts. Timely troubleshooting is critical to ensure both safety and comfort while traveling.
Fortunately, troubleshooting the Atwood RV water heater is a manageable DIY task when approached systematically. With the right tools, safety precautions, and step-by-step guidance, most common problems can be identified and resolved without calling a professional.
This guide covers common issues, necessary tools, detailed troubleshooting steps, interpretation of results, and preventive maintenance practices. By following these instructions, you can restore your water heater’s proper function, maintain consistent hot water, and prevent future breakdowns.
Proper maintenance and proactive troubleshooting help protect your investment, extend the lifespan of your water heater, and keep your RV comfortable for all your adventures.
Common Issues with Atwood RV Water Heaters
One of the most frequent problems is a pilot light that won’t ignite. Clicking noises without flame often indicate a faulty igniter, blocked pilot tube, or electrical failure.
Water that heats inconsistently or fails to reach the desired temperature is another common symptom. This can be caused by a faulty heating element, thermostat issues, or sediment buildup in the tank.
Heaters that cycle on and off repeatedly may have electrical problems or a malfunctioning thermostat. Repeated cycling stresses components and increases energy consumption.
A pilot that keeps going out could indicate a worn thermocouple or a misaligned igniter. Continuous outages can make the water heater unreliable and frustrating to use.
Strange noises during operation, such as popping, hissing, or gurgling, often signal sediment accumulation in the tank. Sediment can reduce efficiency and damage heating elements over time.
Electrical issues, such as blown fuses or tripped breakers, often result from shorted wires or a faulty circuit board. Ignoring these problems can lead to further damage or even unsafe conditions.
Minor leaks around plumbing connections, valves, or fittings are also common. While these may seem small, they can exacerbate internal corrosion or damage electrical components if left unchecked.
Tools and Materials Needed
A multimeter is essential for checking voltage, continuity, and resistance in the water heater’s electrical components.
Screwdrivers, pliers, and an adjustable wrench are needed to remove panels, disconnect wiring, and access components safely.
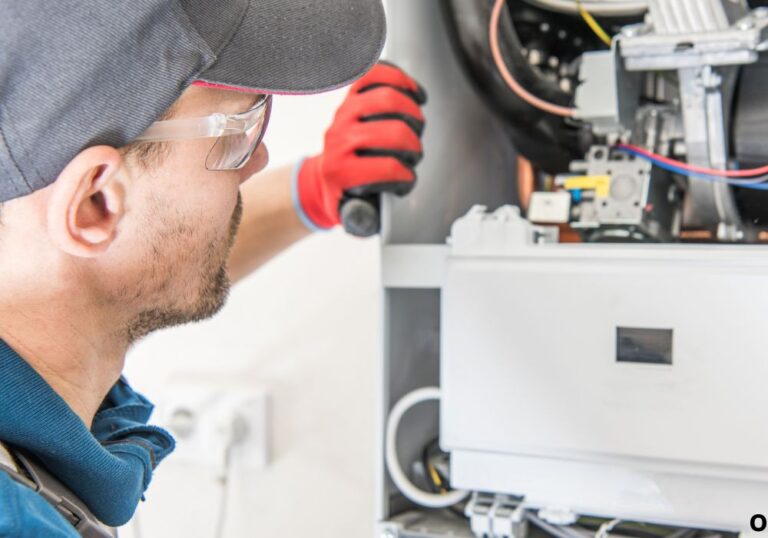
Safety gloves and goggles protect you from burns, electrical shock, or debris during inspection and troubleshooting.
Cleaning cloths help remove dust, corrosion, or sediment from connections and the pilot assembly.
Optional replacement parts, such as thermocouple, igniter, heating element, or circuit board, allow immediate repair if testing indicates a fault.
A flashlight helps inspect hard-to-see areas behind panels or under cabinets.
Workspace preparation is important. Disconnect power, turn off gas, ensure proper ventilation, and keep the area dry for safety.
Organize all tools and materials before starting to streamline the troubleshooting process. Being prepared prevents errors and improves efficiency.
Step-by-Step Troubleshooting Process
Step 1: Turn off all electrical power and disconnect shore power. Working on live circuits is extremely dangerous.
Step 2: Shut off the gas supply to the water heater. Ensure the tank is cool before beginning inspection.
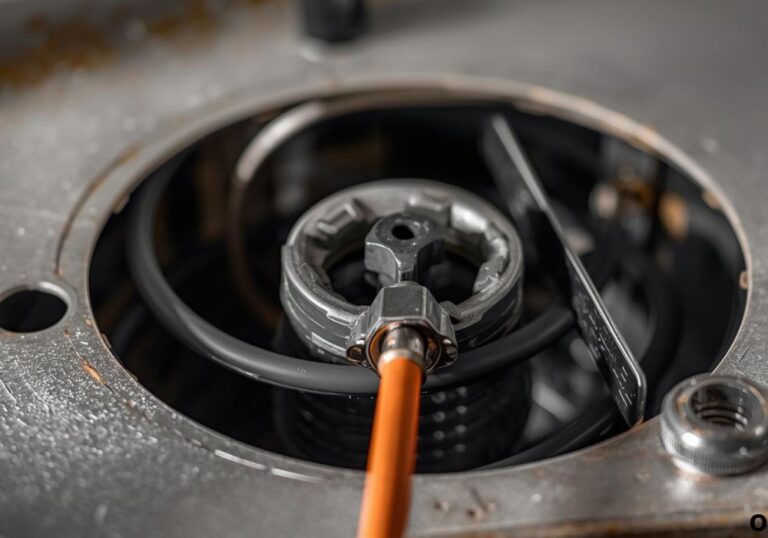
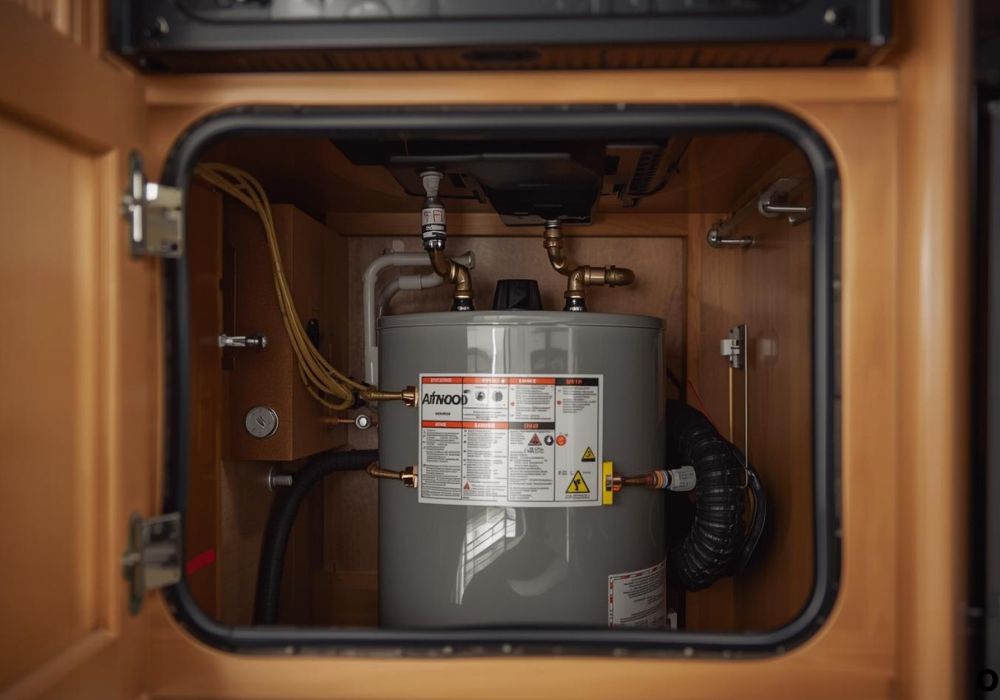
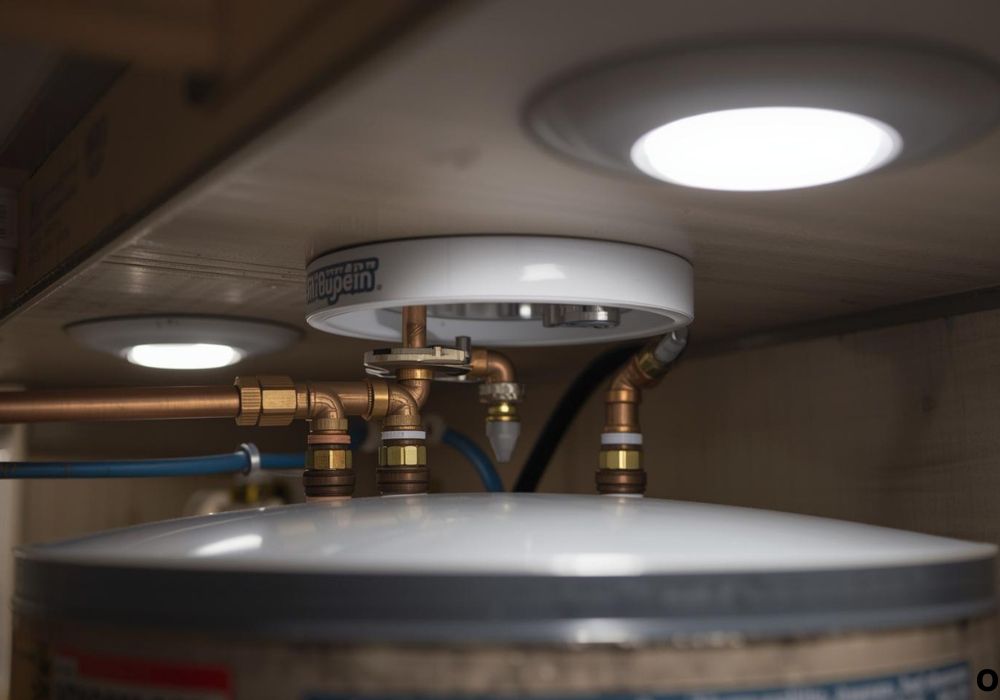
Step 3: Remove the access panel to expose the pilot assembly, thermostat, circuit board, and heating element. Use a flashlight to see clearly.
Step 4: Visually inspect the pilot light, thermocouple, and igniter. Look for corrosion, soot buildup, or damage that could prevent proper ignition.
Step 5: Test the thermocouple and igniter using a multimeter. Check for continuity and proper voltage according to manufacturer specifications.
Step 6: Inspect the heating element for corrosion, sediment accumulation, or wear. Test its continuity with a multimeter to ensure proper function.
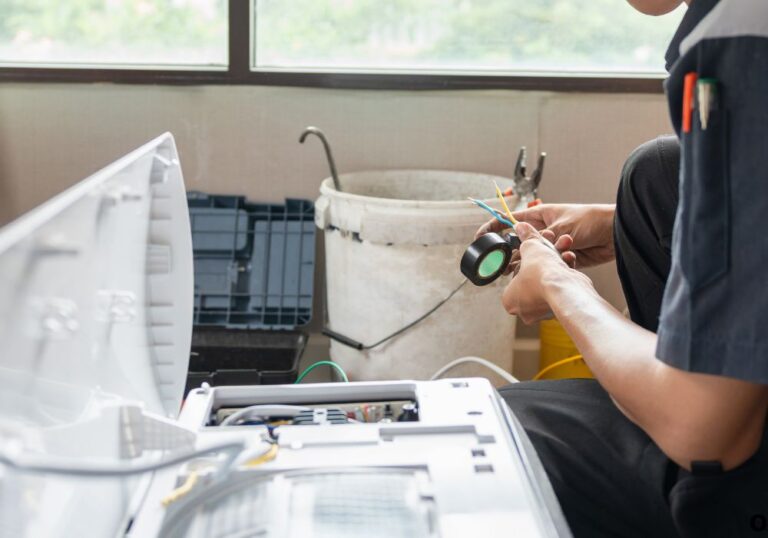
Step 7: Examine the circuit board and wiring connections. Look for burnt areas, loose connections, or corrosion that could affect performance.
Step 8: Check for gas supply issues. Inspect the regulator, valves, and lines for leaks or blockages.
Step 9: Reassemble all components carefully, ensuring connections are tight and the panel is secure.
Step 10: Restore power and gas, then test the water heater. Confirm the pilot ignites consistently, the heater cycles correctly, and the water heats properly.
Extra tips: Take photos of wiring before disassembly, use insulated tools, and clean components during inspection. Methodical troubleshooting prevents mistakes and ensures accurate results.
Safety Tips While Troubleshooting
Always disconnect both power and gas supply before working on the water heater.
Wear protective gloves and goggles to prevent burns or injury from electrical components.
Avoid touching wet surfaces during testing or inspection. Moisture increases the risk of shock.
Use insulated tools to reduce the risk of electrical hazards.
Test your multimeter before use to ensure accuracy.
Double-check all wiring and connections before restoring power. Loose or damaged wires can cause shorts.
Keep a fire extinguisher nearby for added safety while troubleshooting gas-powered appliances.
Do not rush the process. Careful inspection and testing ensure both safety and accurate diagnosis.
Preventing Future Atwood Water Heater Issues
Regularly clean and inspect the pilot, thermocouple, and igniter for debris and corrosion.
Flush the tank periodically to remove sediment that can damage the heating element and reduce efficiency.
Inspect the circuit board and wiring connections for signs of wear, corrosion, or looseness.
Maintain proper gas supply and regulator function to ensure safe operation.
Replace worn components proactively rather than waiting for complete failure.
Keep the access panel secured to prevent debris or moisture intrusion.
Document maintenance, inspections, and replacements for future reference.
Periodic testing ensures continued reliable operation and prevents unexpected failures.
Cost Considerations
A multimeter costs approximately $10–$30 and can be used for multiple maintenance tasks.
Replacement parts vary: thermocouple ($20–$30), igniter ($25–$50), heating element ($30–$60), circuit board ($50–$150).
DIY troubleshooting saves labor costs, which can exceed $100 per professional service.
Hidden costs may arise from wiring damage, corrosion, or delayed repair.
Professional inspection ensures safety and accurate diagnosis but costs more.
Investing in quality tools and replacement parts reduces future problems and increases water heater reliability.
Planning for both DIY and professional options ensures preparedness for any issue.
Frequently Asked Questions (FAQ)
How do I know if my Atwood water heater is malfunctioning?
Signs include pilot issues, inconsistent water temperature, and tripped breakers.
Can I troubleshoot it myself?
Yes, with proper tools, safety precautions, and step-by-step instructions.
What tools are needed?
Multimeter, screwdrivers, pliers, adjustable wrench, gloves, goggles, and flashlight.
Do I need specific replacement parts?
Yes, ensure compatibility with your Atwood water heater model.
How often should I inspect my water heater?
Before each travel season and whenever performance issues arise.
Can sediment damage the heating element?
Yes, sediment buildup reduces efficiency and may shorten the element’s lifespan.
Is professional troubleshooting necessary?
Not always, but recommended for complex electrical or gas issues.
How do I test the thermocouple and igniter?
Use a multimeter to check continuity and voltage according to manufacturer specs.
What if the pilot keeps going out?
Check the thermocouple, igniter, gas supply, and regulator.
Should I flush the tank regularly?
Yes, it prevents sediment buildup that can damage components.
Can wiring issues mimic component failure?
Yes, loose or corroded connections can cause symptoms similar to failed parts.
What safety precautions are essential?
Disconnect power and gas, wear gloves and goggles, and work in a ventilated area.
How can I prevent future failures?
Regular cleaning, inspections, and replacing worn parts proactively.
What if the water still doesn’t heat after troubleshooting?
Check all components systematically; replace faulty parts as needed.
Can unusual noises indicate water heater problems?
Yes, popping or gurgling often points to sediment or heating element issues.
Conclusion
Troubleshooting your Atwood RV water heater is a manageable DIY task with the right tools and precautions. Following step-by-step guidance ensures safe diagnosis and restores proper function.
Regular inspection, cleaning, and preventive maintenance extend the life of your water heater and ensure reliable hot water. High-quality replacement parts reduce the risk of repeated problems.
Timely troubleshooting prevents safety hazards, costly repairs, and inconvenient downtime during trips. Proper care guarantees consistent hot water, safety, and comfort for every adventure.
By following these steps, your Atwood RV water heater will remain functional, safe, and reliable. Proactive maintenance and careful troubleshooting preserve your investment and ensure peace of mind on the road.
I’m David R. Coleman, the founder, lead writer, and lifelong tool enthusiast behind GarageToolPro.com. With years of experience in automotive repair, woodworking, and home DIY projects, I created this platform to share practical tips, detailed tool reviews, and step-by-step guides that help mechanics, hobbyists, and homeowners get the job done right the first time.