How to Install an RV Water Heater Bypass Kit
You’ve parked your RV for the season and it’s time to winterize. As you start pumping antifreeze through the plumbing, you realize the water heater will need several extra gallons just to fill it up. That’s wasted product and money.
An RV water heater bypass kit prevents this problem by rerouting antifreeze around the water heater instead of through it. It’s a small, affordable upgrade that makes winterizing faster, cheaper, and safer.
This guide will show you exactly how to install an RV water heater bypass kit, what tools you’ll need, and how to use it correctly for both winter and summer RV maintenance.
Why You Need a Water Heater Bypass Kit
RV water heaters hold 6–12 gallons of water. During winterizing, filling the entire tank with RV antifreeze adds unnecessary cost and time.
A bypass kit isolates the tank from the rest of the system so antifreeze flows only through the water lines. This saves up to 10 gallons of antifreeze and reduces the risk of chemical residue inside the tank.
It also allows for easy maintenance and draining without disturbing the rest of the system. Many modern RVs come with a factory-installed bypass kit, but if yours doesn’t, adding one is simple and cost-effective.
Installing a bypass system also helps prevent corrosion and contamination when transitioning between winter and summer use.
Tools and Parts You’ll Need
Before starting, gather all the necessary tools and materials to make the job smooth and leak-free.
- RV water heater bypass kit (single, dual, or three-valve type depending on your setup)
- Adjustable wrench or socket set
- Plumber’s Teflon tape
- Screwdrivers for access panels
- Towels or small bucket for draining
- Flashlight for better visibility
- Gloves and eye protection
Ensure your kit matches the heater brand (Suburban or Atwood) and that fittings are compatible with your plumbing size—usually ½-inch connections.
Step-by-Step Installation Process
Step 1: Turn Off and Drain the System
Turn off your propane supply, water heater switch, and water pump. Open a hot water faucet to relieve pressure.
Next, remove the water heater drain plug and let the tank empty completely. This prevents spills and pressure buildup during installation.
Step 2: Access the Back of the Water Heater
Locate the back of your RV’s water heater from inside a cabinet or under a bed compartment. You’ll see two water lines—cold water entering at the bottom and hot water exiting at the top.
Use a flashlight to ensure you have enough room to work safely around these connections.
Step 3: Disconnect Existing Water Lines
Use your wrench to carefully loosen and remove the cold and hot water lines connected to the heater. Have a towel ready to catch any residual water.
Label each line to avoid confusion when reconnecting them later.
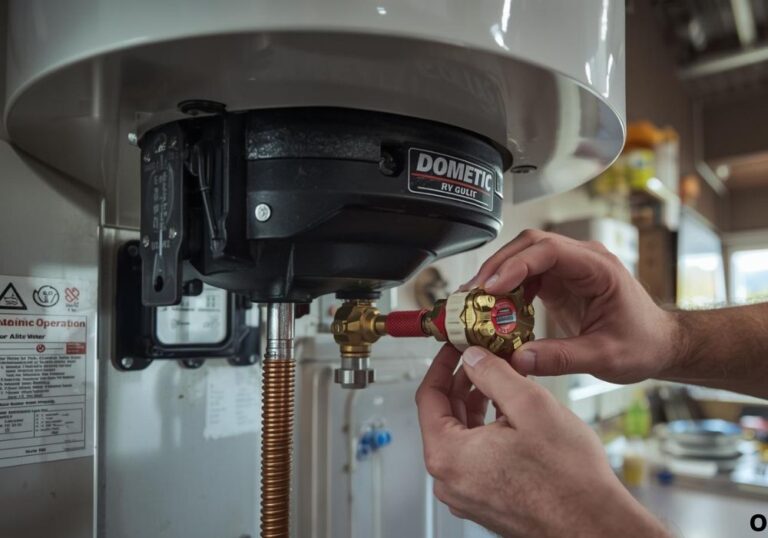
Step 4: Install the Bypass Valves
Attach the bypass valves to the hot and cold inlets on the heater. Wrap the threads with Teflon tape before tightening to prevent leaks.
The valves should be oriented so they can connect with the bypass hose that links both lines together.
Step 5: Connect the Bypass Hose
Attach the provided short hose between the two bypass valves. Make sure connections are snug and properly sealed.
This hose creates a bridge that allows antifreeze to flow from the cold line directly to the hot line when the valves are set to bypass mode.
Step 6: Test the System
Close all valves and turn on the RV water pump to pressurize the system. Open faucets and check for water flow and leaks.
Next, switch to bypass mode and confirm water flows between the cold and hot lines without entering the heater tank.
Tighten any fittings if necessary until no drips are visible.
Using the Bypass Kit During Winterizing
When preparing for winter, turn both bypass valves so the water heater is isolated. The cold water should flow directly into the hot line without entering the tank.
Drain the heater completely before adding antifreeze. Then, when pumping antifreeze into the plumbing system, it will skip the water heater entirely, saving product and protecting the system from freeze damage.
In spring, switch the valves back to normal mode to restore the heater to the water circuit.
Common Mistakes to Avoid
Many RV owners forget to relieve water pressure before disconnecting lines, which can cause a sudden burst of water. Always depressurize first.
Do not overtighten fittings—this can crack threads or damage the heater ports. Tighten gently but firmly.
Ensure the bypass valves are labeled correctly. Setting them in the wrong position can cause hot and cold water mixing or airlocks.
Finally, always test for leaks before closing up the access panel.
Maintenance Tips

Operate the bypass valves at least twice a year to keep them moving freely.
Inspect the hose and fittings annually for cracks, rust, or mineral buildup. Replace worn parts promptly.
During de-winterizing, run fresh water through the system for several minutes to flush out all traces of antifreeze.
Keep the bypass valves in normal position whenever the RV water heater is in use during the season.
FAQs
1. What is an RV water heater bypass kit?
It’s a plumbing setup that allows you to route water or antifreeze around your water heater tank when winterizing.
2. Why should I install one?
It saves antifreeze, simplifies winterization, and protects your water heater from unnecessary chemical exposure.
3. Can I install it myself?
Yes, installation takes about one hour with basic hand tools.
4. Do all RVs come with one installed?
No, older or budget RVs may not include a bypass system.
5. How do I know what type to buy?
Check your heater brand—Suburban or Atwood—and choose a compatible single-, dual-, or three-valve kit.
6. Should I drain the heater before installing?
Yes, always drain to prevent spills and pressure buildup.
7. What happens if I don’t use a bypass?
You’ll waste gallons of antifreeze and may leave residue inside the tank.
8. Does the bypass affect normal water heating?
No, when set to normal mode, your heater works exactly the same.
9. Can I leave the valves in bypass mode all year?
No, only use bypass mode during storage or winterization.
10. How much antifreeze will I save?
Usually between 6 and 10 gallons, depending on your heater size.
11. How often should I inspect the bypass?
Check it every spring and fall for leaks or stiffness in the valves.
12. Can I install a bypass on an electric-only heater?
Yes, the process is the same regardless of the heating source.
13. What if I mix up the valve positions?
Refer to the kit diagram; if you get no hot water, your valves are likely reversed.
14. Is it safe to use Teflon tape on RV water fittings?
Yes, it prevents leaks and makes removal easier later.
15. Should I use a plumber if I’m unsure?
Yes, if you’re not comfortable with RV plumbing, a technician can install it quickly.
Conclusion
Installing an RV water heater bypass kit is one of the smartest upgrades for any RV owner. It simplifies winterizing, saves antifreeze, and protects your system from unnecessary wear.
With just a few basic tools and an hour of your time, you can install the kit yourself and enjoy easier maintenance every season.
Next time you prepare your RV for storage, you’ll be glad you added this small yet powerful feature.
I’m David R. Coleman, the founder, lead writer, and lifelong tool enthusiast behind GarageToolPro.com. With years of experience in automotive repair, woodworking, and home DIY projects, I created this platform to share practical tips, detailed tool reviews, and step-by-step guides that help mechanics, hobbyists, and homeowners get the job done right the first time.