How to Winterize an RV Without Water Pump
The first cold night of the year can be a quiet warning for RV owners.
Temperatures drop, and any leftover water hiding in the pipes begins to freeze, creating invisible pressure that can crack fittings and destroy plumbing lines.
Each winter, thousands of RVs suffer burst pipes because owners forget to remove every last drop of water.
According to RVTravel, frozen plumbing can cause repairs costing over $1,200 on average. It’s a preventable problem with the right winterization strategy.
Most RV guides recommend running pink antifreeze through the system using the onboard water pump.
But not everyone wants to do that. Some owners prefer to keep chemicals out of their fresh water lines, while others have broken or inaccessible pumps. The good news is that winterizing an RV without a water pump is completely possible.
This method uses a combination of gravity drainage and compressed air to protect every part of the water system.
It’s clean, efficient, and ideal for off-season storage. According to KOA, properly draining and blowing out lines can prevent freezing damage even in sub-zero conditions.
In this guide, you’ll discover step-by-step how to drain tanks, blow out water lines, bypass the heater, and protect traps with antifreeze.
Each section includes short, direct answers to common questions so you can follow confidently without missing a single detail.
By the end, you’ll know exactly how to winterize an RV without water pump and keep your vehicle ready for next spring’s adventures — with zero freeze damage and total peace of mind.
Why Winterizing Without a Water Pump Matters
When temperatures fall below freezing, even a small amount of trapped water can expand and burst RV pipes. The damage often goes unnoticed until spring, turning a simple oversight into a costly plumbing repair.
Traditional methods rely on the onboard water pump to push antifreeze through the lines. However, that approach can introduce chemicals into drinking water systems and cause unnecessary stress on the pump.
Winterizing an RV without a water pump focuses on air pressure and drainage rather than liquid chemicals. This method clears moisture naturally, protecting fittings, valves, and seals from internal pressure caused by ice formation.
By eliminating antifreeze circulation, you avoid chemical odors and reduce long-term maintenance needs. It also saves time when de-winterizing since no flushing is required before your first trip of the season.
This process is especially beneficial for RVs stored in moderate or dry climates. Owners who frequently disconnect and reconnect their rigs find that drainage and air-blow methods offer simpler protection with fewer moving parts.
Why avoid using the water pump during winterization?
It can trap residual water inside, increasing the risk of freezing and pump damage.
Does winterizing without the pump save money?
Yes, it reduces antifreeze use and prevents premature pump wear, cutting both cost and maintenance.
Is this method safe for all RVs?
It’s suitable for most RVs, but always check your owner’s manual for system-specific advice.
Will this protect fittings and joints from freezing?
Yes, proper air-blow and drainage prevent water buildup, protecting connections throughout the system.
What’s the biggest advantage of this method?
Cleaner plumbing, reduced antifreeze taste, and longer pump life — all while preventing costly freeze damage.
Tools, Supplies, and Preparation
Before starting, gather everything you’ll need to winterize your RV without using the pump. Preparation ensures the process goes smoothly and prevents overlooked steps later on.
Essential tools include an air compressor with adjustable pressure, a blow-out adapter for the city water inlet, non-toxic RV antifreeze, a wrench set, hose caps, and basic safety gear. You’ll also need access to all your drain valves, faucets, and low-point drains.
Keep the compressor pressure between 30–40 PSI to avoid damaging lines. Disconnect the RV from all water sources and turn off heating elements on the water heater before draining or blowing air.
Removing water filters and opening faucets ahead of time will make draining faster and more complete. Finally, park the RV on level ground for proper water flow through the plumbing system.
What PSI should the compressor be set to?
Set it between 30 and 40 PSI for safe pressure levels.
Where should the air hose be connected?
At the city water inlet using a screw-in blow-out adapter.
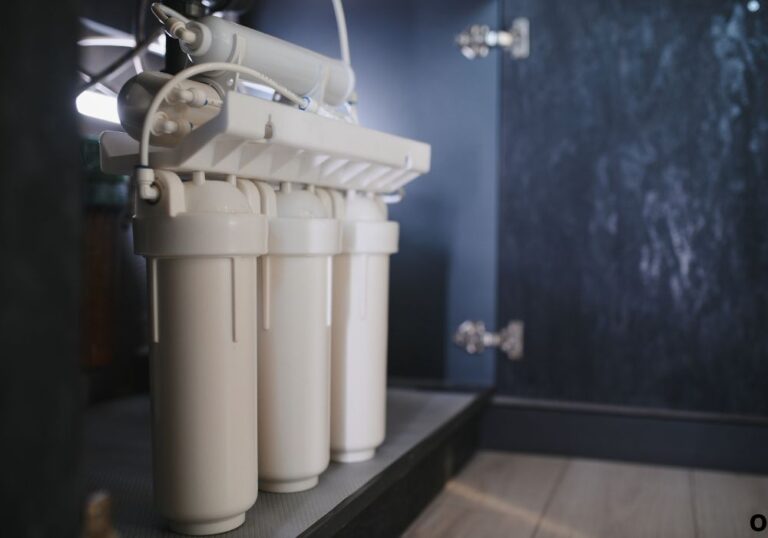
Do I need to remove filters?
Yes, remove or bypass them so air can move freely through lines.
Is automotive antifreeze safe to use?
No, only use non-toxic RV antifreeze rated for potable systems.
Do I need a water heater bypass kit?
It’s optional but helps isolate the water heater and save antifreeze.
Step-by-Step Process to Winterize Without Water Pump
This section outlines the complete process — from draining to sealing. Follow these steps carefully to keep your RV protected all winter.
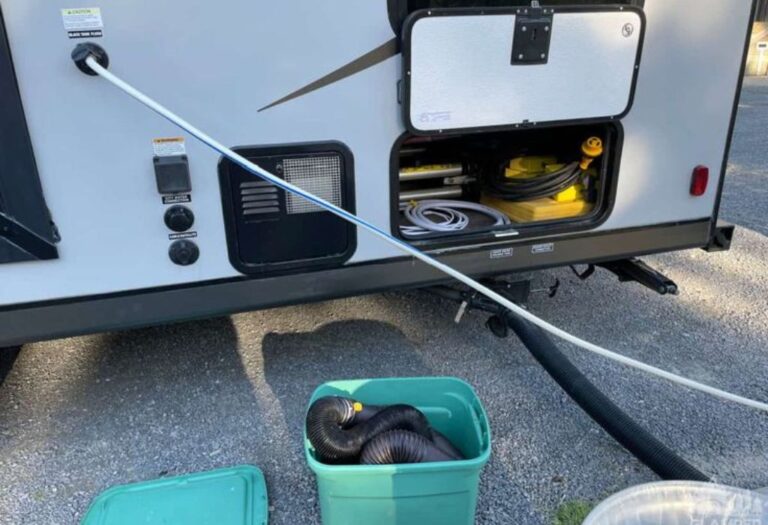
Drain All Tanks and Open Valves
Start by draining the freshwater, gray, and black tanks completely. Open every faucet, shower, and valve to let gravity empty the system. Remove any showerheads or sprayers that may trap water.
Let air flow naturally through the system as water drains. The goal is to remove as much moisture as possible before introducing compressed air.
Should the black and gray tanks be drained first?
Yes, empty the waste tanks first to prevent contamination.
Do faucets stay open during drainage?
Yes, open all faucets to allow air movement.
Does the shower hose need special care?
Yes, lay it flat to drain completely.
Are there low-point drains to open?
Yes, find and open both hot and cold low-point drains.
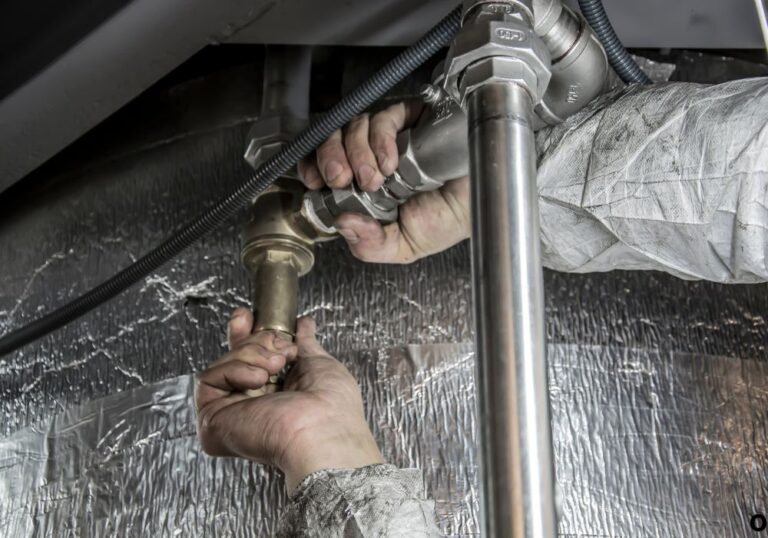
Bypass the Water Heater and Remove Anode Rod
Switch your bypass valves to isolate the water heater. Remove the anode rod and open the relief valve to let water escape. Make sure the heater is cool and disconnected from power.
By bypassing, you prevent water or air from filling the heater tank unnecessarily. It also keeps antifreeze or condensation from settling inside.
What is a bypass valve?
A valve that redirects water flow around the heater.
Do I remove the anode rod?
Yes, it allows the tank to drain fully and prevents rust.
Should the heater be on during draining?
No, ensure both gas and electric elements are off.
What if my heater has no bypass?
Drain it completely and blow air gently through.
Blow Out Water Lines with Compressed Air
Attach the compressor hose to the city water inlet and slowly pressurize the lines. Begin at 30 PSI and increase gradually to 40 PSI. Open faucets one at a time, starting from the closest to the farthest outlet.
Allow air to blow until no water sprays or sputters. This method clears water from all pipes without pushing antifreeze through the system.
Which faucets should be opened first?
Start near the inlet and move outward.
How long should air blow through each line?
A few seconds until water stops sputtering.
Should air pressure stay constant?
Yes, maintain 30–40 PSI throughout.
What if a line still leaks water?
Blow again or tilt the RV slightly to aid drainage.
Is it okay to open all faucets at once?
Yes, it speeds up venting and equalizes pressure.
Add Antifreeze to Drains and Traps
Once air has cleared the system, add small amounts of non-toxic RV antifreeze to drains, sinks, and toilets. This step protects P-traps and low points that can still hold water.
Pour about a cup into each sink and shower drain, and a quart into the toilet bowl to protect the seal. Antifreeze keeps seals lubricated and prevents ice from forming in drain traps.
Why use antifreeze after blowing air?
Air removes water, but traps still need freeze protection.
How much antifreeze per drain?
About ½ to 1 cup per drain and a quart for toilets.
Should antifreeze go in the freshwater tank?
No, only use it in drains and traps.
Do I need antifreeze in the water heater?
No, not if the heater is bypassed and empty.
Should open lines be sealed afterward?
Yes, cap them to keep debris or insects out.
Common Issues, Pitfalls, and Troubleshooting
Even with careful steps, some mistakes can lead to partial freeze damage. Common issues include missed low-point drains, overpressure, or trapped water in bends.
Check each valve, fitting, and faucet after blowing air to ensure lines are dry. Don’t exceed 40 PSI, as excessive pressure can loosen seals or damage joints.
Why does water still come out after blowing air?
Some pipes have vertical sections where water pools. Tilt the RV or blow again.
Can high pressure damage the plumbing?
Yes, anything above 40 PSI risks damage.
What if air doesn’t reach a faucet?
It may be closed or clogged; inspect and reopen it.
How do I handle external lines like outdoor showers?
Open them and blow air directly through.
What if my RV has an ice maker or washer?
Blow out those lines separately and use antifreeze in their drains.
De-Winterizing and Spring Startup
When temperatures rise again, reversing the process is simple. Start by closing all drain valves, removing any caps, and reconnecting water filters.
Run clean water through the system to flush any remaining antifreeze from traps. Sanitize the fresh water tank with a diluted bleach solution for a safe drinking supply.
How do I remove antifreeze taste from water lines?
Flush until water runs clear and odor-free.
Can I turn on the pump immediately?
Yes, after confirming valves and fittings are properly sealed.
How should bypass valves be reset?
Switch them back so the heater is in normal operation.
When should filters be replaced?
During spring setup before filling the tank.
Is tank sanitizing necessary every year?
Yes, especially if the system sat unused for months.
Tips and Best Practices

Label all valves before starting so you can return them to their original positions later. Check gaskets, seals, and joints for cracks during the process.
Always perform this procedure before consistent freezing weather begins. It’s faster and more effective than emergency draining after frost arrives.
Should the compressor run continuously?
No, use short bursts to prevent overpressure.
Is skipping antifreeze okay?
Only in mild climates with no freezing risk.
How to track open and closed valves?
Use color-coded tape or tags.
When is the ideal time to winterize?
Before night temperatures stay below 32°F (0°C).
Can I repeat this method yearly?
Yes, it’s safe and reliable for long-term use.
Cost, Time, and Effort Comparison
Winterizing an RV without using a water pump is both cost-effective and quick. Most owners finish within one to two hours.
This method uses less than a gallon of antifreeze and eliminates the need for pump operation. The initial cost of an air compressor pays off after the first season of use.
How much antifreeze does this save?
Up to 50% compared to full-pump systems.
How long does the process take?
Usually between one and two hours.
Is an air compressor worth buying?
Yes, especially if you maintain your RV yearly.
Can I rent a compressor instead?
Yes, many hardware stores offer rentals for a small fee.
Are winterization kits helpful?
Yes, kits with hoses and adapters simplify setup.
Conclusion
Winterizing an RV without a water pump is simple once you understand the steps. Draining tanks, bypassing the water heater, blowing out lines, and protecting traps with antifreeze can save thousands in future repairs.
This approach keeps your plumbing clean, avoids chemical buildup, and extends the life of your RV’s pump. It’s the ideal choice for anyone seeking a low-cost, low-maintenance way to protect their investment during the cold season.
Before the next freeze arrives, follow this guide to winterize your RV without water pump safely and confidently. Your RV will be ready for spring — no leaks, no damage, and no expensive surprises.
I’m David R. Coleman, the founder, lead writer, and lifelong tool enthusiast behind GarageToolPro.com. With years of experience in automotive repair, woodworking, and home DIY projects, I created this platform to share practical tips, detailed tool reviews, and step-by-step guides that help mechanics, hobbyists, and homeowners get the job done right the first time.