How to Remove Pressure Relief Valve on RV Heater
A leaking or faulty pressure relief valve can turn your RV water heater into a safety hazard.
Excessive pressure can damage the tank, while leaks waste water and compromise performance.
Many RV owners notice dripping or hissing around the valve and wonder how to safely remove it for inspection or replacement.
Knowing how to remove a pressure relief valve on an RV water heater ensures both safety and efficiency during maintenance.
According to RVIA statistics, over 40% of RVs experience minor water heater issues within the first five years of use (RVIA).
Ignoring a faulty valve can lead to bigger problems, including scalding hazards or tank failure.
This article explains step-by-step how to remove pressure relief valve on RV water heater, essential safety precautions, common problems, and maintenance tips.
By the end, you’ll know how to replace the valve safely and keep your RV water heater operating smoothly.
Understanding Pressure Relief Valves in RV Water Heaters
What Is a Pressure Relief Valve?
A pressure relief valve is a safety mechanism designed to release water when pressure or temperature exceeds safe levels.
It prevents tank rupture and protects plumbing components from damage.
What does a T&P valve do?
It releases excess temperature or pressure to prevent accidents.
Why is it important in RV heaters?
It ensures safety in compact RV tanks, reducing the risk of bursts or leaks.
How often should it be checked?
At least once a year or when leaks occur.
Can a faulty valve be dangerous?
Yes — it can cause leaks, scalding, or even tank rupture.
Are all RV water heaters equipped with one?
Most propane and electric models include a T&P valve for safety compliance.
Common Problems with Pressure Relief Valves
Valves can leak, stick, or become corroded over time.
Signs include dripping water, hissing, or continuous discharge even when the tank is not over-pressurized.
How do you know a valve is failing?
Persistent dripping or moisture around the tank indicates failure.
Can mineral buildup affect it?
Yes — hard water can clog the mechanism.
Is a leaking valve always broken?
Not always — sometimes high pressure elsewhere is the cause.
Can temperature cause valve discharge?
Yes — exceeding 210°F triggers the valve to release water.
Is it safe to ignore minor leaks?
No — even small leaks can indicate a serious safety issue.
Safety Precautions Before Removing a Valve
Before working on your RV water heater, safety is crucial.
Turn off the water supply and power source, then relieve tank pressure.
Wear gloves, eye protection, and place a bucket beneath the valve to catch residual water.
Should the RV be level before working?
Yes — leveling ensures safe drainage and reduces spills.
Do you need to drain the entire tank?
Partial drainage may suffice, but fully draining is safest.
Can hot water burn you during removal?
Yes — always test and release pressure first.
Is propane shutdown necessary?
Yes — prevents accidental heating or ignition.
Are tools required?
Basic wrenches, pliers, and Teflon tape are essential.
Tools and Materials Needed
Gather all tools and materials before beginning.
You will need an adjustable wrench, Teflon tape or pipe thread sealant, gloves, bucket, and rags.
Optional items include a replacement valve and screwdriver for tank access.
Can I use a standard wrench?
Yes — adjustable or open-end wrenches work fine.
Do I need Teflon tape?
Yes — ensures a watertight seal on the new valve.
Are replacement valves universal?
Valve size varies; confirm your RV model before purchase.
Is a bucket necessary?
Absolutely — it prevents water spills and protects the RV interior.
Any protective gear required?
Gloves and safety glasses are recommended to avoid burns and water splashes.
Step-by-Step Guide to Removing the Valve
Draining the Water Heater
Turn off the RV’s water supply and power source.
Open a hot water tap to relieve pressure and drain water into a bucket or sewer connection.
Can I skip draining?
No — pressurized water can cause burns or property damage.
Is opening the relief lever enough?
Partial release helps, but full drainage ensures safety.
How long does draining take?
Typically 5–10 minutes depending on tank size.
Should the RV be connected to shore water?
No — disconnect or shut off before draining.
Is hot water dangerous during drain?
Yes — allow a few minutes for the water to cool if needed.
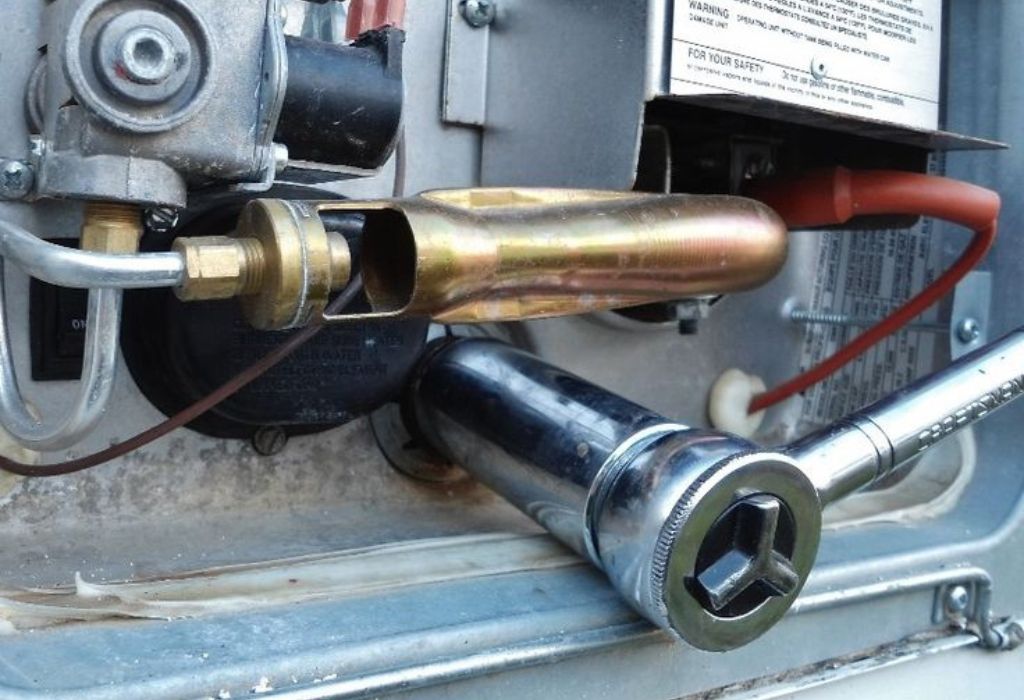
Removing the Valve
Use a wrench to turn the valve counterclockwise.
Keep a bucket underneath to catch any remaining water.
Inspect threads and the valve seat for corrosion or damage.
Does the valve come off easily?
Usually yes, but corrosion may require gentle force.
Can old pipe thread sealant affect removal?
Yes — loosen stuck threads carefully with heat or lubricant.
Should threads be cleaned?
Yes — this ensures proper fit for the replacement valve.
Is it safe to touch the valve directly?
Gloves are recommended; residual water may still be hot.
Do I need a replacement immediately?
Yes — never leave the water heater without a functioning pressure relief valve.
Installing a New Valve
Preparation
Wrap threads with Teflon tape or apply pipe sealant.
Verify the new valve matches your RV heater’s size and pressure rating.
Is Teflon tape mandatory?
Yes — it prevents leaks at the connection.
Do valves come in different pressure ratings?
Yes — ensure the new valve matches manufacturer specifications.
Can I reuse the old valve?
Not recommended if it shows wear or corrosion.
Should threads be lubricated?
Only with pipe-safe sealant; avoid grease.
Do I need to tighten firmly?
Yes — hand tight plus 1/4 turn with a wrench; avoid overtightening.
Installation
Screw the new valve clockwise until snug.
Refill the tank and slowly open the water supply.
Lift the test lever to ensure proper operation and check for leaks.
How to test the valve?
Lift the lever slightly — water should flow and stop properly.
What if water leaks after installation?
Check sealant and retighten; replace valve if necessary.
Can pressure build quickly?
Yes — monitor the first few minutes after installation.
Is it safe to turn on power before testing?
No — ensure water flow is normal before applying heat.
Should I inspect regularly?
Yes — annual inspections help maintain safety.
Common Problems and Troubleshooting
Dripping after installation may indicate loose threads or debris.
A water heater that doesn’t hold pressure may require a tank flush or a replacement valve.
A stiff lever can result from mineral deposits or mechanical wear.
Why does a new valve leak?
Improper sealant or cross-threading.
What if the lever sticks?
Clean or replace; forcing it may damage the valve seat.
Can the wrong valve cause failure?
Yes — incorrect pressure rating can lead to premature release or malfunction.
Is a dripping valve dangerous?
Minor drips are usually safe, but continuous leaks indicate malfunction.
When should I call a professional?
If corrosion, persistent leaks, or installation issues occur.
Maintenance Tips to Extend Valve Life
Test the valve annually by lifting the lever.
Flush the tank periodically to reduce mineral buildup.
Replace the valve at first signs of leaks or corrosion.
How often should the T&P valve be replaced?
Every 3–5 years or sooner if faulty.
Does flushing help valve longevity?
Yes — it removes sediment that can block operation.
Can harsh water damage it?
Yes — consider a filter if water is hard.
Is manual testing enough?
Combine visual inspection with lever testing for best results.
Should I document maintenance?
Yes — it helps track replacements and inspections.
Conclusion & Call-to-Action
Pressure relief valves are vital for RV water heater safety.
Knowing how to remove pressure relief valve on RV water heater ensures safe maintenance and prevents costly repairs.
Always follow proper safety procedures, use the right tools, and replace faulty valves promptly.
Check your RV water heater today, maintain the valve regularly, and keep your system running safely and efficiently.
I’m David R. Coleman, the founder, lead writer, and lifelong tool enthusiast behind GarageToolPro.com. With years of experience in automotive repair, woodworking, and home DIY projects, I created this platform to share practical tips, detailed tool reviews, and step-by-step guides that help mechanics, hobbyists, and homeowners get the job done right the first time.