How to Install a Shurflo RV Water Pump Guide
The water pump starts to whine the night before departure, and the kitchen faucet sputters. A simple upgrade restores steady pressure and quiets the cabin fast.
This guide explains how to install Shurflo RV water pump hardware with clear steps. The plan covers tools, wiring, fittings, priming, and leak checks.
Curiosity builds when learning how little stands between weak flow and hotel-like pressure. A popular Shurflo 4008 is rated around 3.0 GPM with a shut-off near 55 PSI, giving comfortable performance for most layouts (Shurflo 4008 specs).
First starts are easier when a pump can self-prime. The 4008 lists dry prime capability up to about 6 feet, which speeds installation and service restarts (spec sheet).
Many owners compare models before buying. The long-running Shurflo 2088 family covers service flows in the ~2.7–4.0 GPM range depending on variant, which helps size an upgrade for larger rigs (2088 series overview).
This article shows how to install shurflo rv water pump components step by step. By the end, the system will be safe, leak free, and tuned for smooth cycling.
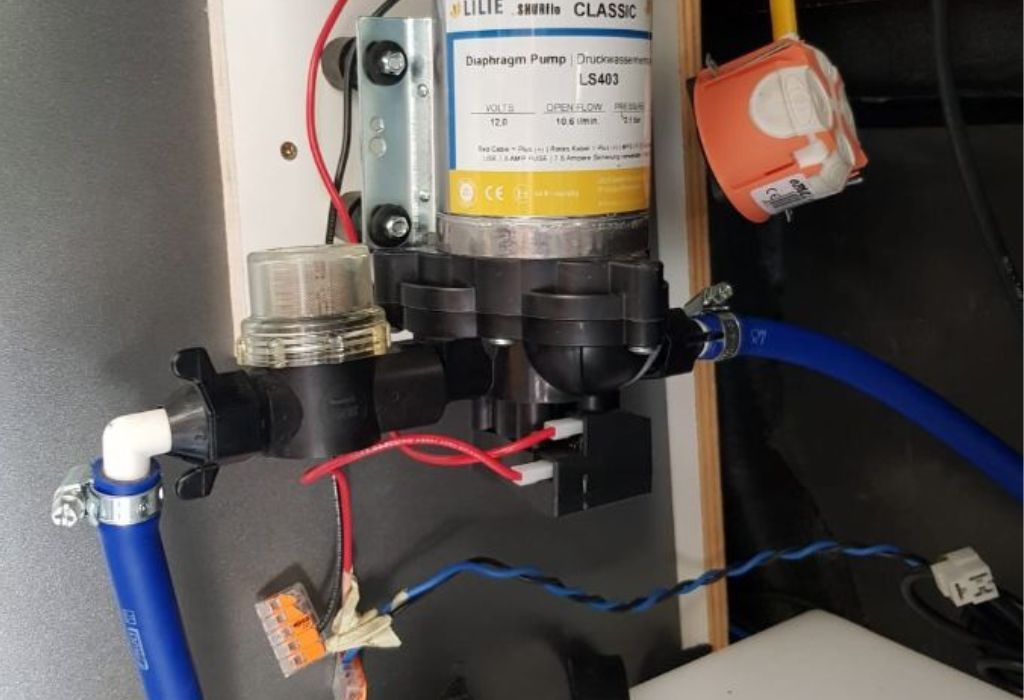
What Is a Shurflo RV Water Pump?
A Shurflo RV water pump is a compact 12V diaphragm pump that pressurizes fresh water to faucets, showers, and toilets. Internal check valves enforce one-way flow while a pressure switch starts and stops the motor based on line pressure.
Common models include the Shurflo 4008 and 2088 selected for different flow and pressure needs. Many installations pair the pump with a clear inlet strainer and an optional accumulator tank to smooth pulsation.
What does a Shurflo pump do?
It provides pressurized water on demand so fixtures run like a small home system.
How does it know when to run?
A built-in pressure switch turns the pump on when pressure drops and off at the set point.
Does the pump include a check valve?
Yes, internal valves prevent backflow through the head.
Which models are most common in RVs?
The 4008 is a frequent replacement, and the 2088 appears in many older or higher-flow builds.
Where should it be installed?
Near the fresh tank on a firm, accessible surface with short, flexible inlet and outlet lines.
Tools, Parts, and Safety Prep
Gather tools before starting to save time. A Phillips screwdriver, nut driver, PEX cutter, adjustable wrench, crimp tool, and a basic multimeter cover most tasks.
Parts include a Shurflo pump, clear inlet strainer, barbed or quick-connect fittings, Teflon tape for NPT threads, wire connectors with heat-shrink, and the correct fuse size.
What size fuse is typical for a 4008 circuit?
Many setups use 7.5–10A, but always follow the model rating and wiring length.
What wire gauge should be used?
Use manufacturer-recommended gauge for the run to avoid voltage drop.
Is a strainer required?
Yes, Shurflo recommends an inlet strainer to protect internal valves.
Are thread sealants needed?
Use Teflon tape on plastic NPT threads and never on barbs.
Should power be disconnected first?
Yes, pull the pump fuse or disconnect the battery before work.
Planning the Installation Location
Choose a dry, ventilated, serviceable spot near the tank and plumbing manifold. Short inlet runs help priming and reduce cavitation.
Use vibration-damping feet and flexible hose sections to keep noise from traveling through cabinetry. Leave hand clearance for removing the strainer bowl and fittings.
Can the pump be mounted vertically?
Horizontal is preferred unless the manual shows an approved vertical orientation.
How close should the strainer be to the pump?
Directly on the inlet or as close as practical for protection and easy inspection.
Do rigid lines increase noise?
Yes, flexible sections reduce resonance and hum.
How much clearance is ideal?
Leave space to pull the strainer, tighten clamps, and check for leaks.
Should an accumulator tank be planned now?
Optional, but it smooths pulsing and reduces cycling.
Removing the Old Pump
Turn off city water and open a faucet to depressurize the lines. Place towels and a tray under the work area to catch drips.
Label the positive and negative wires and take a quick photo of hose routing. Cap open lines to keep debris out while swapping units.
How can spills be minimized?
Use towels and a shallow container under fittings as they are loosened.
Can old fittings be reused?
Only if undamaged and compatible with the new ports.
Should the old strainer be kept?
A new clear strainer is recommended for best sealing and visibility.
Is there value in inspecting the old pump?
Yes, sediment or cracks can explain previous noise or pressure issues.
How are lines protected during the swap?
Use temporary caps or tape to prevent contamination.
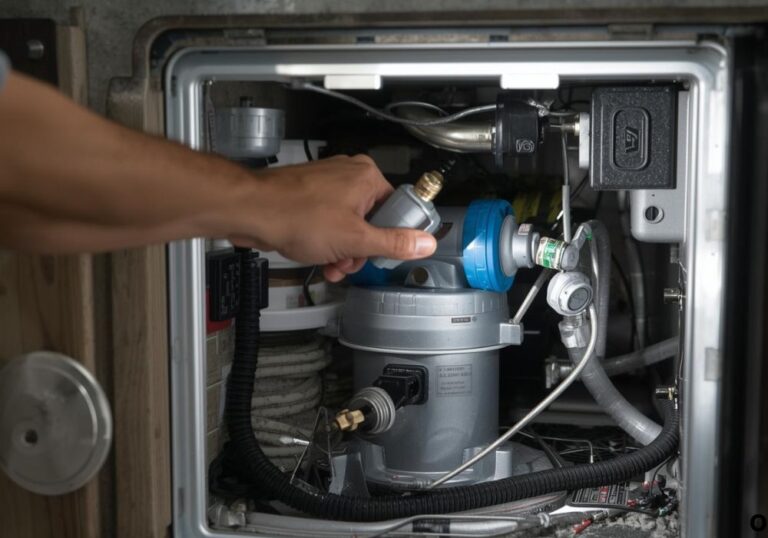
Plumbing Connections: Strainer, Inlet, Outlet, Fittings
Thread the clear inlet strainer into the pump inlet and hand-snug it. Apply Teflon tape to male NPT threads only and avoid over-tightening plastic.
Choose fittings that match your plumbing type, whether barbed hose, PEX adapters, or quick-connect couplings. Use stainless clamps on barbs and cut hose ends square for a reliable seal.
Which way does the strainer arrow point?
Toward the pump to indicate flow direction.
Barb or threaded fittings for hose?
Use barbs for hose with clamps and NPT threads for adapters.
PEX to barb connections, how are they made?
PEX transitions through a PEX-to-NPT adapter, then to a barb fitting on the pump.
Is an external check valve needed?
Usually no, but some layouts include one near the city water tee.
How tight is tight enough on plastic threads?
Hand snug plus a small turn, stopping if resistance spikes.
Electrical Wiring: 12V DC, Polarity, Fuse, Ground

Confirm the circuit is off, then test with a multimeter. Connect positive to the fused feed and negative to a solid chassis or return ground.
Use marine-grade crimp connectors with heat-shrink for moisture resistance. Keep wires supported and away from hot surfaces or sharp edges.
Does polarity matter?
Yes, red to positive and black to negative on most Shurflo pumps.
Where should the inline fuse sit?
As close to the power source as practical for protection.
Are butt connectors acceptable?
Yes, if crimped properly and sealed with heat-shrink.
What about the wall switch or control panel?
Wire through the existing pump switch or controller.
How is voltage drop avoided?
Use adequate gauge and clean, tight connections.
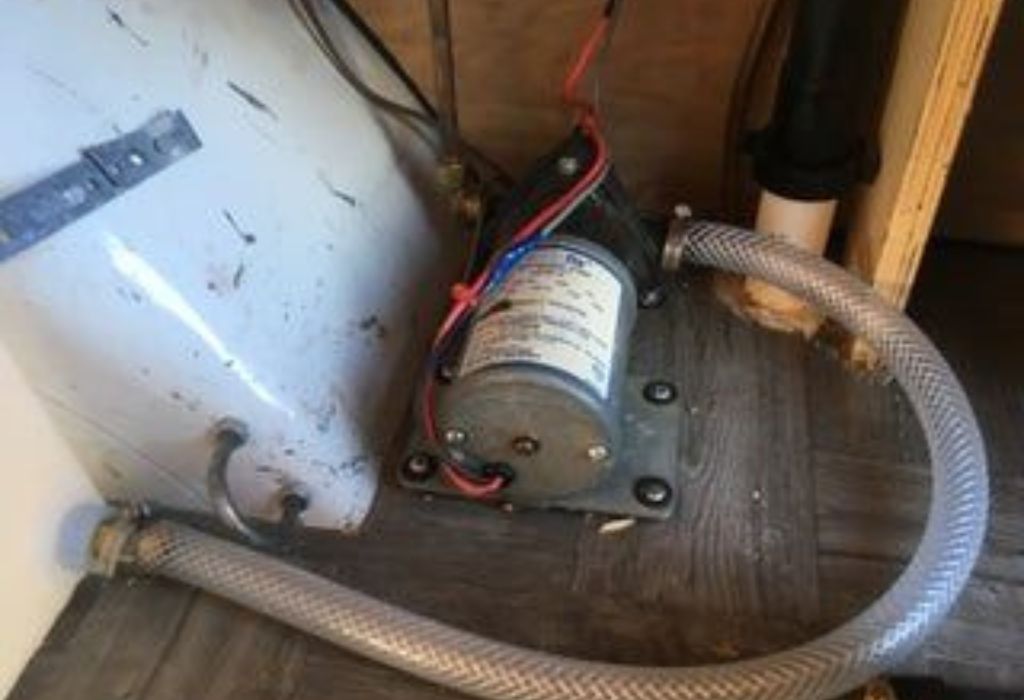
Mounting the Pump
Mount on a flat, rigid base with rubber isolation feet to absorb vibration. Drive screws snugly without crushing the isolators.
Use short flexible hose loops on both inlet and outlet to decouple the motor from cabinetry. Verify there is no hose strain in any direction.
Should the feet be overtightened?
No, compressing the rubber transmits vibration and noise.
Is a backing plate helpful?
Yes, on thin panels a backing plate prevents flex and rattles.
Can the pump touch the wall?
Avoid contact that can buzz under load.
How is alignment checked?
Hoses should run without sharp bends or twist.
What labeling helps service later?
Tag inlet and outlet lines and note fuse size near the mount.
Priming and First Start
Close all fittings and open the nearest cold faucet. Restore 12V power and toggle the pump on until water flows solid without spurts.
If the pump struggles, fill the inlet hose or strainer bowl with clean water to help it prime. Check the fresh tank level and verify valves are open.
No water after 30 seconds, what now?
Check the tank level, strainer seating, and look for suction leaks.
Sputtering water at first, is that normal?
Yes, air purging clears after a short run.
How can priming be sped up?
Pre-fill the inlet plumbing and keep the pump low relative to the tank.
Pump runs but no pressure, what is likely?
A suction leak, collapsed hose, or closed valve is common.
How is the water heater handled?
Purge air at a hot faucet after the cold side runs steady.
Pressure Testing and Adjustments
Close the faucet and watch for a clean shut-off. The pump should stop and hold pressure without cycling.
Use a gauge on a faucet or tee to read actual PSI during operation. Minor cycling can be reduced with an accumulator tank pre-charged to the cut-in pressure.
What is normal shut-off pressure for a 4008?
About 55 PSI per the spec sheet linked earlier.
Can the pressure switch be adjusted?
Some models allow minor adjustment; follow the manual exactly.
Why does short cycling happen?
Small leaks, restrictive aerators, or no accumulator can cause it.
Should an accumulator be pre-charged?
Yes, match the system’s cut-in for best results.
Is a gauge necessary?
A gauge verifies PSI and saves guesswork.
Noise and Vibration Reduction
Noise falls when the pump is isolated from rigid structure. Flexible loops and soft mounts reduce resonance through cabinets and walls.
A foam pad between the mount and base panel absorbs motor harmonics. Gentle hose bends avoid turbulence and chatter near elbows.
Humming through walls, how is it cured?
Add soft mounts, hose loops, and a thicker backing plate.
Rattling at certain RPMs, what helps?
Re-align hoses and loosen then re-snug fasteners to relieve stress.
Is the strainer a noise source?
If the bowl is loose, hand-snug and confirm the O-ring is seated.
Does rigid PEX add buzz near the pump?
Yes, add a short flexible section at the pump.
Are elbows right at the outlet okay?
Gentle bends are better than hard elbows next to the head.
Troubleshooting After Installation
If faucets pulse or flow is weak, check clogged aerators and kinked hoses first. If the pump never shuts off, inspect for leaks or a mis-seated strainer O-ring.
Warm wires or a blown fuse signal undersized gauge or a short. City water filling the tank points to a separate city-to-tank check valve that may be stuck.
Water hammer on shut-off, how is it reduced?
Install or tune an accumulator to cushion pressure spikes.
Air in hot lines only, what causes it?
Purge the water heater and verify bypass valves are correct.
Persistent priming issues, what changes help?
Lower the pump location or shorten the suction path.
Weak flow at one faucet, what is likely?
A clogged aerator or debris in the fixture cartridge.
Pump runs hot, is that normal?
Excess heat suggests restricted flow or extended duty beyond rating.
Winterization and Long-Term Care
Protect the pump during freezing weather with an RV winterization kit or bypass. Many owners pump RV antifreeze through the lines as directed by the manufacturer.
In spring, sanitize the fresh system and flush until odor is gone. Clean the strainer seasonally and re-check clamps and electrical connections.
Can the pump sit with RV antifreeze?
Yes, potable-system antifreeze is compatible with pump elastomers.
Is spring sanitizing required?
Yes, follow a dilute bleach procedure recommended for RV systems.
Store the pump dry if removed?
Keep ports capped and the body dry and clean.
Annual maintenance checklist, what is included?
Strainer cleaning, clamp inspection, wire and fuse check, and leak test.
When is replacement better than repair?
If noise, leaks, or pressure loss persist after service.
Cost, Time, and Upgrade Options
Most DIY installs take 45–90 minutes once parts are in hand. Time varies with access, fittings, and whether an accumulator or new plumbing adapters are added.
Pump prices vary by model and retailer. Upgrades like flexible hoses, isolation feet, and a small accumulator often deliver the biggest comfort gains per dollar.
Approximate pump price range, what to expect?
Mid-range among RV pumps, with model and retailer affecting cost.
Add an accumulator now or later?
It can be added later if cycling persists.
Do stainless clamps matter?
Yes, they resist corrosion and keep seals tight under vibration.
Energy draw a concern for boondocking?
Check the amp draw on the spec sheet and size wiring and fusing accordingly.
Warranty considerations, what protects coverage?
Follow installation instructions and retain receipts and wiring notes.
Future Trends and Innovations
Quieter heads and smarter pressure control are arriving in modern RV pumps. Some products move toward brushless DC motors for efficiency and longevity.
Fittings continue to standardize with quick-connect options that simplify service. Serviceable cartridge components reduce downtime during replacement.
Are brushless pumps worth it?
They can be quieter and more efficient where budgets allow.
Remote monitoring available?
Aftermarket sensors can alert for leaks or excessive runtime.
Better materials in new valves?
Improved elastomers and polymers extend seal life.
Standardized ports becoming common?
More models adopt common quick-connect formats for faster swaps.
Is efficiency improving?
Demand-driven control reduces cycling and power use.
How to Install Shurflo RV Water Pump: Quick Checklist
Turn off power and depressurize the system. Mount the pump on isolation feet near the tank with short, flexible inlet and outlet loops.
Install the inlet strainer, apply Teflon tape to NPT fittings, and connect plumbing with clamps or quick-connects. Wire positive through a correctly sized fuse and connect the negative ground, then prime and leak test.
What is the one step never to skip?
Install and seat the inlet strainer to protect the pump.
How is the fastest leak check done?
Dry every joint and watch for forming beads while cycling the pump.
What is the most common noise fix?
Flexible hose loops and softer mounts reduce humming dramatically.
Where is time best spent during planning?
Routing hoses to avoid tight bends and allowing service access.
What confirms a successful install?
Clean shut-off, no cycling, solid flow, and a quiet cabinet.
Conclusion
A thoughtful installation delivers quiet operation, steady pressure, and fewer surprises on the road. The steps above explain how to install shurflo rv water pump components safely and cleanly.
Start with location planning, protect the inlet with a strainer, and wire with proper gauge and fusing. Prime, test, and tune pressure with a gauge and an optional accumulator for the smoothest results.
Regular seasonal checks keep the system reliable for years. A clean, leak-free pump means showers run strong and trips start stress free.
I’m David R. Coleman, the founder, lead writer, and lifelong tool enthusiast behind GarageToolPro.com. With years of experience in automotive repair, woodworking, and home DIY projects, I created this platform to share practical tips, detailed tool reviews, and step-by-step guides that help mechanics, hobbyists, and homeowners get the job done right the first time.