How to Hook Up Solar Panels to RV Batteries: Complete Step-by-Step Guide
RV life is all about freedom. For many travelers, that freedom means going off-grid and enjoying nature without relying on crowded campgrounds or constant hookups. But when you’re boondocking, keeping your batteries charged becomes a challenge. That’s where solar power comes in.
Installing solar panels on your RV is one of the smartest investments you can make. They provide clean, renewable energy, reduce generator use, and give you the ability to camp almost anywhere. But a common question for beginners is: how do you hook up solar panels to RV batteries safely and correctly?
In this complete guide, you’ll learn everything you need—from understanding the parts of a solar system to step-by-step installation instructions. By the end, you’ll feel confident enough to power your RV with the sun.
Understanding RV Solar Systems
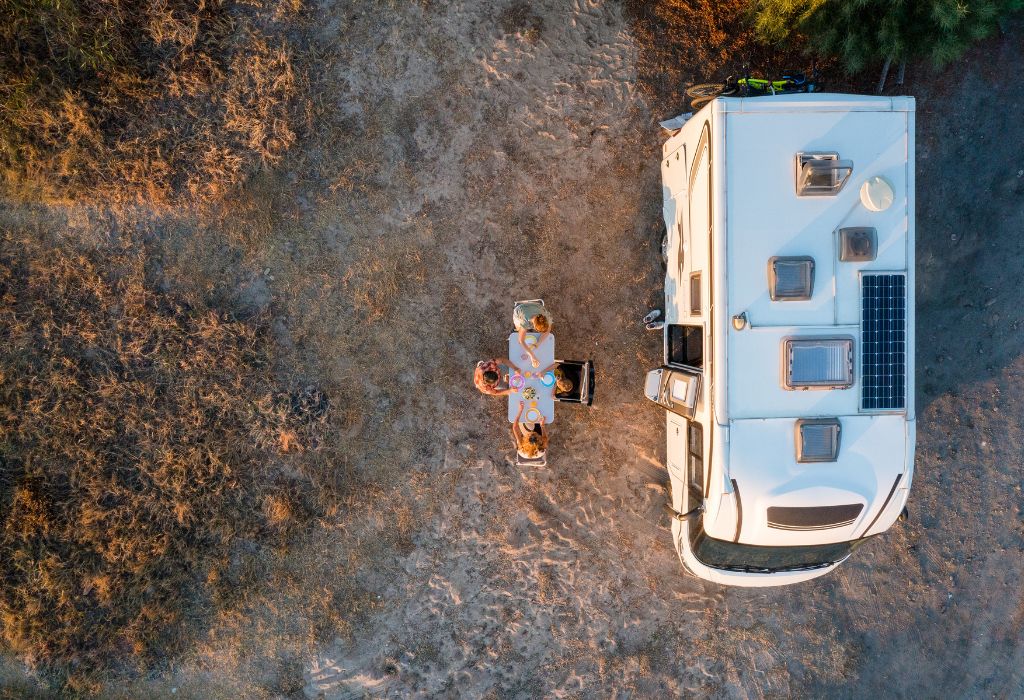
Before you start hooking up wires, it helps to understand how an RV solar system works.
- Solar panels capture sunlight and convert it into DC electricity.
- A charge controller regulates the electricity from the panels to prevent overcharging the batteries.
- RV batteries store that electricity for later use.
- An inverter (optional) converts DC battery power into AC power so you can run household appliances.
Without a charge controller, the electricity from the solar panels could damage your RV batteries. That’s why it’s a necessary part of the system.
Types of RV Solar Panels
Not all solar panels are created equal. The type you choose will affect efficiency and durability.
- Monocrystalline Panels: Highly efficient, long-lasting, and space-saving. Best choice for serious RV solar users.
- Polycrystalline Panels: More affordable but slightly less efficient. A good option if budget matters.
- Flexible Panels: Lightweight and bendable, great for curved RV roofs but not as durable as rigid ones.
- Rigid Panels: Mounted on aluminum frames, durable and efficient, but heavier.
For RVs, rigid monocrystalline panels are the most popular choice because they balance efficiency and durability.
Choosing the Right RV Batteries for Solar
Your solar panels are only half the story—the energy they produce needs to be stored somewhere. That’s where RV batteries come in.
- Flooded Lead-Acid Batteries: Affordable but require regular maintenance.
- AGM (Absorbed Glass Mat) Batteries: Maintenance-free and more durable than flooded.
- Gel Batteries: Safe but lower in power output compared to AGM.
- Lithium-Ion Batteries: Lightweight, long-lasting, and fast-charging. They cost more but provide the best performance.
When selecting batteries, pay attention to amp-hour (Ah) capacity. More capacity means more stored energy. For example, a 200Ah battery can run twice as long as a 100Ah battery before needing a recharge.
Tools and Materials Needed
Before you start, gather the right tools and parts.
- Solar panels.
- Charge controller (PWM or MPPT, with MPPT being more efficient).
- RV batteries.
- Inverter (if you want to run AC appliances like microwaves or TVs).
- Wires and connectors (MC4 connectors, fuses, breakers).
- Mounting brackets or stands.
- Tools: drill, screwdriver, multimeter, wire stripper, wrench, safety gloves, and glasses.
Safety Precautions Before Installation
Solar systems are powerful and must be handled carefully.
- Park your RV on a level surface.
- Turn off all electrical systems before working.
- Wear safety gloves and glasses to protect yourself.
- Never connect solar panels directly to batteries without a charge controller.
- Make sure wires are the correct gauge to prevent overheating.
Step-by-Step: How to Hook Up Solar Panels to RV Batteries

Now let’s dive into the actual installation process.
- Mount the solar panels: Secure them on the RV roof with mounting brackets, or place portable panels outside. Make sure they face the sun at the right angle.
- Connect the solar panels together: If you have multiple panels, connect them in series (higher voltage) or parallel (same voltage, more current).
- Run wires to the charge controller: Use MC4 connectors and proper gauge wiring. Keep wire runs as short as possible.
- Install the charge controller: Place it close to the batteries but in a ventilated area to prevent overheating.
- Connect the charge controller to the batteries: Attach the positive wire to the positive terminal and the negative to the negative terminal.
- Add a fuse or breaker: Always install fuses between the solar panels, charge controller, and batteries to prevent electrical fires.
- Test the system: Use a multimeter to check that power is flowing correctly.
- Connect an inverter (optional): If you want to run AC appliances, wire the inverter to the battery bank.
Series vs. Parallel Connections Explained
When connecting multiple solar panels, you have two choices: series or parallel.
- Series Connection: Voltage adds up while current stays the same. Best for longer wiring runs and higher-voltage charge controllers.
- Parallel Connection: Voltage stays the same while current increases. Best if you want redundancy (if one panel is shaded, others still produce power).
For most RV setups, parallel wiring is preferred because RVs usually run on 12V systems.
Using a Solar Charge Controller
The charge controller is the heart of your RV solar system.
- Why it’s needed: It prevents batteries from overcharging or being damaged.
- Types:
- PWM (Pulse Width Modulation): Cheaper but less efficient.
- MPPT (Maximum Power Point Tracking): More expensive but extracts more energy from solar panels.
- PWM (Pulse Width Modulation): Cheaper but less efficient.
- Sizing the controller: Choose one that matches your solar panel output and battery system. For example, if you have 400W of solar on a 12V system, you’ll need at least a 30A controller.
Common Mistakes to Avoid
Even small errors can damage your RV’s electrical system.
- Connecting panels directly to batteries without a controller.
- Using undersized wires that overheat under load.
- Skipping fuses or breakers, creating a fire hazard.
- Overloading batteries by connecting too much solar power.
- Poor roof sealing after mounting panels, leading to leaks.
Maintenance and Troubleshooting
Once your system is running, regular care keeps it reliable.
- Clean solar panels every few weeks for maximum efficiency.
- Inspect wiring and connectors for wear or corrosion.
- Monitor the charge controller regularly for voltage and current readings.
- Recharge and maintain batteries, especially lead-acid ones.
- If the system isn’t charging, check fuses, wire connections, and solar panel output.
Frequently Asked Questions (FAQs)
- How many solar panels do I need for my RV?
A typical RV uses 200–400 watts of solar for light usage. Full-time boondockers often install 600–1000 watts. - Can I run my air conditioner on solar power?
In most cases, no. RV air conditioners require a lot of power. You’d need a very large solar setup and battery bank. - Do I need lithium batteries for solar panels?
No, but lithium batteries perform better and last longer. Lead-acid batteries are cheaper but require more maintenance. - What size inverter should I use?
A 1000–2000W inverter is usually enough for most RV owners. Choose based on your appliance needs. - Are portable solar panels worth it?
Yes. They’re easy to set up, and you can move them into the sun if your RV is parked in the shade.
Conclusion
Installing solar panels on your RV is one of the best upgrades you can make. It gives you energy independence, reduces generator use, and extends your off-grid adventures.
By following the proper steps—mounting panels, wiring them through a charge controller, connecting to your RV batteries, and testing the system—you can safely and efficiently power your RV with solar energy.
Start small if you’re unsure. Even a single 100W panel can keep your lights and small electronics charged. As you gain experience, you can expand your system to run larger appliances.
With the right setup, you’ll enjoy the peace of mind that comes with knowing your RV batteries are always ready—charged by the sun.
I’m David R. Coleman, the founder, lead writer, and lifelong tool enthusiast behind GarageToolPro.com. With years of experience in automotive repair, woodworking, and home DIY projects, I created this platform to share practical tips, detailed tool reviews, and step-by-step guides that help mechanics, hobbyists, and homeowners get the job done right the first time.

