How to Fix RV Wall Water Damage Step by Step
You wake up one morning in your RV, noticing a soft, spongy spot on the wall near a window. You press gently, and water seeps through the wallpaper. That sinking feeling tells you something every RV owner dreads — wall water damage.
Whether it’s from a roof leak, a window seal failure, or hidden plumbing moisture, water damage inside an RV can quickly spread and weaken the structure.
Ignoring it only makes the problem worse. Over time, water seeps into insulation, plywood, and framing, causing rot, mold, and costly repairs.
According to RV repair experts, about 70 percent of long-term RV damage begins with small leaks left unnoticed or untreated.
In this guide, you’ll learn how to fix RV wall water damage step by step — from finding the source of the leak to repairing the wall, drying the materials, and preventing it from happening again.
What Causes Water Damage in RV Walls
Water damage inside an RV can come from several sources. The most common is a roof or window leak where sealant has cracked or peeled over time.
Plumbing leaks from sinks, showers, or water lines hidden behind panels can also cause hidden damage.
Condensation from poor ventilation may lead to gradual moisture buildup in colder climates.
Even minor cracks or loose trim can let water enter and spread behind the wall covering unnoticed.
Understanding the root cause helps you fix the current problem and prevent future leaks effectively.
Signs of Water Damage in RV Walls
The sooner you identify water damage, the easier it is to repair. Look for these warning signs:
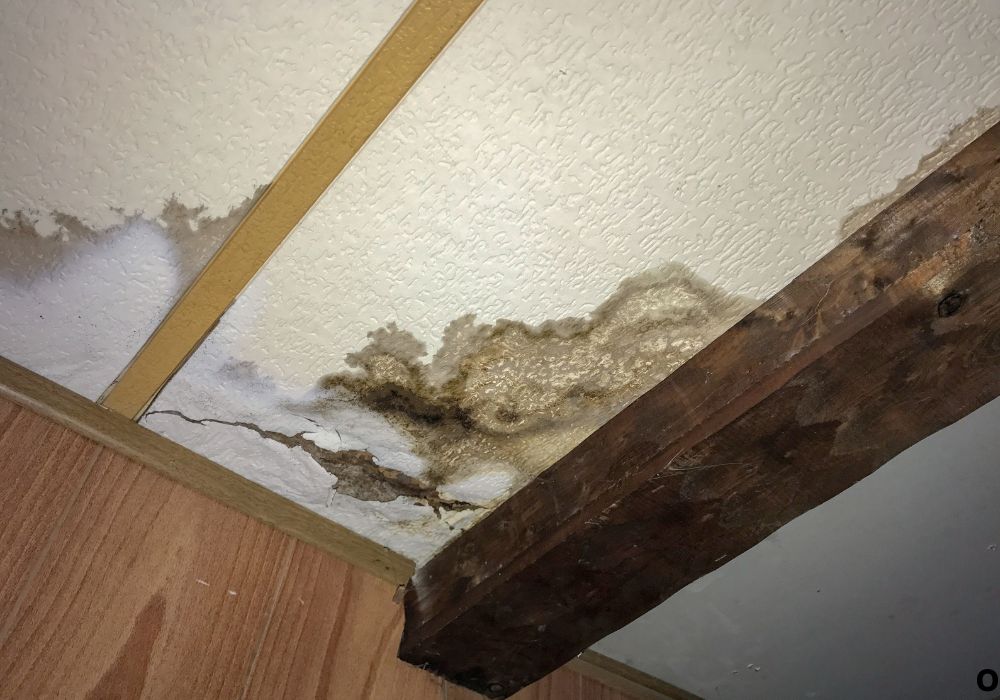
- Soft or spongy wall panels when pressed.
- Stains, bubbles, or discoloration in wallpaper or wallboard.
- Musty or damp odors, especially near windows or floors.
- Warped or peeling interior trim.
- Mold or mildew spots forming in corners or seams.
These early symptoms indicate moisture has entered your wall structure and needs attention before structural rot develops.
Regular inspections after rain or washing your RV can catch damage before it spreads.
Why You Should Fix Water Damage Quickly
Water damage doesn’t stay isolated for long. Once moisture gets inside RV walls, it spreads quickly through the wood and insulation.
If left untreated, it leads to delamination — where the wall’s outer fiberglass layer separates from the plywood substrate.
This not only weakens structural strength but also ruins your RV’s appearance and resale value.
Mold growth can cause respiratory issues and unpleasant odors that linger even after drying.
Fixing it early saves time, money, and ensures your RV remains comfortable and safe.
Tools and Materials You’ll Need
Gathering the right tools before you start makes the process faster and cleaner.
You’ll need a moisture meter, utility knife, screwdrivers, putty knife, heat gun or hair dryer, wood hardener, fiberglass resin, replacement wall paneling, sealant, and paint or wallpaper.
Have gloves, goggles, and a respirator mask to protect against mold or dust.
A dehumidifier or fan helps speed up the drying process after removing damaged material.
Keep caulking tools and butyl tape handy for sealing edges and joints during reassembly.
Step 1: Identify and Stop the Source of the Leak

Before fixing the wall, you must find where the water is coming from.
Inspect the RV roof, windows, vents, and exterior seams carefully. Look for cracked sealant, damaged rubber roof membranes, or loose screws.
Use a garden hose to spray water around potential leak areas while someone inside watches for drips.
If the leak comes from plumbing, shut off the water supply and test the fittings behind panels.
Repairing the source first prevents the problem from recurring after you rebuild the wall.
Step 2: Remove the Damaged Wall Panel
Once the leak is stopped, start by removing the damaged section of the wall.
Use a utility knife to cut out soft or swollen areas. Peel back wallpaper or decorative panels until you reach dry, solid material.
Be careful not to cut into wiring or plumbing hidden behind the wall.
If insulation feels damp, remove it completely and dispose of it safely.
Proper removal ensures no trapped moisture remains to restart the damage cycle later.
Step 3: Dry Out the Affected Area
Drying the wall is the most important step before rebuilding.
Use a fan, heat gun, or dehumidifier to dry the area completely over 24 to 48 hours.
Check moisture levels using a moisture meter — the reading should drop below 15 percent before you proceed.
Wipe all surfaces with a disinfectant to kill mold spores or bacteria.
If you skip this step, residual moisture may cause new rot or delamination even under fresh panels.
Step 4: Treat Mold and Rot
If you find dark spots or a musty smell, mold may already be growing.
Spray affected areas with a mold remover or a solution of vinegar and water. Allow it to sit for 10–15 minutes before wiping.
For rotted wood, apply wood hardener to strengthen the remaining structure. Severely damaged wood should be replaced entirely.
Always wear gloves and a mask during this step to avoid inhaling spores.
Treating mold early ensures your repair lasts longer and stays safe.
Step 5: Repair or Replace Damaged Framing
Check the wall studs and framing for structural integrity.
If they’re soft or crumbling, replace them with new wood pieces cut to the same dimensions.
Attach replacements securely using screws or adhesive, ensuring alignment with the surrounding framework.
For minor rot, a few coats of wood hardener may restore strength.
This step restores stability to your RV’s wall and prevents future sagging or cracking.
Step 6: Install New Insulation and Wall Panels
After drying and repair, install fresh insulation to replace any removed material. Use foam board or fiberglass insulation compatible with RV walls.
Next, cut new wall panels to size using the old ones as templates.
Secure them in place with adhesive or screws, ensuring edges align cleanly.
Seal seams with RV caulking or butyl tape to prevent air and moisture entry.
Once installed, the wall should look and feel solid again, ready for finishing touches.
Step 7: Refinish and Seal the Wall
Apply wallpaper, paint, or paneling that matches your RV’s interior.
Use a primer before painting to prevent moisture absorption and ensure even coverage.
Seal joints and corners with clear RV sealant for added protection.
If the damage was near a window or roofline, reapply exterior sealant to those areas as well.
Proper sealing ensures your new repair stays watertight for years.
Step 8: Prevent Future Water Damage
After repairs, prevention becomes your best defense.
Inspect roof seams, windows, and vents every three months. Apply fresh sealant when you notice cracks or wear.
Wash your RV regularly to remove debris that can hold moisture against seals.
Install a small dehumidifier inside to control condensation during humid weather.
Routine maintenance keeps your RV dry, strong, and protected from hidden leaks.
Professional vs DIY Repairs
Minor water damage repairs are perfect for DIY enthusiasts with basic tools.
However, if water has spread across large areas or into the floor, professional help may be safer.
RV technicians can detect hidden damage using infrared cameras and moisture probes.
A professional repair might cost between $500 and $2,000, depending on severity.
For small leaks and wall patches, DIY methods are far more affordable and equally effective if done correctly.
Market and Maintenance Insights
According to a 2024 RV repair study, water damage ranks as the number one insurance claim among RV owners nationwide.
Over 80 percent of these claims result from roof seal failure or unnoticed window leaks.
Experts recommend full inspections twice a year — once before the camping season and once before winter storage.
Preventive care can extend your RV’s structural life by up to 10 years and maintain its resale value by 25 percent or more.
Taking action early always pays off in the long run.
FAQs
1. What causes RV wall water damage?
Leaks from roofs, windows, or plumbing lines are the most common culprits.
2. How can I tell if my RV wall has water damage?
Soft walls, stains, mold, or musty odors are clear indicators.
3. Can I repair RV wall damage myself?
Yes, if the affected area is small and the structure underneath is still solid.
4. How long does it take to fix RV wall water damage?
Usually between 2 to 4 days, depending on drying time.
5. What kind of materials do I need?
Moisture meter, wood hardener, insulation, wall panels, sealant, and paint.
6. How do I dry RV walls quickly?
Use fans, dehumidifiers, and proper ventilation for at least 24 hours.
7. Can I just cover the damaged area instead of replacing it?
No, hidden moisture can cause rot and mold behind the surface.
8. What’s the best way to treat mold in RV walls?
Use a mold remover or vinegar-water solution and let it fully dry.
9. How much does professional repair cost?
Typically between $500 and $2,000 depending on damage size.
10. Can water damage weaken RV insulation?
Yes, wet insulation loses effectiveness and should be replaced.
11. Should I use regular house paint on RV walls?
No, use lightweight RV-specific or moisture-resistant paint.
12. How can I prevent water damage in the future?
Inspect and reseal all seams, windows, and roof edges regularly.
13. Is it safe to camp in an RV with water damage?
Not recommended, as mold and rot can affect air quality and structure.
14. Can I use a moisture meter to detect hidden leaks?
Yes, it’s a great tool for finding damp areas behind panels.
15. How often should I check for water leaks?
At least twice a year and after any heavy rain or washing.
Conclusion
Knowing how to fix RV wall water damage helps you protect your RV from one of its biggest long-term threats.
With patience and the right materials, you can restore strength, beauty, and comfort to your camper’s interior.
Always fix leaks quickly, dry materials completely, and seal joints properly to prevent future damage.
A dry RV not only lasts longer but also gives you peace of mind every time you hit the road — rain or shine.
I’m David R. Coleman, the founder, lead writer, and lifelong tool enthusiast behind GarageToolPro.com. With years of experience in automotive repair, woodworking, and home DIY projects, I created this platform to share practical tips, detailed tool reviews, and step-by-step guides that help mechanics, hobbyists, and homeowners get the job done right the first time.