How to Fix a Grey Water Valve on Your RV and Prevent Future Problems
You’re parked at the dump station, ready to empty your grey water tank, but the valve handle won’t budge. A stuck or leaking grey water valve on your RV turns what should be a quick task into a messy, stressful problem.
This common issue plagues many RV owners and often shows up at the worst possible time—when you’re far from help or ready to hit the road. With the right knowledge and tools, you can diagnose, repair, or replace the valve quickly and confidently.
In this guide you’ll learn how to fix a grey water valve on your RV: how to identify the symptoms, what tools and parts you’ll need, step-by-step procedures for repair or replacement, and how to maintain your system to avoid future headaches.
By the end you’ll understand the full process and feel empowered to perform the repair yourself without pulling into a service bay.
Why Grey Water Valves Fail on RVs
Grey water valves often fail due to a combination of corrosion, cable binding, debris, or seal deterioration inside the valve body. rvtravel.com+2mygrandrv.com+2
Many RVs use a blade-gate or ball-valve for the grey tank; over time rust or sediment can collect around the blade and prevent full closure or smooth motion. forestriverforums.com
Cable mechanisms that pull the valve often run through sheaths and sharp bends. If moisture freezes or residue accumulates inside the sheath, the cable can bind even though the exterior handle moves freely. facebook.com+1
Knowing why the valve fails helps you avoid the problem. For instance, regular lubrication and clearing tank debris reduce the risk of a stuck valve during a trip.
Diagnosing the Problem: How to Know It’s the Valve
Before you replace anything, you’ll want to diagnose exactly what’s wrong with your grey water valve on your RV.
Start with the simple test: after the valve is closed, open your sewer hose connection cap and check for residual liquid. If there is grey water present when the valve should be sealed, the valve or its seal is leaking. The RVgeeks
Next, try operating the handle. Does it feel stiff or “dead” (no change in tank). Or does it move freely but the valve doesn’t open? If the latter, the internal mechanism is likely jammed or disconnected. mygrandrv.com
Then inspect cable routing (if applicable). Feel for tight bends, frozen sheaths, or corrosion. Also, check for rust around the valve body outside. If it’s heavily rusted, the valve may need replacement rather than lubrication.
Finally monitor for leaks: water forming under the RV after you close the valve or logic that if the valve is fully open but tank empties slowly you might have partial opening or internal restriction.
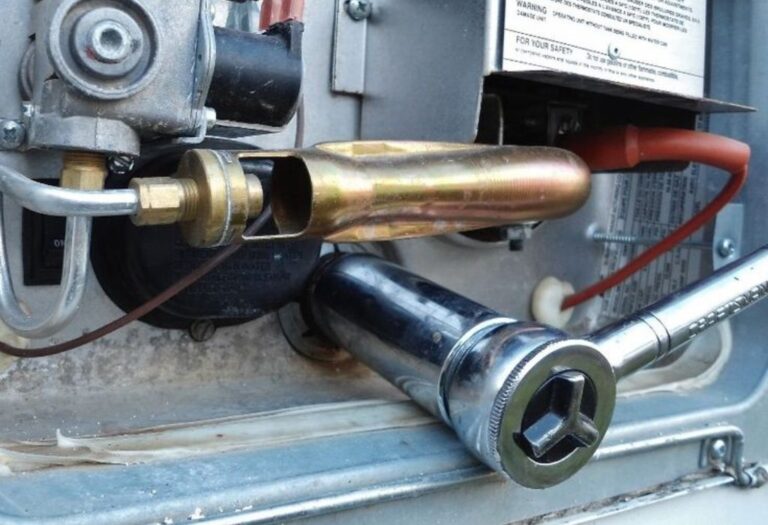
Tools and Parts You’ll Need to Fix a Grey Water Valve
To fix or replace the grey water valve on your RV, you’ll need some basic tools and parts.
Here’s a checklist:
- Disposable gloves and safety glasses (you’re working near waste plumbing)
- Basic socket set or wrench (many valves are held by four bolts). The RVgeeks
- Penetrating lubricant or silicone spray safe for rubber seals (to free binding).
- Replacement valve unit (either blade-gate or ball-valve) with correct size (1½″ or 2″ typical for grey tanks). The RVgeeks
- New rubber gaskets/seals to insert on both sides of the valve body.
- Bucket and clean rags/towels to catch any residual fluid when removing valve.
Make sure you confirm your RV’s valve size and configuration before ordering parts. A wrong size means extra work.
Step-by-Step Guide to Lubricate and Free a Jammed Valve
If the valve just sticks but isn’t leaking, you may avoid full replacement by following a freeing and lubrication procedure.
- Empty the tank or position RV: park on a slope so residual water is away from the valve. Clean out the area around the valve.
- Spray lubricant: apply lubricant around the cable sheath, pivot point of valve, and inside the valve shaft if accessible. Work the handle back and forth gently to free movement. rvtravel.com
- Flush warm soapy water: with valve closed, fill tank with mild soapy water and let it slosh around. Then open and close valve a few times to flush out debris.
- Test operation: open and close valve multiple times. If fluid pours out fully, you’re good. If it’s sluggish or drips when closed, proceed to replacement.
In many cases this maintenance step restores smooth operation and avoids downtime.
How to Replace the Grey Water Valve on Your RV
When lubrication doesn’t solve it, you need to replace the valve. Follow these steps carefully.
Step 1: Empty the tank & prepare workspace
Ensure the grey tank is drained and flush it with clean water to reduce odor and residual liquid. Position the RV so the valve is above ground or placed in containment.
Step 2: Disconnect cable or handle extension
Unbolt the handle extension or cable from the valve. Remove the mounting bolts holding the valve body.
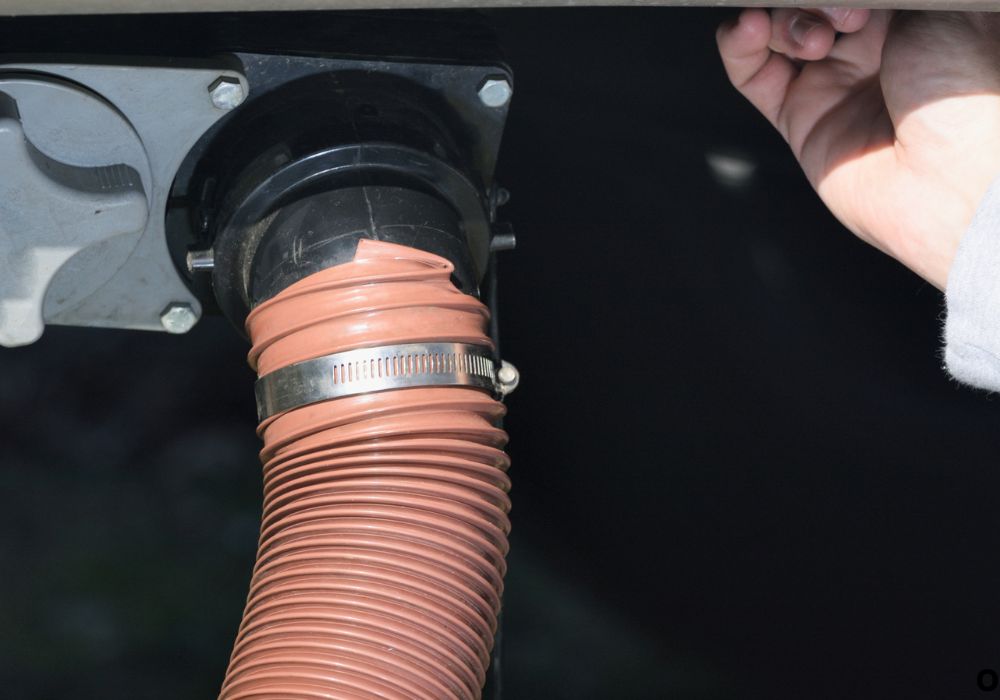
Step 3: Remove old valve body
Carefully remove the old valve from the plumbing. Catch any residual drainage with bucket/rags. Clean pipe ends, removing old gasket material. forestriverforums.com
Step 4: Install new gaskets and valve
Place new rubber gaskets on each side of the pipe ends. Position the new valve body in place, align bolt holes, then insert bolts loosely.
Step 5: Torque bolts and attach handle
Once aligned, tighten bolts evenly to manufacturer spec to prevent leaks. Reattach the cable/handle extension. Test open/close action.
Step 6: Test under load
Fill the tank partially, close valve and inspect for leaks. Then open valve for dump test. A leak‐free operation confirms success.
Following all steps carefully ensures you’ll restore your RV’s grey water system and avoid sloppy repairs.
Preventive Maintenance to Keep the Valve Working
After repair you’ll want to maintain the valve so future failures are less likely.
Operate the valve handle a few times each trip to prevent sediments from setting.
Apply silicone lubricant annually to the cable and pivot points, especially if you travel in cold or humid conditions.
Inspect cable routing for sharp bends, corrosion or chafing. Fix any issues before they worsen.
Flush the grey tank occasionally with soapy water and inspect the valve body underneath the RV for buildup or rust. Proactive care prevents sticky valves in the field.
Safety and Operational Tips
Working on your grey water valve requires caution and cleanliness. Always wear gloves and eyewear.
Have your RV in park with the engine off and chocks in place. Never work underneath the RV without proper support.
Ensure the tank vent is open and you use protective containment to avoid sewer spills.
When replacing the valve, dispose of old parts and fluid in accordance with local regulations.
Proper care and safe procedures keep you protected and your RV clean.
FAQs (Frequently Asked Questions)
1. How do I know if the valve is stuck or just the cable?
If the handle moves but nothing drains, likely the blade is stuck inside. If the handle doesn’t move, the cable sheath or mechanism may be binding.
2. Can I replace just the seals instead of the whole valve?
Yes, if the body is in good condition you can remove old seals and install new ones. However access is tricky and often replacement is easier.
3. What size is a typical grey water valve on an RV?
Grey water valves are commonly 1½ inches in diameter but some newer models use 2 inches. Always measure before buying. The RVgeeks
4. How much does a replacement valve cost?
Basic 1½″ blade-gate valves can cost between $30-$50, while larger or premium models may cost more.
5. How long does the repair take?
If accessible, replacing a valve takes about 1-2 hours. Lubricating a stuck valve can take 30-60 minutes.
6. Is this something I can do in the field without tools?
Minor lubrication yes; full replacement generally requires tools and some mechanical comfort.
7. Why does the valve leak when closed?
Usually caused by worn or twisted seals, debris in the gate path, or bolts not tightened evenly.
8. Can freezing weather cause valve problems?
Yes. Water inside or around the cable or gate can freeze, preventing movement in cold climates. mygrandrv.com
9. Can I replace a grey valve with a different type (e.g., ball valve)?
Yes—some upgrade kits use ball valves or mess-free valves—but ensure compatible pipe size and mounting.
10. Should I replace the black water valve at the same time?
It’s a good idea if you’re doing major service, since both are often aging and the black tank valve is larger and more critical.
11. How often should I perform maintenance on the valve?
Operate and inspect the valve at least once every season or every trip in cold or corrosive environments.
12. Can I take the RV to a dump station while the valve is stuck?
Only if you’re confident it will open. If not, risk of backup and leak increases.
13. How can I reduce my risk of valve failure?
Flush tanks regularly, avoid letting solids sit for long periods, and store RV in less corrosive conditions.
14. Do all RVs have cable-operated valves?
No. Some use direct metal handles, remote cable, or even electric actuators depending on model.
15. Is the repair covered under warranty?
Only if the valve malfunction is due to manufacturer defect and still within coverage. Most wear and corrosion issues are not covered.
Conclusion
Fixing a grey water valve on your RV is a manageable task with the right preparation, tools, and understanding of the system. Lubricating a stuck mechanism or replacing a worn valve with new seals can save you from messy stops and costly service calls.
Take the time now to perform the repair, inspect the whole system, and implement preventive maintenance. That way you’ll be ready for your next adventure without fear of a failed and messy dump station experience.
Your RV’s plumbing system is a key part of its comfort and usability on the road. By knowing how to fix a grey water valve, you ensure your travels remain smooth, clean, and worry-free.
I’m David R. Coleman, the founder, lead writer, and lifelong tool enthusiast behind GarageToolPro.com. With years of experience in automotive repair, woodworking, and home DIY projects, I created this platform to share practical tips, detailed tool reviews, and step-by-step guides that help mechanics, hobbyists, and homeowners get the job done right the first time.