How to Fix Check Valve on RV Water Pump Easily
Imagine preparing for a relaxing camping trip only to find your fresh water tank mysteriously filling up while connected to city water. The culprit in most cases is a failing check valve on the RV water pump.
A check valve is a small but essential part of the water system, preventing water from flowing backward into the fresh tank. When it malfunctions, backflow can cause tanks to overflow, pumps to cycle endlessly, and plumbing components to wear out faster.
The frustration is common among RV owners. In fact, plumbing failures are one of the top five maintenance issues reported in RVs, and water system malfunctions account for nearly 20% of RV service visits each year (RVIA).
The problem often goes unnoticed until water waste, leaks, or pump noise become too obvious to ignore. Left unresolved, it can create costly water damage inside the RV or force premature replacement of the pump.
The good news is that fixing or replacing a check valve does not always require professional service. With basic tools and a step-by-step approach, most RVers can solve the issue in less than an hour.
This guide explores how to fix check valve on RV water pump in detail. From spotting early warning signs to repairing or replacing faulty parts, the steps outlined here will help restore proper water flow, extend pump life, and prevent expensive plumbing repairs.
By the end, you will know how to identify the symptoms, test the valve, make the necessary repairs, and keep your RV water system running reliably on every trip.
What Is a Check Valve in an RV Water Pump?
A check valve, also called a non-return valve, is a small device designed to control the direction of water flow. Its main purpose is to prevent water from flowing backward into the fresh water tank.
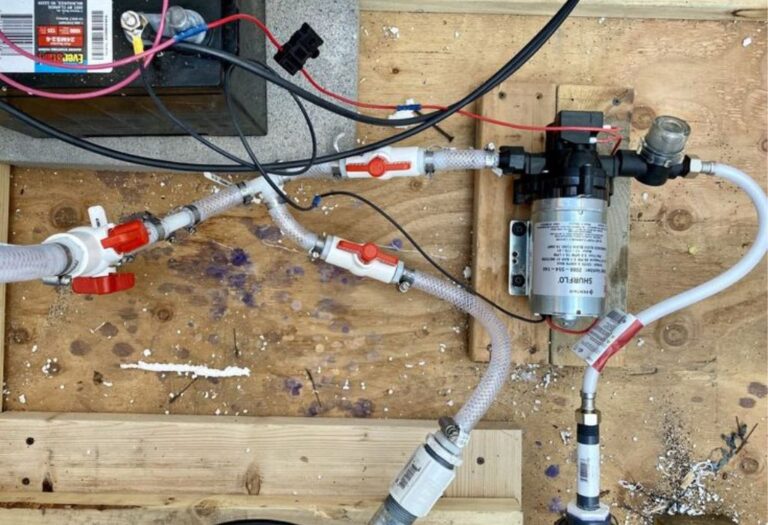
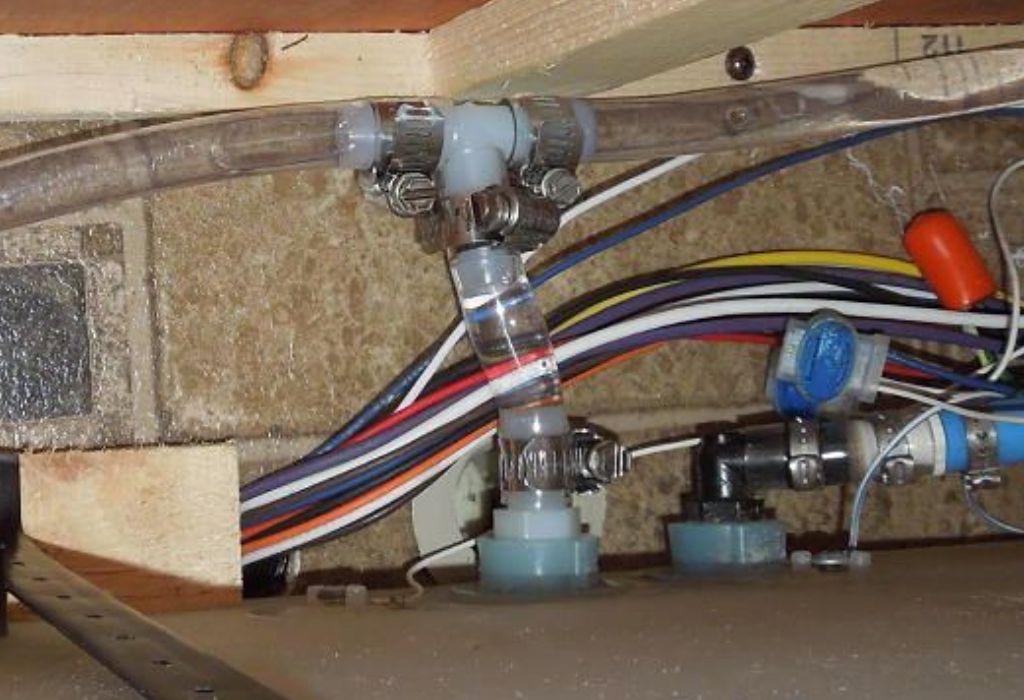
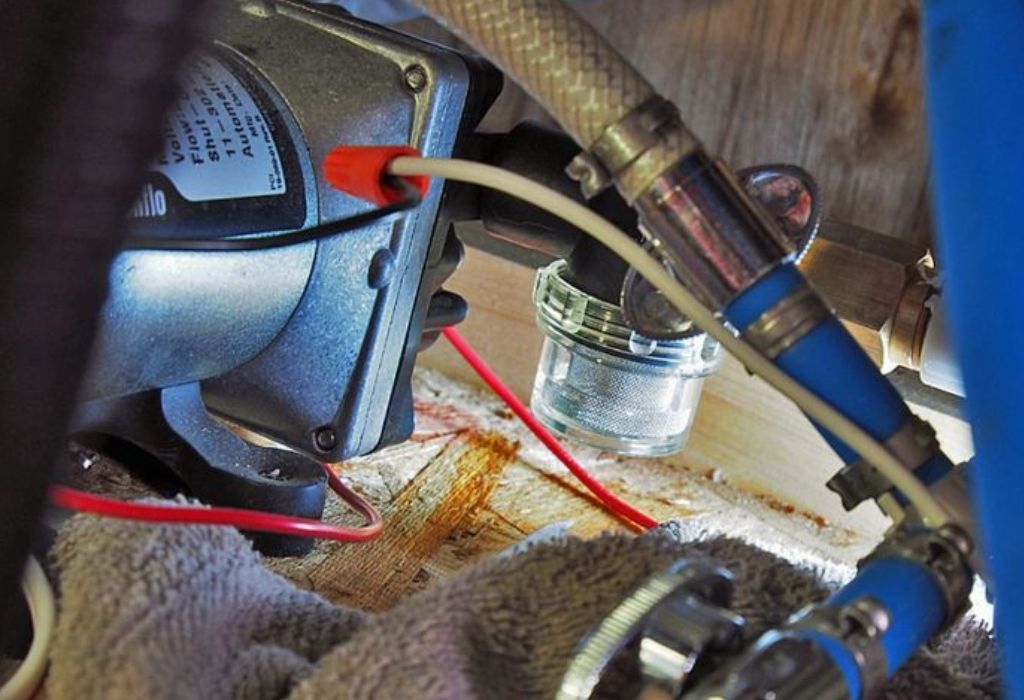
In most RV water pumps, the check valve is built into the pump head and works alongside the diaphragm and pressure switch. Some systems also include an external inline check valve on the suction or discharge line.
The valve uses a spring or seal that opens when water is pushed through and closes tightly when the flow stops. This one-way action keeps pressure stable and prevents unwanted backflow into the system.
Over time, mineral buildup, worn seals, or debris can interfere with the check valve’s sealing ability. When this happens, the pump struggles to hold pressure, and water can leak back into the tank.
What does a check valve do in an RV plumbing system?
It ensures water flows only one way and blocks backflow into the fresh water tank.
Where is the check valve usually found?
It is typically located inside the pump head or installed externally as an inline valve.
What causes a check valve to stop working?
Common causes include debris, mineral deposits, worn seals, or a damaged diaphragm.
Can an RV water pump work without a check valve?
No, without a check valve, the system cannot maintain stable pressure or prevent backflow.
Do all RVs have a separate external check valve?
Not always; many rely solely on the internal check valve inside the pump.
Common Symptoms That the Check Valve Is Failing
A failing check valve rarely breaks suddenly. Instead, it shows early warning signs that gradually worsen if left unchecked.
One common symptom is a fresh water tank that fills on its own when connected to city water. This indicates water is flowing backward through the pump.
Another sign is when the pump cycles on and off even when no faucet is open. This happens because the leaking check valve causes pressure loss.
Loss of prime is also common. When the pump struggles to draw water, a worn check valve may be allowing air into the system.
Finally, unusual noises like gurgling or dripping can suggest the valve is not sealing correctly. Over time, these issues may damage the diaphragm or cause leaks at fittings.
Why is the fresh water tank filling when on city water?
Because the check valve is leaking and allowing backflow into the tank.
Why is my water pump cycling on and off rapidly?
The system loses pressure through the bad check valve, forcing the pump to restart.
Why is water leaking around fittings or valves?
A failed check valve causes pressure fluctuations that stress seals.
Can a clogged filter mimic check valve failure?
Yes, blockages can create similar low-pressure symptoms.
Is loss of prime always due to check valve failure?
Not always, but a faulty valve is often the main reason.
Diagnostic Steps Before Repairing
Before attempting to fix the check valve, it’s important to confirm the diagnosis.
First, shut off city water and turn off the pump. Open a faucet to release system pressure.
Next, flush the pump by running water briefly to clear debris. If problems remain, move on to testing.
Disconnect the discharge or suction line and check for reverse flow. Water dripping backward usually confirms check valve issues.
Inspect the pump’s filter strainer, seals, and diaphragm for visible wear or buildup. A flashlight helps reveal cracks or stuck debris.
Should city water be off before testing the check valve?
Yes, it ensures accurate results and prevents backflow.
How can running the pump flush debris?
It pushes stuck particles out of the check valve.
How do you manually test for backflow?
Disconnect a line and see if water flows backward.
What parts should be inspected visually?
The screen filter, pump head, diaphragm, and seals.
Do you need special tools for inspection?
Usually no, a flashlight and basic hand tools are enough.
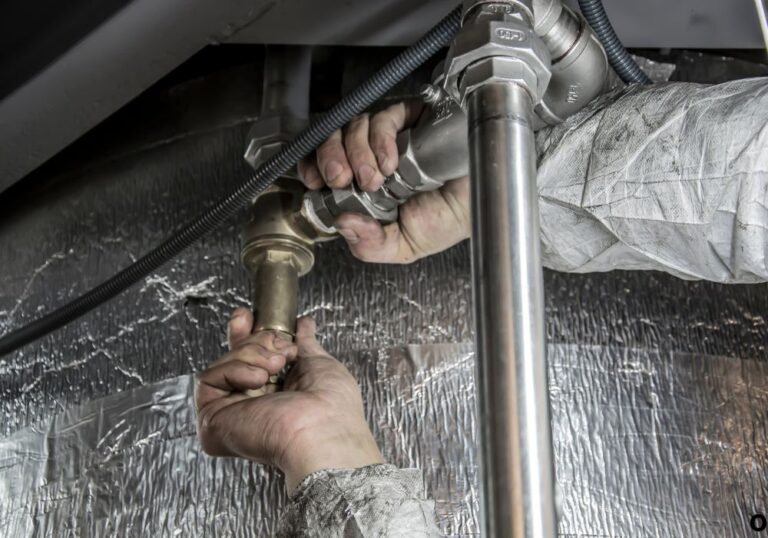
How to Fix or Repair the Check Valve
There are several methods for fixing a check valve depending on the severity of the problem.
Cleaning the Check Valve
Disassemble the pump head, remove the check valve, and clean it with fresh water. Use a soft brush to remove debris and mineral deposits.
Replacing the Check Valve Cartridge
Many pumps allow you to buy a replacement check valve kit. Match the kit to your pump model and install it by following manufacturer instructions.
Installing an Inline External Check Valve
If the internal valve is beyond repair, add an inline valve on the discharge line. Ensure the arrow points in the direction of water flow.
Replacing the Pump Head or Entire Pump
Severe internal damage may require replacing the pump head or the entire pump. While more costly, it restores reliability.
Can cleaning solve most check valve issues?
Yes, debris is a frequent cause of failure.
Can any check valve kit work?
No, use a kit designed for your specific pump.
Should the valve arrow point toward the pump or rig?
The arrow must follow the water flow toward the rig.
How do you prime the pump after repair?
Fill the suction line with water and run until flow is steady.
What torque is safe when installing a valve?
Tighten firmly but avoid over-torquing; use Teflon tape.
Testing and Verification After Repair
Once the repair is complete, testing is essential.
Turn on the water supply and activate the pump with a faucet open. Watch for leaks, pressure stability, and backflow into the tank.
A pressure gauge is useful for confirming the pump holds steady pressure. If the gauge drops, the valve may still be leaking.
Let the system run for several minutes under normal conditions. This ensures the repair will hold during travel and use.
How to confirm the check valve is working?
Backflow stops, and pressure remains stable.
Should pressure gauges be used?
Yes, they provide reliable confirmation.
What indicates a bad seal or leak?
Dropping pressure or visible water at fittings.
How long should the system run during testing?
At least a few minutes with faucets operating.
What to do if failure reoccurs?
Reinspect the valve, seals, or consider replacing the pump.
Preventive Maintenance and Best Practices
Preventing check valve issues saves time and money.
Flush the pump at least once a season to clear debris. Add a prefilter to the suction line to stop particles from entering.
Always turn off the pump when using city water to avoid pressure conflicts. This reduces strain on the check valve.
Keep a small repair kit in your RV with spare O-rings, a check valve cartridge, and sealant tape.
Regular inspections help avoid unexpected failures during trips. Many RVers report that routine checks prevent most water system problems.
How often should check valves be cleaned or replaced?
Inspect once per season and replace at first sign of wear.
Does a prefilter help?
Yes, it traps debris before it reaches the pump.
Why must the pump be off on city water?
It prevents pressure fighting and check valve damage.
Are OEM parts better than generic ones?
Yes, OEM valves generally fit and seal better.
What spares should RVers carry?
A valve cartridge, O-rings, and Teflon tape.
Common Mistakes and Troubleshooting
Many DIY repairs fail due to simple mistakes.
One mistake is forgetting to shut off city water before repair. Another is overtightening fittings, which cracks threads and damages seals.
Reversing the check valve orientation is another common issue. The arrow must point in the correct direction of water flow.
Neglecting to prime the pump after repair also leads to poor performance. Without priming, air remains trapped in the lines.
What if water still backflows after repair?
The diaphragm or pump head may need replacement.
Can wrong pipe size cause issues?
Yes, mismatched fittings create leaks and turbulence.
Can debris remain after flushing?
Yes, visual inspection is always necessary.
Is overpressurizing harmful?
Yes, it can force water past weak seals.
When should the pump be replaced entirely?
If repeated repairs fail or parts are worn beyond fixing.
Future Trends in RV Pump and Check Valve Design
RV plumbing technology continues to improve.
New check valves use corrosion-resistant materials such as stainless steel and advanced polymers. These last longer and resist mineral buildup.
Some pumps feature modular cartridges that allow quick check valve replacement without full disassembly. This makes repairs faster for RV owners.
Future designs may include smart sensors that alert owners when the pump loses pressure or backflow begins. Such innovations could eliminate surprises on the road.
Conclusion
Fixing a check valve on an RV water pump is not as intimidating as it seems. With basic tools and the right approach, the problem can often be solved in under an hour.
By understanding the symptoms, testing properly, and applying the correct repair method, RV owners can restore pressure, stop backflow, and protect their water systems.
Regular maintenance and preventive checks ensure fewer problems during trips and extend the life of the pump. Carrying spare parts and inspecting seasonally are small steps that make a big difference.
The next time you notice a cycling pump or an overfilling tank, remember that the check valve is likely the issue. Addressing it quickly keeps your adventures on track and your RV water system reliable for years to come.
I’m David R. Coleman, the founder, lead writer, and lifelong tool enthusiast behind GarageToolPro.com. With years of experience in automotive repair, woodworking, and home DIY projects, I created this platform to share practical tips, detailed tool reviews, and step-by-step guides that help mechanics, hobbyists, and homeowners get the job done right the first time.