How to Bypass an RV Water Pump Step by Step
The first chill of winter arrives, and RV owners begin preparing their rigs for freezing temperatures.
One critical step in this process is winterizing the plumbing system, which raises a key question: how to bypass an RV water pump to save time and protect the system?
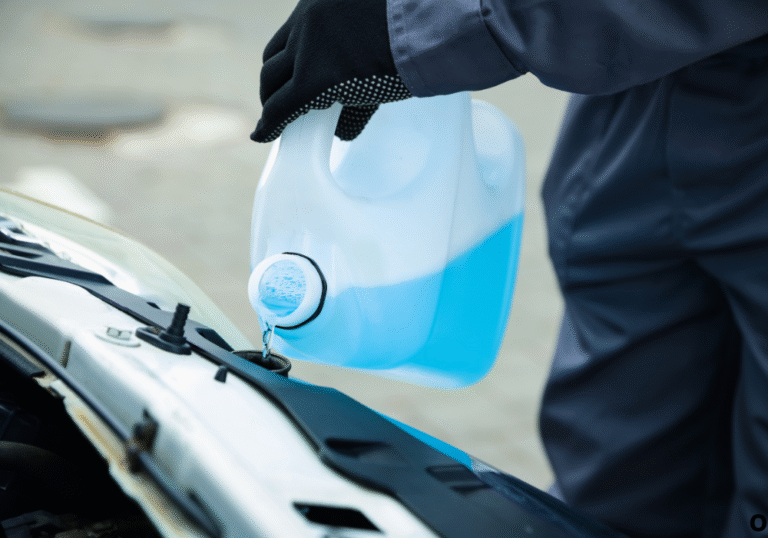
This task is more than routine maintenance. Without a bypass, gallons of antifreeze would need to flow through the pump, wasting money and putting unnecessary strain on the equipment.
Considering that over 11 million U.S. households own RVs (RVIA), this is a challenge many face each winter.
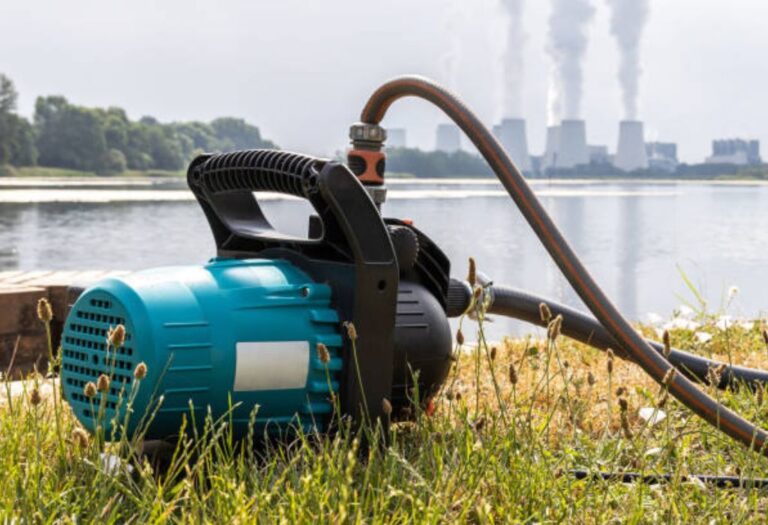
The water pump plays a central role in the RV plumbing system. It draws fresh water from the tank and supplies sinks, showers, and appliances when city water isn’t available.
But during storage or freezing conditions, leaving the pump in use without a bypass can lead to frozen lines, cracked components, and costly repairs.
Bypassing the RV water pump is a simple yet highly effective solution. It reroutes the plumbing system so antifreeze can circulate directly into the lines without passing through the pump.
This small adjustment can save 2–3 gallons of antifreeze per winterization, reducing both cost and chemical exposure to the pump.
Curiosity often surrounds the process: is a bypass complicated, do you need special tools, and can it really be done by a beginner?
The good news is that most RV owners can complete this task themselves with basic tools and a bypass kit.
This article provides a clear, step-by-step guide to bypassing an RV water pump. It also explains the tools needed, common mistakes to avoid, and expert tips for keeping your RV plumbing safe through winter and beyond.
Quick Answer — Why and How to Bypass an RV Water Pump
Bypassing an RV water pump means redirecting the plumbing system so antifreeze or maintenance tasks can be done without sending fluid through the pump. This protects the unit, saves antifreeze, and simplifies the process.
The setup is temporary and can be reversed easily. Using a bypass kit or built-in valves, most RV owners can switch between regular flow and bypass mode in minutes.
It is one of the most important steps in preparing an RV for winter storage. Without it, the pump may fill with antifreeze or even crack from freezing temperatures, leading to expensive repairs.
What does bypassing an RV water pump mean?
It reroutes water flow around the pump.
Why is bypassing necessary?
It prevents damage, saves antifreeze, and makes winterizing easier.
Is a bypass permanent?
No, it can be switched back quickly.
Can every RV use the same method?
No, designs vary, but the steps are similar.
Do you need a professional to bypass a pump?
Not usually—DIY kits make it simple.
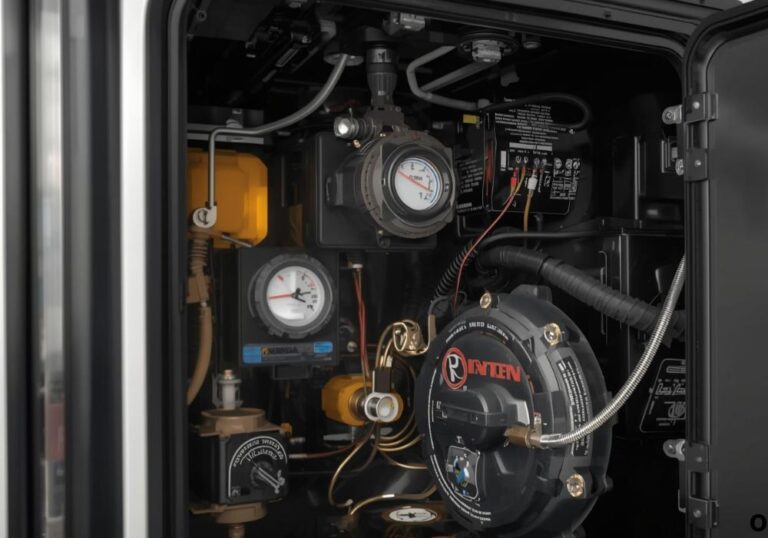
Understanding the RV Water Pump System
The Role of the Water Pump
The RV water pump is the heart of the plumbing system when city water is unavailable. It draws fresh water from the tank and supplies sinks, showers, and appliances.
Without it, no pressurized water would flow inside the RV during travel or boondocking. The pump automatically engages when faucets are opened, maintaining steady pressure.
What does the RV water pump do?
It delivers pressurized water from the fresh tank.
Does it work when connected to city water?
No, city water bypasses the pump automatically.
Why is the pump important?
It allows off-grid water use.
Does the pump need regular maintenance?
Yes, cleaning filters and checking lines is essential.
Is it safe to run the pump dry?
No, running dry can burn out the motor.
Why a Bypass System Exists
The bypass isolates the pump during winterizing or repair. It ensures antifreeze doesn’t fill the pump unnecessarily.
It also reduces contamination risks and lowers the amount of antifreeze required for the job. On average, bypassing can save 2–3 gallons of RV antifreeze per season.
What does a bypass system do?
It redirects water around the pump.
Why does this save money?
It avoids filling the pump with antifreeze.
Does it protect the pump?
Yes, it prevents chemical buildup and freezing damage.
Is bypassing only for winterizing?
No, it’s also useful during pump replacement.
Can it be added to older RVs?
Yes, bypass kits are widely available.
Tools and Materials Needed for Bypassing
Bypassing an RV water pump requires only basic tools. A screwdriver, pliers, hose clamps, and Teflon tape are commonly used.
A bypass kit typically includes valves, hoses, and fittings. Many modern RVs come with pre-installed bypass valves, making the process even easier.
Do all RVs include bypass kits?
No, some require aftermarket kits.
How much does a kit cost?
Most range between $15–$30 at RV supply stores.
Can the bypass be DIY-built?
Yes, with valves, hoses, and clamps.
Do you need power tools?
No, hand tools are usually enough.
Should you use Teflon tape?
Yes, it helps prevent leaks at joints.
Step-by-Step Guide to Bypass an RV Water Pump
Step 1 — Turn Off Power and Water Supply
Always start by shutting off electrical power to the pump. Turn off all water sources and relieve pressure in the lines.
Why turn off the pump first?
To prevent electrical hazards.
Do you need to drain lines?
Yes, relieve system pressure before starting.
What if the pump runs accidentally?
It could spray water or damage fittings.
Should city water be disconnected?
Yes, always shut off external connections.
Do you need safety gloves?
Yes, especially when handling antifreeze.
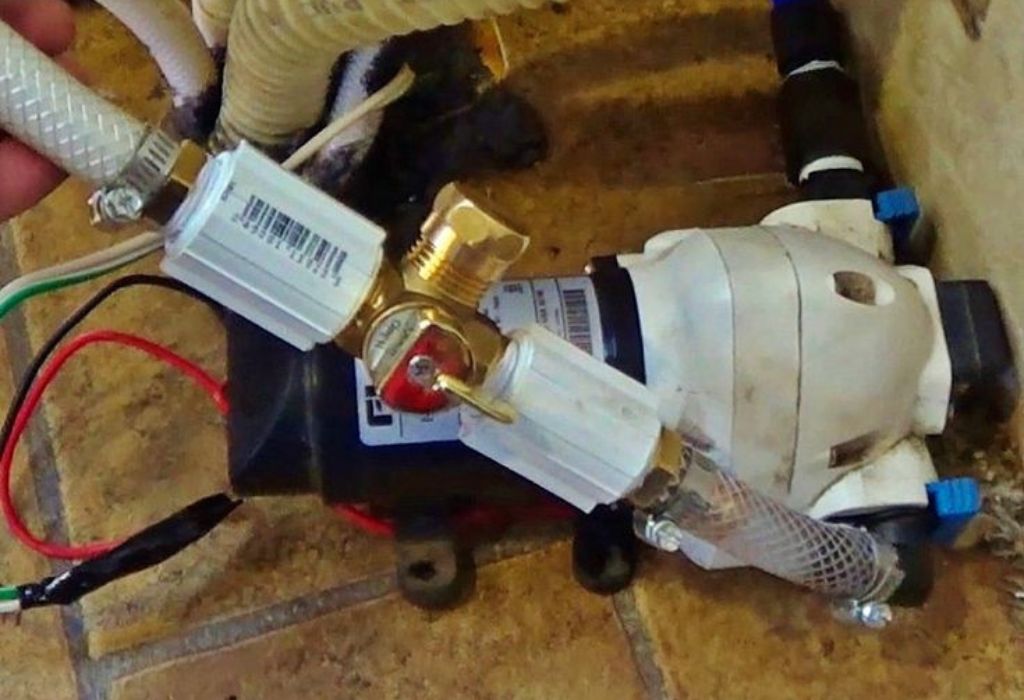
Step 2 — Locate the Water Pump
The pump is usually near the fresh water tank or under cabinets. Tracing plumbing lines helps identify its location.
Where is the pump most often found?
Near the tank or utility bay.
Can it be hidden?
Yes, sometimes behind panels.
How do you confirm it’s the pump?
Follow hoses and look for electrical wiring.
Are all pumps in the same place?
No, locations vary by RV layout.
Should you label it?
Yes, to simplify future work.
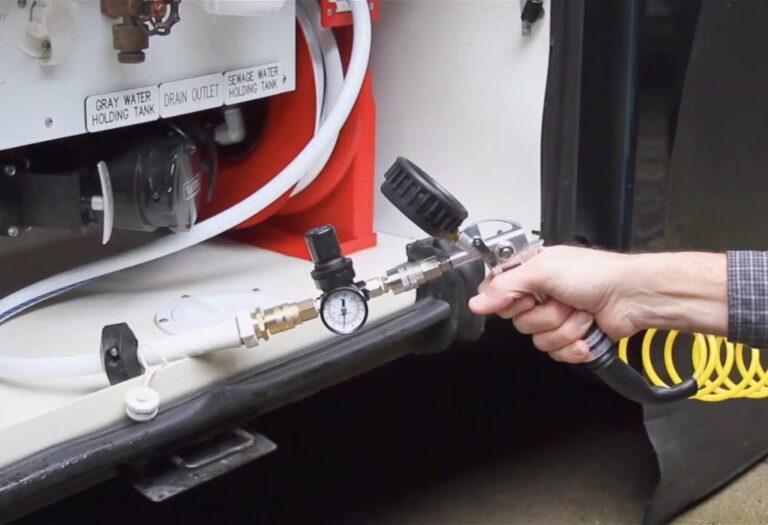
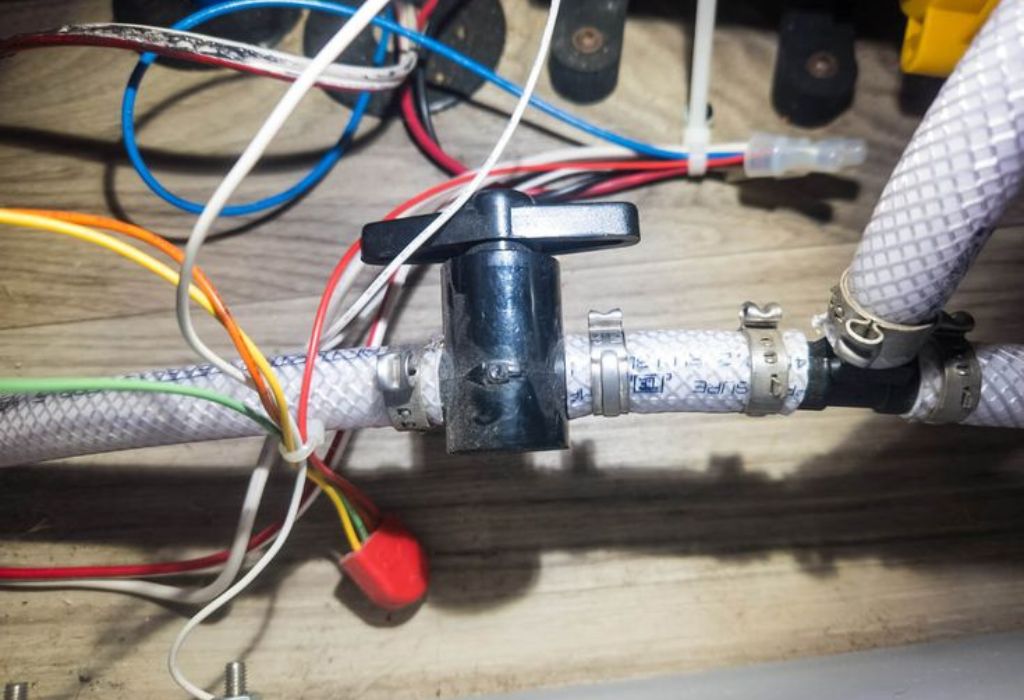
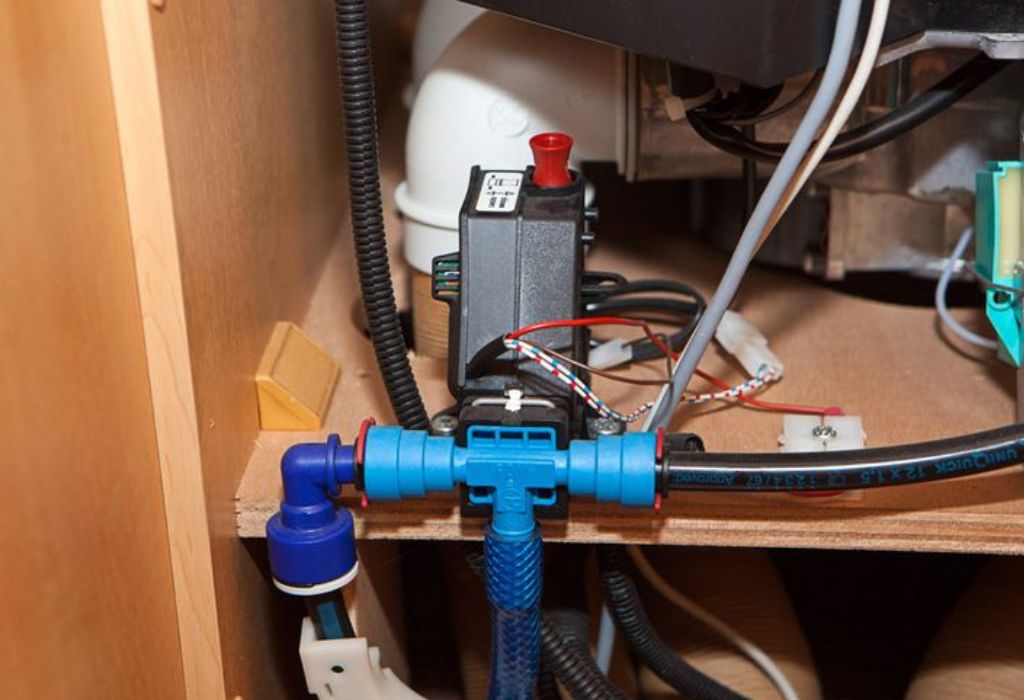
Step 3 — Install the Bypass Valve or Kit
Attach the bypass kit’s fittings and hoses. Secure connections with hose clamps and ensure proper valve placement.
Do you need special hoses?
Yes, RV-grade potable water hoses are best.
What if fittings don’t match?
Adapters may be needed.
Is it difficult to install?
No, most kits are beginner-friendly.
Can leaks occur here?
Yes, tighten clamps and seal threads.
Do valves need orientation?
Yes, check instructions for correct direction.
Step 4 — Close Normal Flow, Open Bypass Line
Turn the valves to block pump inlet and outlet. Open the bypass line so fluid flows around the pump.
What happens if valves are set wrong?
Water won’t flow or antifreeze may leak.
Should both pump valves be closed?
Yes, to fully isolate the pump.
Does bypassing affect faucets?
No, water will still reach fixtures.
Can antifreeze now enter the lines?
Yes, without going through the pump.
Is this step reversible?
Yes, simply switch valves back.
Step 5 — Test the System
Run the pump briefly to check for leaks and confirm flow. After testing, shut off the pump until needed.
How do you know it’s working?
No leaks and water flows smoothly.
What if leaks appear?
Tighten connections or reseal joints.
Is running the pump for testing safe?
Yes, but only for a short time.
Do you need to test with antifreeze?
Yes, if winterizing the RV.
What should be done after testing?
Switch valves back for normal use.
Common Problems During Pump Bypass
Leaks can occur from loose clamps or fittings. Incorrect valve settings often cause water to stop flowing.
Air pockets sometimes get trapped in lines, requiring purging by briefly running the pump.
Why is my system still pressurized?
Because valves may not be fully closed.
What if antifreeze won’t flow?
Valves may be in the wrong position.
Can hoses disconnect under pressure?
Yes, if clamps are loose.
What if air is stuck in the system?
Run the pump briefly to purge it.
Can bypass damage plumbing?
Not if installed correctly.
Benefits of Using a Bypass System
Bypassing saves gallons of antifreeze each year. It reduces chemical exposure inside the pump and lowers maintenance costs.
It also makes future repairs easier by isolating the pump from the plumbing system.
How much antifreeze is saved?
Usually 2–3 gallons per season.
Does bypassing protect the pump?
Yes, by avoiding chemical buildup.
Can it reduce long-term costs?
Yes, fewer repairs and less antifreeze needed.
Does it help with pump replacement?
Yes, bypassing isolates the pump for service.
Is it worth installing in all RVs?
Yes, for both winterizing and repairs.
Professional Tips and Safety Precautions
Always depressurize lines before working. Double-check valve positions after bypassing.
Wear gloves when handling antifreeze, and keep a plumbing diagram for reference.
Is RV antifreeze safe?
Yes, only use non-toxic RV-approved antifreeze.
Do you need a plumber to install bypass?
Not usually, most RV owners can do it.
How often should valves be checked?
At least once a season.
Can automotive antifreeze be used?
No, only RV-specific products are safe.
Should bypass be tested yearly?
Yes, before freezing weather.
Conclusion — Should You Bypass Your RV Water Pump?
Bypassing an RV water pump is a simple but essential step in winterizing and maintaining the plumbing system. It protects the pump, saves antifreeze, and prevents costly damage.
With basic tools and a bypass kit, most RV owners can complete the process themselves. Once installed, the system makes both winterizing and pump maintenance faster and safer.
Is bypassing really necessary?
Yes, for proper winterization and maintenance.
Does it extend pump life?
Yes, by keeping antifreeze out of the pump.
Can beginners handle this task?
Yes, it’s beginner-friendly with simple tools.
What’s the bottom line?
Every RV owner should know how to bypass their pump for safety and savings.
I’m David R. Coleman, the founder, lead writer, and lifelong tool enthusiast behind GarageToolPro.com. With years of experience in automotive repair, woodworking, and home DIY projects, I created this platform to share practical tips, detailed tool reviews, and step-by-step guides that help mechanics, hobbyists, and homeowners get the job done right the first time.