How Much Pressure to Blow Out RV Water Lines?
The first freezing night often catches RV owners off guard. One day the water system works perfectly, and the next morning, a burst pipe floods the floor because a small amount of water was left in the lines.
Each winter, hundreds of RVs suffer cracked fittings and ruptured lines from improper winterization.
According to RVTravel, water damage repairs can cost over $1,000 if frozen pipes burst in multiple sections.
That’s a big price to pay for skipping one simple step — adjusting air pressure correctly when blowing out the lines.
Most RV owners know they need compressed air to remove water, but few realize the exact PSI makes all the difference.
Too little pressure, and water remains trapped in low points. Too much pressure, and you can blow apart delicate faucets or check valves.
Finding the right balance is the key to safe and complete winterization. The right PSI not only clears every line efficiently but also protects fittings, pumps, and seals from unnecessary stress.
According to KOA, using a regulated 30–40 PSI is the industry standard for protecting plumbing systems during air blow-outs.
In this guide, you’ll learn exactly how much pressure to blow out RV water lines without risking leaks or damage.
You’ll also discover how to use regulators, air adapters, and correct sequencing to keep your RV’s plumbing safe, dry, and ready for spring.
By the end, you’ll know how to winterize confidently — no frozen pipes, no expensive repairs, and no wasted antifreeze.
Why Pressure Matters in RV Blow-Outs
Compressed air is one of the most effective tools for winterizing an RV’s plumbing system. It forces out the last traces of water from pipes, fittings, and fixtures that would otherwise freeze and expand during cold weather.
However, air pressure is a double-edged sword. When the pressure is too low, it fails to clear all the moisture, leaving behind hidden pockets of water that can freeze and crack the pipes. When it’s too high, it can blow apart connections or damage delicate check valves and faucets.
Most RV plumbing systems use PEX or vinyl tubing, which are flexible but not built for extreme pressure. They can safely handle around 40–50 PSI during normal use, but short bursts from an unregulated compressor can spike far higher. These spikes often occur so fast that fittings can split before the gauge even reacts.
Using a pressure regulator ensures that the air entering the lines stays within a safe range. It also helps maintain consistent airflow so the entire system is cleared evenly without stressing seals or connectors.
The correct balance of pressure keeps your RV’s plumbing dry without risk. Proper regulation also extends the life of the system by preventing leaks and premature wear in O-rings, valves, and faucets.
What happens if air pressure is too high?
It can rupture plastic fittings, pop seals, or damage the check valve at the city water inlet.
What happens if pressure is too low?
Water remains trapped in low spots, which can freeze and burst during storage.
Is more pressure better for large RVs?
No, even large systems rely on consistent 30–40 PSI to prevent overloading smaller lines.
Can a compressor’s built-in gauge be trusted?
Not entirely, since pressure drops between the tank and the RV inlet. Always use an inline regulator at the connection point.
Does steady air pressure clean lines better?
Yes, a constant 30–40 PSI clears the plumbing more effectively than high bursts of uneven pressure.
Recommended PSI Range (The Short Answer)
The ideal pressure for blowing out RV water lines is 30–40 PSI. This range provides enough force to push out all remaining water without over-pressurizing the system.
Start on the low end at around 25–30 PSI, then increase gradually if small water spurts continue. Every RV model is slightly different, and older rigs with flexible tubing or older fittings may require lower pressure.
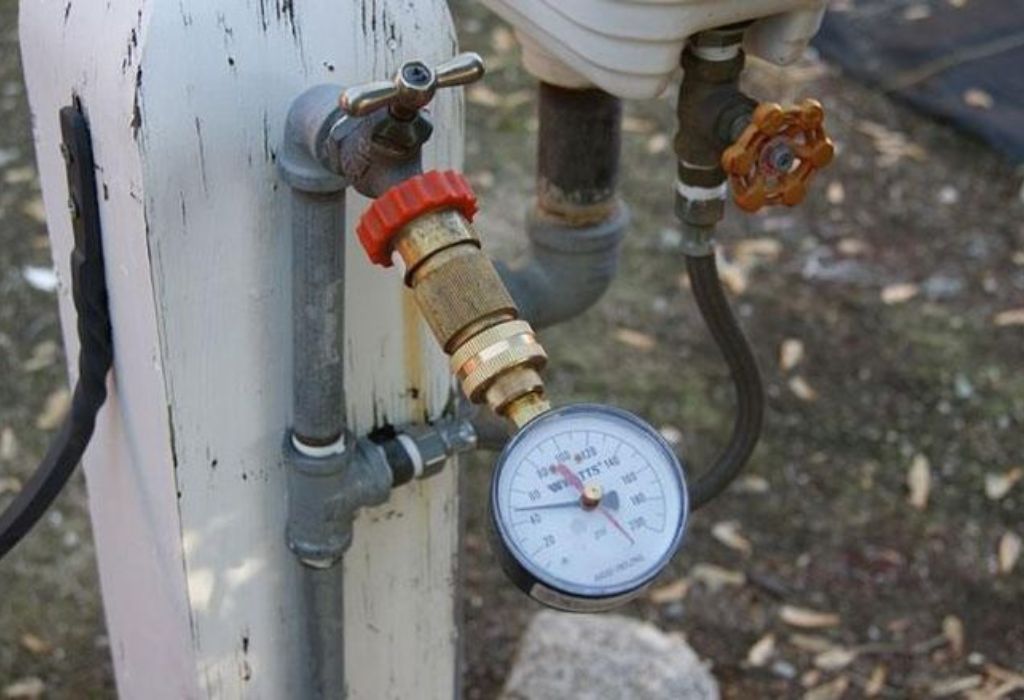
Even though many air compressors can reach 100 PSI or more, RV plumbing isn’t designed for those levels. The safest approach is to regulate air through a dedicated blow-out adapter connected to the city water inlet and monitor pressure with an inline gauge.
Is 50 PSI safe for RV lines?
No, 50 PSI can strain fittings and valves, especially in older RVs. Stay below 40 PSI.
Will 20–25 PSI work for smaller rigs?
Yes, but you may need to repeat the cycle twice to ensure all lines are cleared.
Why use a regulator if the compressor already has one?
Tank regulators don’t always reflect real pressure at the RV inlet, where spikes can occur.
How do I know my system’s limit?
Check the RV owner’s manual or the manufacturer’s PSI rating.
Is consistent pressure better than bursts?
Yes, steady airflow clears lines more efficiently and prevents water backflow.
Tools and Setup Checklist
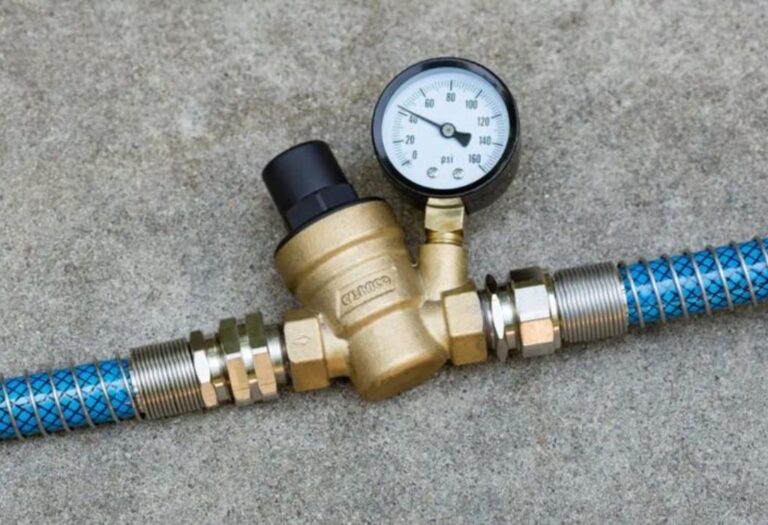
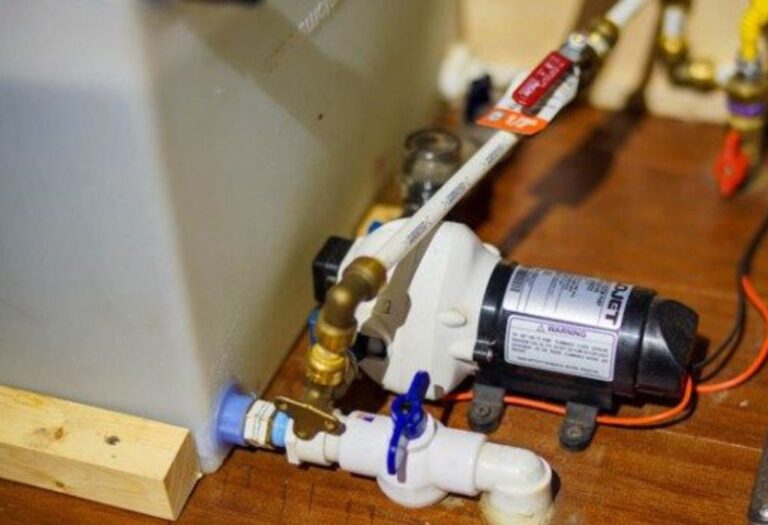
Proper tools make the process safer and faster. You’ll need an air compressor (oil-less preferred), adjustable regulator, blow-out adapter, pressure gauge, air hose, and non-toxic RV antifreeze for the traps.
Remove or bypass any water filters before beginning. Filters trap moisture and can rupture if left in place. Disconnect external hoses, and turn off your water pump and heater elements before introducing air.
Make sure the compressor’s tank is fully charged, and connect it using an adapter specifically designed for RV water systems. Avoid makeshift fittings that could leak or cross-thread.
Do I need a special adapter?
Yes, use a brass or aluminum blow-out adapter that fits the city water inlet.
Is antifreeze still required?
Only for P-traps and drains after air purging, not inside the main water lines.
How important is a regulator?
Essential — it prevents sudden spikes that can damage plumbing.
Can a small portable compressor work?
Yes, as long as it maintains steady airflow at 30–40 PSI.
Should filters be reinstalled afterward?
Yes, reinstall filters only after de-winterizing in spring.
Step-by-Step: How to Blow Out RV Water Lines

1. Drain All Tanks and Lines
Begin by draining the freshwater tank, black tank, and gray tank completely. Open all faucets, showers, and exterior valves to allow gravity to remove as much water as possible.
If your RV has low-point drains, open them now. Leave faucets open until water stops flowing. Then close all drains before connecting the compressor.
Why drain tanks first?
It reduces water volume so air can clear lines faster.
Do I leave drains open while blowing air?
No, close them to maintain steady airflow through the system.
What about the water heater?
Drain and bypass it to prevent air from entering the tank.
Should faucets be open or closed?
Start closed, open one at a time as air moves through.
Can the water pump stay on?
No, keep it off to avoid dry running.
2. Connect the Compressor
Attach the compressor to the city water inlet using the blow-out adapter and regulator. Start at 25–30 PSI, then gradually increase to 40 PSI maximum.
Keep the compressor running in short cycles. Watch the inline gauge to maintain pressure consistency throughout the process.
Why start low?
Low pressure prevents sudden air shocks that could loosen fittings.
Should I use continuous air or bursts?
Short continuous bursts are safer and more effective than rapid pulsing.
Do I need to bleed air between fixtures?
Yes, open one fixture at a time for even purging.
How to protect the check valve?
Avoid holding the trigger for more than a few seconds at a time.
Can air leak out through open drains?
Yes, close unused drains before pressurizing the system.
3. Open Fixtures in Sequence
Start with the faucet closest to the city water inlet and work outward. Open both cold and hot sides individually until only air escapes.
Move through every fixture — kitchen sink, bathroom sink, shower, outdoor shower, and toilet sprayer. If your RV has a washing machine or ice maker, purge those separately.
How long should each fixture run?
Until sputtering stops and only air blows out, usually 5–10 seconds.
Do I open all faucets at once?
No, one at a time to maintain full airflow.
Do I need to repeat?
Yes, a second pass ensures trapped water is removed.
Can I forget the outside shower?
No, it’s one of the most common freeze points.
What about sprayer hoses?
Lay them down so gravity helps release leftover water.
4. Blow Out Low-Point Drains
After clearing fixtures, reopen the low-point drains and let air flow for a few seconds. This step purges the lowest sections where water usually collects.
Watch for sputters or mist, then close drains once they run dry.
Do low-point drains matter?
Yes, they prevent trapped water that can burst fittings.
Should I keep faucets open while draining?
Yes, open faucets release trapped air pockets.
Can this step be skipped?
Never — low points are where freezing starts.
Is antifreeze needed here?
Only in extreme cold or if you suspect trapped moisture.
Can I reuse this method for de-winterizing?
Yes, reverse the order in spring to check for clear flow.
5. Protect Traps and Toilets
Once the air process is complete, pour non-toxic RV antifreeze into every sink, shower, and toilet. About ½ to 1 cup per drain and 1 quart for the toilet bowl is sufficient.
This step keeps P-traps from freezing and seals from drying out. It also prevents sewer odors from seeping into the RV during storage.
Why add antifreeze if lines are dry?
Traps still hold small water pools that can freeze.
Can I skip the toilet?
No, the bowl and valve seal can dry and crack.
Does antifreeze harm plumbing?
No, RV-safe antifreeze lubricates seals and protects plastic components.
What type should I use?
Choose propylene glycol-based pink antifreeze labeled for RV use.
Can I use automotive antifreeze?
Never — it’s toxic and not safe for potable water systems.
Safety Tips and Common Mistakes
Avoid exceeding 40 PSI even if your compressor can go higher. High pressure can silently weaken fittings and create leaks that appear months later.
Always use a regulator rated for air, not a garden-hose water regulator. Air regulators respond faster and maintain stable pressure.
Do not forget small fixtures like ice makers, washing machines, or outdoor sinks. These are common freeze-damage points because owners assume air automatically reaches them.
Why did my lines still freeze after blow-out?
Moisture likely remained trapped in low points or traps without antifreeze.
Can I use a tire inflator compressor?
Yes, if equipped with a regulator and adapter, but avoid long continuous runs.
Do I need to leave faucets open after finishing?
Yes, leave them open to relieve residual pressure.
Can I store the RV immediately after blowing out?
Yes, once pressure is relieved and antifreeze added to traps.
What about the freshwater tank vent?
Ensure it’s open so trapped air escapes during blowing.
Antifreeze vs Air: Which Method Is Better?
Both air and antifreeze protect your RV plumbing, but each has pros and cons. Air avoids introducing chemicals into the system and saves on antifreeze costs. Antifreeze, however, provides added protection in extreme cold or for complex plumbing layouts.
Many experienced RV owners use a hybrid method — blow out lines with air and then pour antifreeze into traps and low-flow areas. This approach ensures both dryness and freeze resistance.
Is air enough for mild climates?
Yes, if pressure and sequence are correct.
Is antifreeze needed below zero?
Recommended, as even small residual water can freeze solid.
Can both methods be used together?
Yes, blow out first, then finish with antifreeze for full protection.
Which saves time?
Air-only is faster and cleaner, especially for frequent travelers.
Does antifreeze leave residue?
Slightly, but it’s harmless and easy to flush in spring.
De-Winterizing and Pressure Testing in Spring
When temperatures rise, reconnect the water source and refill the freshwater tank. Run water through each fixture to remove any traces of antifreeze.
Inspect all fittings and joints for leaks under normal city water pressure with a regulator in place. If you notice any drips, tighten fittings or replace worn O-rings before use.
Do I need to sanitize the system?
Yes, flush with a mild bleach solution before drinking from RV lines.
What pressure should I test at?
Normal city water pressure, about 40–50 PSI, through a regulator.
How to check for hidden leaks?
Run the pump with all faucets closed; if it cycles, a small leak exists.
Can I reinstall filters now?
Yes, once lines are flushed and water runs clear.
Should I test the check valve?
Yes, ensure it seals and prevents backflow during hookup.
Conclusion
Knowing how much pressure to blow out RV water lines can make the difference between a smooth winter and a costly spring repair. Keeping pressure within 30–40 PSI ensures the system is clean, dry, and safe from freezing damage.
Use a regulator, blow-out adapter, and consistent air supply to protect every fixture. Finish with antifreeze in the drains and traps for extra safety.
Winterizing properly not only saves money but also extends the life of your RV’s plumbing system. Before the next freeze arrives, take 20 minutes to follow these steps — and rest easy knowing your RV will be ready for next season without a single burst line.
I’m David R. Coleman, the founder, lead writer, and lifelong tool enthusiast behind GarageToolPro.com. With years of experience in automotive repair, woodworking, and home DIY projects, I created this platform to share practical tips, detailed tool reviews, and step-by-step guides that help mechanics, hobbyists, and homeowners get the job done right the first time.