The Ultimate Guide: Sanitizing Your RV Water System
Embarking on an RV adventure promises freedom, scenic views, and the comfort of home on wheels. However, overlooking one critical maintenance task can quickly turn your dream trip into a nightmare: ensuring your RV’s water system is clean and safe. Just like any other part of your home, your RV’s fresh water tank and plumbing can become a breeding ground for bacteria, mold, and algae, leading to unpleasant odors, strange tastes, and even health risks.
This comprehensive guide will walk you through the essential process of sanitizing your RV water system, detailing every step from preparation to completion, and crucially, answering the question that often puzzles RVers: how long does it really take to sanitize an RV water system effectively? Get ready to learn the ultimate way to guarantee fresh, potable water for all your journeys ahead.
Why Sanitize Your RV Water System?
Many RV owners, especially newcomers, might wonder if sanitizing their water system is truly necessary. After all, if the water looks clear, isn’t it clean? The simple answer is no. Even seemingly clear water can harbor a multitude of invisible threats that compromise both the quality and safety of your fresh water supply. Regular sanitization isn’t just a recommendation; it’s a critical practice for several compelling reasons:
Firstly, and perhaps most importantly, sanitization prevents the growth of harmful bacteria, mold, and algae. These microorganisms thrive in dark, damp environments like your RV’s water tank and lines, especially when the system sits unused for extended periods. Bacteria like E. coli or Legionella can pose significant health risks, leading to gastrointestinal illnesses or respiratory problems. Mold and algae not only contaminate the water but can also damage your plumbing over time. Stagnant water, especially in warmer climates, creates an ideal breeding ground. A single season of disuse without proper cleaning can turn your fresh water tank into a biological soup, making any water drawn from it unsafe for drinking, cooking, or even brushing teeth. The potential for biofilm—a slimy layer of microorganisms—to build up on the inside of your pipes and tank is also a major concern, as it protects bacteria from disinfectants and can be notoriously difficult to remove once established.
Secondly, a sanitized system eliminates unpleasant odors and bad tastes that can develop due to microbial growth or stagnant water. Imagine pouring a glass of water, only to be met with a metallic, musty, or plastic-like taste, or a distinct rotten egg smell. This is often a tell-tale sign that your system needs attention. These off-putting sensory experiences are usually caused by bacteria producing sulfurous compounds or other metabolic byproducts. Sanitizing flushes out these culprits, leaving you with fresh, clean-tasting water that makes hydration and cooking a pleasure, not a chore. The satisfaction of knowing your water is truly fresh will greatly enhance your overall camping experience, allowing you to fully enjoy your morning coffee or a refreshing drink after a day of exploring.
Finally, sanitization is an essential part of seasonal preparation and routine maintenance. Before your first trip of the season, after storing your RV for winter, or even after purchasing a used RV, a thorough sanitization ensures that you’re starting with a clean slate. It acts as a reset, clearing out any contaminants that may have settled in while the RV was dormant. Many RVers also choose to sanitize mid-season if they’ve used water from questionable sources, if the RV has been sitting for several weeks, or if any foul odors or tastes begin to emerge. It’s also crucial to sanitize if you’ve recently performed any plumbing work that exposed your water lines to the open air. By making sanitization a regular part of your RV maintenance routine—typically once or twice a year, or as needed—you’re not just protecting your water system; you’re safeguarding your health and enhancing the overall enjoyment of your RVing experience. It’s an investment in your well-being and the longevity of your RV’s plumbing infrastructure.
Gathering Your Supplies
Before you embark on the sanitization journey, a little preparation goes a long way. Having all your necessary supplies on hand will make the process smoother, more efficient, and ensure you’re ready for each step without interruption. You won’t need a huge arsenal of specialized tools, but a few key items are absolutely essential for a successful sanitization. Gathering everything before you begin will save you time and frustration, allowing you to focus on the task at hand.
First and foremost, you’ll need household bleach. However, not just any bleach will do. It’s crucial to use unscented, regular household bleach (typically containing 5-8.25% sodium hypochlorite). The concentration can vary slightly between brands, so always check the label. Avoid “splash-less,” “concentrated,” or scented varieties, as these often contain additives, thickening agents, or perfumes that can leave residues in your water system, are harder to rinse out, or aren’t effective for sanitization. For example, some splash-less bleaches contain polymers that can cling to the inside of your tank and pipes. Always confirm the active ingredient and its percentage on the label to ensure you’re using a pure sodium hypochlorite solution. A standard 1-gallon bottle is usually sufficient for most RVs.
Next, you’ll require accurate measuring cups or spoons to ensure you use the correct amount of bleach. This is a critical step. Using too little won’t effectively sanitize and kill off all microorganisms, potentially leaving your system vulnerable. Using too much, on the other hand, can be difficult to rinse out completely, leading to a persistent bleach smell or taste in your water, and can even be corrosive to certain plumbing components over time. Precision here is key to both effectiveness and safety. A large liquid measuring cup (e.g., a 1-quart or 1-liter capacity) will be useful for mixing your bleach solution.
You’ll also need hoses, specifically a dedicated potable water hose. This is a hose designed and certified for drinking water, identifiable by its white or blue color and often explicitly labeled “Drinking Water Safe.” Never use a standard garden hose (typically green or black) for filling your fresh water tank, as they are not manufactured to potable water standards and can leach harmful chemicals, plastics, or rubber compounds into your drinking water. These chemicals can impart unpleasant tastes and smells, and in some cases, pose health risks. You’ll also need access to a reliable water source with sufficient pressure to fill and rinse your tank effectively. A clean funnel might also be helpful for pouring the bleach solution into the fresh water fill port if your RV doesn’t have an easily accessible opening for direct pouring.
Finally, prioritize your safety. Always wear rubber gloves and eye protection (safety glasses or goggles) when handling bleach. It’s a caustic chemical that can cause severe irritation or chemical burns to skin and eyes upon contact. Working in a well-ventilated area is also advisable to avoid inhaling strong bleach fumes. Having these simple safety measures in place will protect you throughout the process and ensure a safe working environment. Some paper towels or old rags are also handy for immediate clean-up of any spills.
By gathering these straightforward items beforehand, you’ll be well-equipped to tackle the sanitization of your RV water system confidently and safely, setting the stage for a thorough and effective cleaning.
Step-by-Step Sanitization Process
Sanitizing your RV water system might seem like a daunting task, but by breaking it down into manageable steps, you’ll find it’s a straightforward process. Follow these instructions carefully to ensure a clean, safe, and odor-free water supply for your adventures.
Step 1: Drain the System Completely
The first crucial step is to empty your entire fresh water system. Begin by disconnecting from any external water source. Open all hot and cold water faucets inside your RV, including the kitchen sink, bathroom sink, shower, and any outdoor showers. Don’t forget to flush the toilet several times to clear the bowl and supply line. Locate and open your RV’s fresh water tank drain valve, usually found underneath the RV near the fresh water tank. Also, open any low-point drain valves for both hot and cold water lines (these are typically small plastic or brass valves located at the lowest points of your plumbing system, designed to allow all water to exit the lines). Let the water drain completely. If your RV has a water filter, now is a good time to remove the cartridge to prevent it from absorbing the bleach solution later, which can damage the filter and make rinsing more difficult. Bypass your hot water heater (if your RV has a bypass kit) at this stage; if not, you’ll need to drain it separately as well and consider if you want the bleach solution to go through it, as some manufacturers advise against it.
Step 2: Calculate the Correct Bleach Amount
Using the right concentration of bleach is vital for effective sanitization without leaving excessive residue. The general recommendation is 1/4 cup of unscented household bleach (5-8.25% sodium hypochlorite) for every 15 gallons of fresh water tank capacity.
To calculate:
- Find your RV’s fresh water tank capacity (e.g., 60 gallons, 100 gallons). This information is usually in your owner’s manual or on a label near the tank.
- Divide your tank capacity by 15.
- Multiply that number by 1/4 (or 0.25) cup.
Example: For a 60-gallon tank: (60 gallons / 15 gallons) * 1/4 cup = 4 * 1/4 cup = 1 cup of bleach.
For a 100-gallon tank: (100 gallons / 15 gallons) * 1/4 cup ≈ 6.67 * 1/4 cup ≈ 1.67 cups of bleach.
Do not exceed this amount, as it can make rinsing more challenging and potentially damage seals or components over time.
Step 3: Introduce the Bleach Solution Safely
Once you’ve measured the correct amount of bleach, it’s crucial to dilute it before adding it to your fresh water tank. Never pour concentrated bleach directly into the tank.
- In a separate clean bucket or large measuring cup, mix your calculated amount of bleach with at least one gallon of fresh water. Stir thoroughly.
- Locate your RV’s fresh water fill port. This is often a gravity fill port (a larger opening for pouring) or a city water connection that also serves as a tank fill.
- Carefully pour the diluted bleach solution into the fresh water tank. If using a gravity fill, a funnel can be helpful to prevent spills. If your RV only has a pressurized city water inlet for filling, you may need a specialized “water bandit” adapter or a small piece of hose with a fitting to allow you to pour the solution into the line before attaching the main water hose. Alternatively, some RVs have an anti-freeze inlet where you can siphon the solution.
Step 4: Fill the Fresh Water Tank Completely
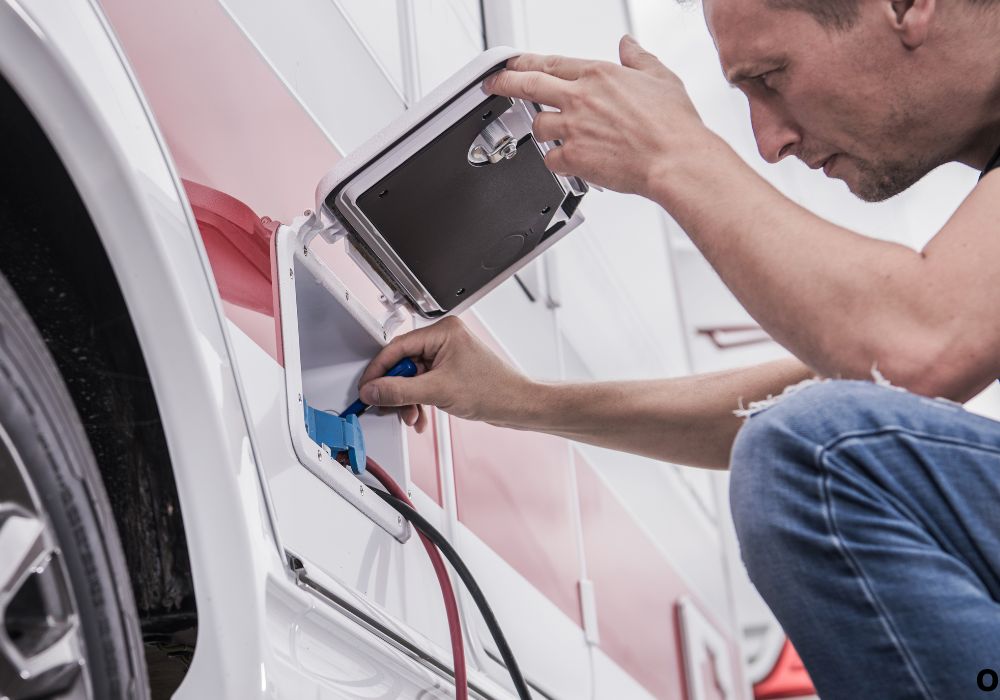
After adding the diluted bleach, connect your clean potable water hose to your RV’s fresh water inlet and to your water source. Begin to fill the fresh water tank. Fill the tank completely until it overflows slightly, or until your tank monitor indicates it’s full. This ensures that the bleach solution reaches all parts of the tank and gets diluted properly. As the tank fills, the bleach solution will disperse throughout the water.
Step 5: Circulate the Solution Through All Lines
With the tank full of the bleach-water solution, it’s time to get it into all your plumbing lines, including the hot water lines (if you didn’t bypass the water heater).
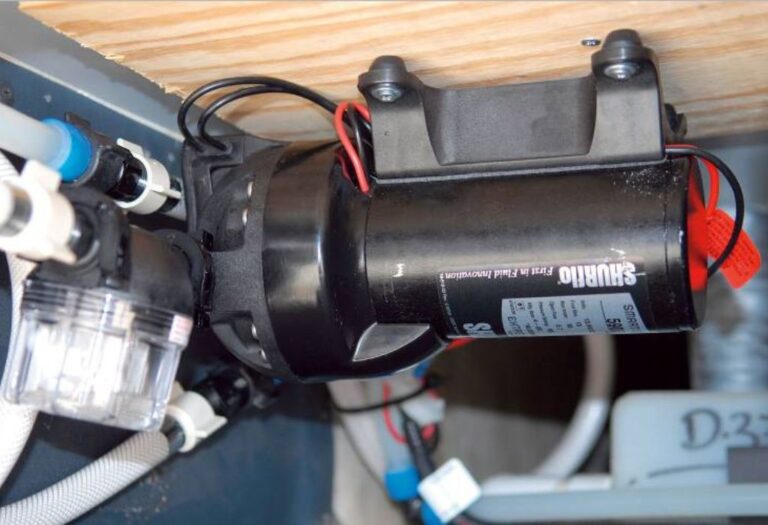
- Turn on your RV’s water pump.
- Starting with the faucet furthest from the pump (often the bathroom sink or shower), open each hot and cold water faucet one at a time. Run the water until you can clearly smell bleach emanating from the tap. This indicates that the bleach solution has filled that particular line.
- Repeat this process for all faucets, showerheads, the toilet (flush until you smell bleach), and any outdoor showers or spray ports. Don’t forget to run water through any ice maker lines if your RV has one.
- Close all faucets once you’ve confirmed the bleach smell from each.
Step 6: Let It Sit (The Crucial Contact Time!)
This is arguably the most critical step in the sanitization process and directly addresses the “how long” question. For the bleach (sodium hypochlorite) to effectively kill bacteria, viruses, and other microorganisms, it needs sufficient contact time.
- Minimum Recommended Time: Most RV experts agree that the bleach solution should sit in your water system for at least 3 to 4 hours.
- For Heavily Contaminated Systems or First-Time Sanitization: If your RV’s water system is particularly foul-smelling, hasn’t been sanitized in a long time, or if you’re sanitizing a used RV for the first time, it’s highly recommended to let the solution sit for 12 to 24 hours (overnight). This extended contact time ensures maximum disinfection.
- Do not drive the RV while the bleach solution is sitting, as sloshing can reduce the effectiveness of the disinfectant. Park it somewhere safe and level.
Step 7: Drain and Rinse Thoroughly (Multiple Times)
After the appropriate contact time, it’s time to flush out the bleach solution completely. This step is crucial to remove any lingering bleach taste or smell.
- Open all fresh water tank drain valves and low-point drains again. Let the system drain completely.
- Once empty, close all drain valves.
- Refill your fresh water tank completely with clean, fresh water (without bleach).
- Turn on your RV’s water pump and open all faucets (hot and cold), shower, and flush the toilet. Let the clean water run through until you no longer detect any bleach smell or taste. This might take several minutes per faucet.
- Drain the system again.
- Repeat the refill, run-through, and drain process at least one or two more times. This is where most RVers spend the bulk of their time during sanitization. Many find that 2-3 full rinses are necessary to completely eliminate the bleach odor and taste. Persistence here will pay off with fresh, clean water.
Step 8: Replace Water Filter (If Applicable)
If you removed your inline water filter cartridge in Step 1, now is the time to replace it with a new, clean filter. Do not reuse the old filter, especially if it was exposed to the bleach solution. Even if it wasn’t, a new filter after a deep clean ensures the best possible water quality. If your RV has a whole-house filter, make sure to replace that cartridge as well.
How Long Does the Sanitization Process Take? (The “Keyword” Answer)
This is the million-dollar question for many RVers, and the answer, while not a single number, can be broken down into clear components. Understanding the time commitment will help you plan your sanitization effectively.
The total time to sanitize your RV water system can range significantly, typically from a minimum of 4-6 hours up to a full 24-48 hours, depending on how long you let the bleach solution sit and how many rinse cycles you perform.
Let’s break down the duration:
Active Contact Time (The “Sitting” Period):
This is the period where the bleach solution is actively disinfecting your water system.
- Standard Disinfection: For routine sanitization of a reasonably clean system, a minimum of 3 to 4 hours is generally sufficient. During this time, you don’t need to do anything, allowing the bleach to work its magic.
- Heavy Contamination or First-Time Use: If your system is heavily contaminated, has a persistent odor, or if you’re sanitizing a newly acquired used RV, extending this contact time to 12 to 24 hours (overnight) is highly recommended. This ensures thorough disinfection of any stubborn bacteria or biofilm.
Full Process Duration (From Start to Finish):
Beyond the active contact time, you need to factor in the hands-on time for preparation, filling, circulation, draining, and multiple rinses.
- Preparation & Initial Drain (Step 1): This typically takes 30 minutes to 1 hour, depending on how quickly your tank drains and how many low-point drains you have to open. Removing filters and bypassing the water heater also adds to this.
- Bleach Calculation & Introduction (Steps 2-3): A quick 10-15 minutes if you have your supplies ready and know your tank size.
- Filling with Bleach Solution (Step 4): This depends heavily on your water pressure and tank size. For a 60-100 gallon tank, this could take 30 minutes to 1.5 hours.
- Circulating the Solution (Step 5): Running water through all lines until you smell bleach usually takes 15-30 minutes.
- Active Contact Time (Step 6): As discussed, this is 3-24 hours. This is mostly passive time where you can do other things.
- First Drain & Rinse Cycle (Step 7 – Part 1):
- Draining: 30 minutes to 1 hour.
- Refilling: 30 minutes to 1.5 hours.
- Running through lines: 15-30 minutes.
- Total for one rinse cycle: 1.5 to 3 hours.
- Subsequent Rinse Cycles (Step 7 – Part 2): You’ll likely need at least 1-2 more full rinse cycles to completely eliminate the bleach smell/taste. Each of these adds another 1.5 to 3 hours.
- Filter Replacement (Step 8): A quick 5-10 minutes.
Bringing it all together:
- Minimum Scenario (Light Sanitize, Quick Rinses):
- Preparation & Initial Drain: 1 hour
- Bleach & Fill: 1.5 hours
- Circulate: 0.5 hours
- Contact Time: 3 hours
- Two Rinse Cycles (including fill, run, drain): 2 * 2 hours = 4 hours
- Filter: 0.1 hours
- Total: Approximately 10.1 hours. (If you do this over a day, it feels like an afternoon project).
- Recommended Scenario (Thorough Sanitize, Multiple Rinses):
- Preparation & Initial Drain: 1 hour
- Bleach & Fill: 1.5 hours
- Circulate: 0.5 hours
- Contact Time: 12 hours (overnight)
- Three Rinse Cycles: 3 * 2.5 hours = 7.5 hours
- Filter: 0.1 hours
- Total: Approximately 22.6 hours. (This often means starting one afternoon, letting it sit overnight, and finishing the rinsing the next morning/afternoon).
Factors Influencing Total Time:
- Tank Size: Larger tanks take longer to fill and drain.
- Water Pressure: Low water pressure significantly extends fill times.
- Level of Contamination: More contamination means longer contact time and potentially more rinse cycles.
- Number of Rinse Cycles: Some RVers are more sensitive to bleach smell/taste and may require additional rinses.
- RV Layout: How easy it is to access drain valves and fill ports can affect manual time.
While the actual “disinfecting” part is passive and only takes a few hours, the entire end-to-end process, including draining, filling, and thorough rinsing, means you should allocate a significant portion of a day, or even spread it over two days, for a truly effective and comfortable sanitization of your RV water system. The key is patience, especially during the rinsing phase.
Tips for Effective Sanitization
Achieving a perfectly sanitized RV water system goes beyond just following the steps; a few pro tips can make the process more effective, safer, and less frustrating.
- Use Only Unscented Household Bleach (5-8.25% Sodium Hypochlorite): This cannot be stressed enough. As mentioned, scented or splash-less bleaches contain additives that are difficult to remove from your system and can leave behind residues, affecting taste and potentially fostering microbial growth. Always read the label carefully to ensure you’re using pure sodium hypochlorite. If the bottle doesn’t specify the percentage, assume it’s around 5-6% and adjust your calculation slightly if you know your RV’s tank capacity requires a precise amount.
- Do Not Over-Bleach: While it might seem intuitive that “more bleach equals more clean,” this is counterproductive. Exceeding the recommended 1/4 cup per 15 gallons can make it significantly harder to rinse out the bleach smell and taste, potentially requiring many more rinse cycles and wasting water and time. Furthermore, excessively strong bleach solutions can be corrosive to certain rubber seals, plastic fittings, and pump components over time, leading to premature wear or leaks. Stick to the calculated amount.
- Sanitize Hot Water Heater Separately (or Bypass It): Most RV manufacturers recommend bypassing the hot water heater during the main system sanitization, especially if you’re using bleach. Bleach can be corrosive to the anode rod (often made of magnesium or aluminum) found in many water heaters, significantly reducing its lifespan. If you do bypass it, remember to drain and flush the water heater thoroughly before putting the RV in storage or if it has been sitting for a long time, as it can also harbor stagnant water and bacteria. If you choose to sanitize the water heater with bleach (some do, especially with glass-lined tanks), first remove the anode rod (if applicable), then follow a similar bleach dilution process for the volume of your water heater, let it sit, and flush it independently until no bleach smell remains. Remember to reinstall a new anode rod if needed.
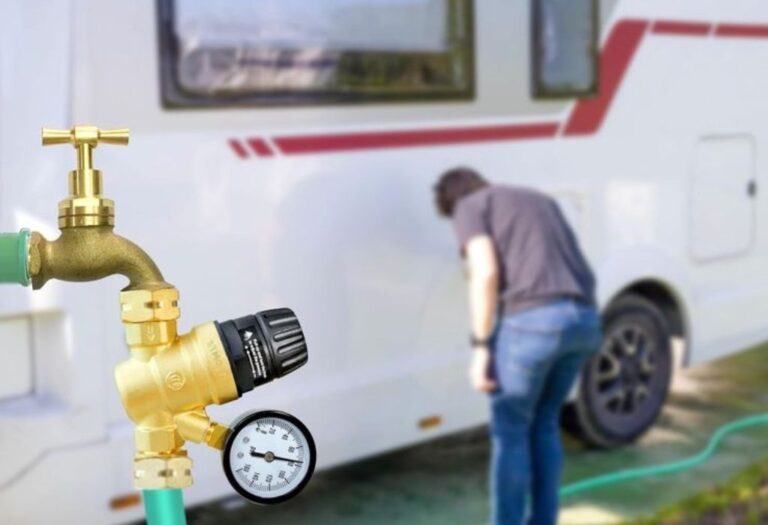
- Don’t Forget the Fresh Water Hose: It’s often overlooked, but your fresh water hose is the first point of contact for water entering your system. If your hose is dirty, contaminated, or has been sitting with stagnant water, it can reintroduce bacteria to your newly sanitized tank. After sanitizing your RV system, coil your hose and fill it with a diluted bleach solution (e.g., 1 tablespoon of bleach per gallon of water). Let it sit for 30 minutes, then drain and flush it thoroughly with clean water before storing it. Always store your potable water hose separately from grey/black tank hoses.
- Frequency of Sanitization: How often should you sanitize?
- Minimum: At least once a year, typically before the first trip of the season, especially after winter storage.
- Recommended: Twice a year, once in spring and once mid-season, particularly if you travel frequently or camp in diverse environments.
- As Needed:
- After your RV has been sitting unused for more than 3-4 weeks, especially in warm climates.
- If you notice any unusual tastes, smells, or discoloration in your water.
- After any plumbing repairs that exposed your water lines to the open air.
- After purchasing a used RV.
- If you’ve filled your tank from a questionable water source.
- Use a Dedicated Gravity Fill Port (if available): If your RV has a dedicated gravity fill port, it’s generally the easiest and most direct way to introduce the diluted bleach solution. If you only have a city water connection that doubles as a tank fill, you might need a special adapter or to siphon the solution through an anti-freeze inlet if available, as mentioned in the steps. Avoid pouring directly into the city water connection without proper tools, as it can be messy and inefficient.
- Consider a Secondary Rinse with Baking Soda: If you’re particularly sensitive to the lingering bleach smell or taste, after completing all your regular water rinses, you can perform an optional final rinse with a baking soda solution. Mix 1 cup of baking soda with a gallon of water, pour it into your empty fresh water tank, fill the tank completely with fresh water, let it sit for a few hours, then drain and rinse one more time. Baking soda is effective at neutralizing odors.
By incorporating these tips into your sanitization routine, you’ll ensure a more thorough cleaning process, prevent common pitfalls, and maintain a healthier water system for all your RV adventures.
Troubleshooting Common Issues
Even with careful planning and execution, you might encounter a few hiccups during or after sanitizing your RV water system. Here are some common issues and how to address them:
Persistent Bleach Smell or Taste:
This is by far the most common complaint after sanitization. It’s frustrating to go through the whole process only to still detect bleach in your drinking water.
- Cause: Insufficient rinsing. The bleach solution, even diluted, can cling to the inside surfaces of your tank and plumbing lines.
- Solution:
- More Rinsing: The simplest and most effective solution is to perform more rinse cycles. Fully drain the system, refill with fresh water, run all faucets (hot and cold) until the tank is empty, and repeat. You might need 3-5 full rinse cycles, especially for larger tanks or if you used slightly too much bleach initially. Patience is key here.
- Drive Around (Optional): Some RVers find that after filling the tank with clean water, driving the RV for a bit (even just around the block) helps slosh the water around, dislodging any remaining bleach solution from the tank walls and corners. Then, drain and rinse again.
- Baking Soda Rinse: As mentioned in the tips, a final rinse with a baking soda solution can help neutralize any lingering odors. Mix 1 cup of baking soda with a gallon of water, pour into the empty tank, fill the tank, let sit for a few hours, then drain and rinse thoroughly with fresh water one last time.
- Activated Carbon Filter: Ensure your RV’s inline or whole-house water filter is an activated carbon filter. These are excellent at removing chlorine (bleach) tastes and odors from the water as you use it. If your current filter is old or not carbon-based, replacing it might solve the problem.
Still Bad Taste or Smell in Water (Not Bleach):
If you’ve rinsed extensively but still detect a strange, non-bleach odor or taste (e.g., musty, plastic-y, metallic, or rotten eggs), it indicates that the sanitization might not have been fully effective or there’s another underlying issue.
- Cause:
- Incomplete Disinfection: The bleach contact time might have been too short, or the bleach concentration too low for the level of contamination. Stubborn biofilm might persist.
- Contaminated Hot Water Heater: If you bypassed the hot water heater but didn’t sanitize it separately, it could be a source of contamination. Hot water tanks can be notorious for bacteria and odors, especially if an anode rod needs replacing.
- Contaminated Hoses: Your fresh water hose might be dirty or leaching chemicals.
- Old or Poor Quality Water: The water you’re filling with might not be truly fresh.
- Plumbing Issue: A decaying rubber seal, a deteriorating plastic component, or corrosion somewhere in the system.
- Solution:
- Repeat Sanitization with Longer Contact Time: If you suspect incomplete disinfection, repeat the entire sanitization process, but this time, let the bleach solution sit for the maximum recommended time (12-24 hours).
- Sanitize Hot Water Heater: If you suspect the hot water heater, drain it, remove the anode rod (if applicable), flush it thoroughly, and then fill it with a bleach solution (using the same 1/4 cup per 15 gallons calculation for its capacity), let it sit, drain, and rinse thoroughly. Replace the anode rod if it’s heavily corroded.
- Clean/Replace Hoses: Ensure your potable water hose is clean and not contributing to the problem. If it’s old or has been used for other purposes, replace it.
- Check Water Source: Try filling your tank from a different, known-good water source.
- Inspect Plumbing: For persistent non-bleach odors, a professional RV technician might need to inspect your plumbing for deteriorating components.
Dealing with Stubborn Algae or Biofilm:
Visible algae or a persistent slimy coating (biofilm) in your tank or clear pipes indicates a significant contamination issue.
- Cause: Prolonged exposure to sunlight (for clear tanks/hoses), long periods of stagnation, or very warm temperatures.
- Solution:
- Aggressive Sanitization: Perform an extended sanitization (12-24 hours contact time) with the bleach solution. The longer contact time is crucial for breaking down biofilm.
- Physical Cleaning (if possible): If your fresh water tank has a large inspection port, you might consider physically scrubbing the inside of the tank with a long-handled brush specifically designed for tank cleaning. This is often impractical for most RV owners.
- High-Pressure Rinse: After initial draining, if you can, use a high-pressure nozzle on your hose to try and dislodge any clinging algae or biofilm from the tank walls before refilling for sanitization.
- Prevention: Always ensure your fresh water tank is covered and not exposed to direct sunlight if it’s a translucent type. Drain your tank if your RV will be sitting unused for more than a couple of weeks, especially in warm weather.
By being aware of these common issues and their solutions, you can effectively troubleshoot problems and ensure your RV’s water system remains consistently clean, safe, and pleasant for all your travels.
Conclusion
Ensuring a clean and safe water supply in your RV is not merely a matter of comfort; it is a fundamental aspect of health and well-being on the road. From preventing the proliferation of harmful bacteria and mold to eliminating unpleasant odors and tastes, the process of sanitizing your RV water system is an indispensable part of responsible RV ownership. While the idea of tackling your RV’s plumbing might seem daunting at first, breaking it down into a clear, step-by-step process reveals it to be a manageable and highly rewarding task.
We’ve walked through everything from gathering the essential, pure unscented bleach and a dedicated potable water hose, to the meticulous steps of draining, calculating, introducing the solution, circulating, and crucially, allowing sufficient contact time. We’ve clarified that while the active disinfection only requires a few hours, the entire end-to-end process, including thorough rinsing, can span anywhere from a dedicated afternoon to a full two days, depending on your RV’s size and the level of contamination. Patience during the rinsing phase is your best friend in ensuring no lingering bleach taste or smell.
Remember that regular sanitization—ideally once or twice a year, or whenever you notice issues—is your best defense against waterborne problems. By following the tips provided, such as always bypassing or separately treating your hot water heater and diligently cleaning your fresh water hose, you fortify your system against contamination. And should you encounter any stubborn issues like persistent smells or tastes, the troubleshooting section offers practical solutions to get your water back to pristine condition.
Ultimately, a well-sanitized RV water system provides peace of mind, allowing you to fully immerse yourself in the freedom and joy of the open road. No more worries about where your next glass of water will come from; just pure, fresh refreshment, ready for all your adventures. So, take the time, follow these steps, and enjoy the clean, safe water that makes your RV truly a home away from home. Happy travels!
I’m David R. Coleman, the founder, lead writer, and lifelong tool enthusiast behind GarageToolPro.com. With years of experience in automotive repair, woodworking, and home DIY projects, I created this platform to share practical tips, detailed tool reviews, and step-by-step guides that help mechanics, hobbyists, and homeowners get the job done right the first time.