How Do You Fix Low Water Pressure in an RV?
Imagine arriving at your favorite campsite after hours on the road.
You hook up the hose, twist the faucet handle, and wait for that satisfying rush of water.
Instead, you’re met with a weak trickle that barely fills your cup.
It’s frustrating, especially after a long trip or when you just want a hot shower.
Low water pressure isn’t just annoying—it’s one of the most common RV problems.
According to the RV Industry Association, about 65% of RV owners report plumbing-related
issues during their first year of use (source).
Most of these problems come from simple causes like clogged filters, weak pumps, or restrictive pressure regulators.The best part?
You don’t need a professional to fix it.
Most water pressure problems can be solved in minutes with a few basic checks and easy repairs.
From clearing filters to adjusting regulators, every step helps you get back strong and steady water flow.
Whether you’re boondocking off-grid or connected to city water, your RV plumbing system depends on proper pressure balance.
When that balance is off, it affects your shower, sink, and overall comfort.
This guide will show you how to fix low water pressure in an RV step by step.
You’ll learn what causes it, how to diagnose it, and how to prevent it from happening again.
By the end, you’ll have full confidence that every drop of water flows exactly the way it should—no matter where the road takes you.
What Causes Low Water Pressure in an RV?
When the water pressure drops in your RV, it’s usually a symptom—not the root problem. The key is identifying what’s restricting or interrupting flow through your plumbing system.
Low pressure often results from clogged filters, weak pumps, or a restrictive regulator. Even debris buildup inside faucet aerators can make a big difference in perceived pressure.
Here are the most common causes to check before replacing parts or calling a professional.
Clogged Water Filter
Over time, minerals and debris accumulate in your inline or onboard filter. This buildup restricts water flow, especially if you use hard water at multiple campgrounds.
Replacing or backflushing the filter usually restores full flow instantly. It’s one of the easiest and most common fixes for weak pressure.
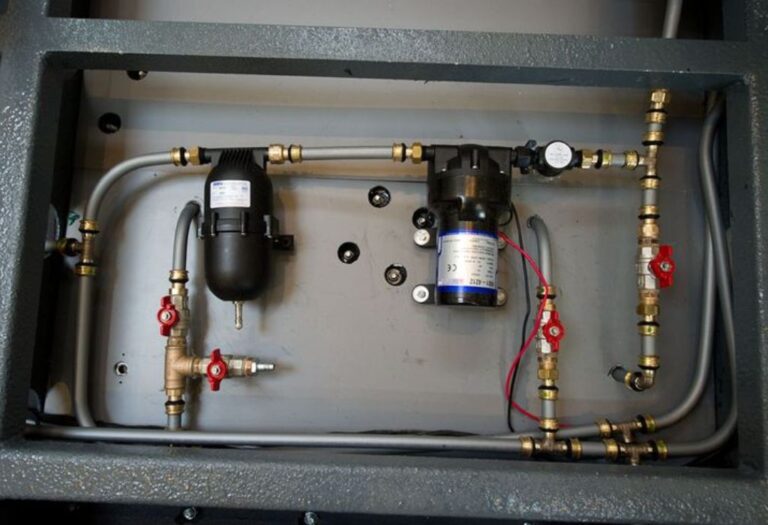
Weak or Failing RV Water Pump
Your water pump maintains system pressure when you’re not hooked to city water. As the pump wears out, it struggles to sustain consistent PSI.
A healthy RV pump delivers 40–60 PSI, but frequent cycling or inconsistent flow means it’s nearing failure or leaking internally.
Pressure Regulator Limitation
A pressure regulator protects your RV from high campground water pressure—but it can also restrict flow too much. Many fixed regulators are limited to 40 PSI, which can feel weak at the faucet.
Switching to an adjustable regulator with a built-in gauge lets you safely increase pressure to 50–60 PSI without risking your plumbing system.
City Water Connection Problems
Sometimes, the issue lies outside your RV. Campgrounds with shared hookups often deliver fluctuating water pressure, especially during peak hours.
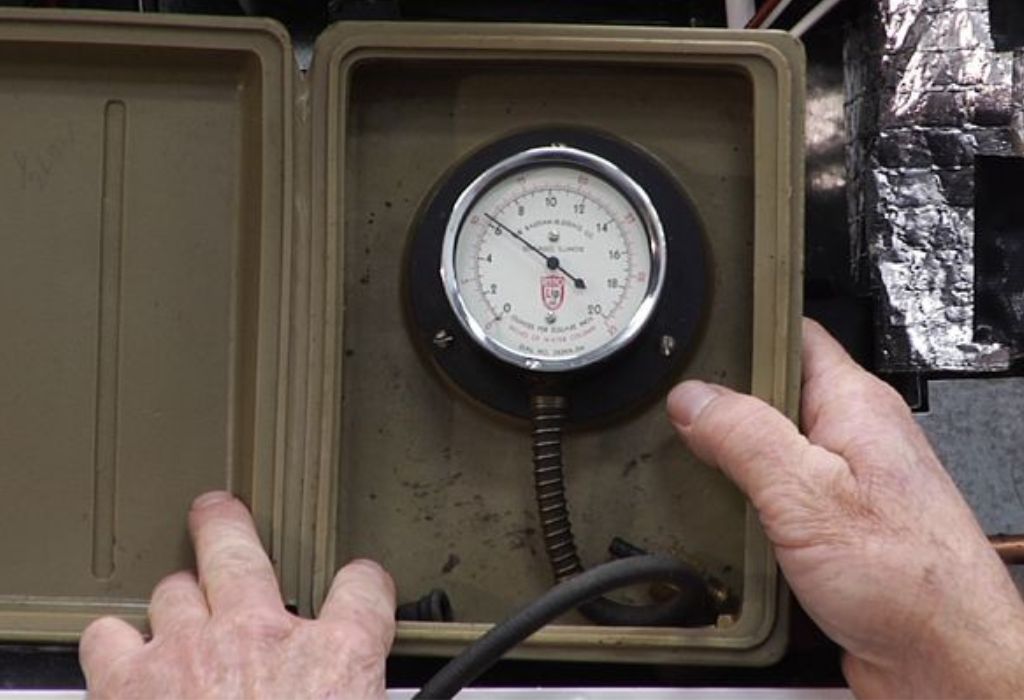
Use a water pressure gauge at the spigot to test the source. If it reads under 40 PSI, the low pressure isn’t your fault—it’s the campground’s supply.
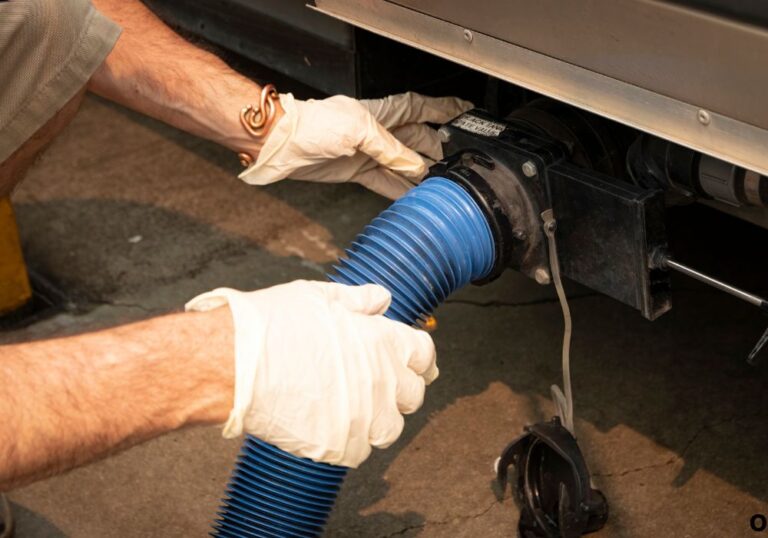
Leaky or Crimped Hose
Kinks, pinholes, or collapsed sections in your freshwater hose can significantly restrict water flow. Soft hoses are especially vulnerable to bending under pressure.
Always inspect and straighten the hose before connecting. Replace it if you notice wear or bulges.
Debris in Faucets or Aerators
Mineral buildup in faucet aerators and showerheads is a hidden but common cause of low flow. Even a small blockage can cut water volume in half.
Unscrew and soak aerators in vinegar overnight to dissolve mineral deposits. Rinse and reinstall for improved pressure.
Quick Answers
What’s the most common cause of low water pressure in an RV?
Clogged filters or weak pumps are responsible for most cases.
Can campground water cause low pressure?
Yes, especially at older or crowded parks with shared lines.
Do regulators lower flow?
Yes, some restrict flow too much—use an adjustable model.
Should I remove the filter to test pressure?
Yes, temporarily bypassing the filter helps pinpoint the problem.
How to Diagnose the Source of Low Water Pressure
Before replacing components, test each part of the system step by step. Proper diagnosis prevents unnecessary repairs and helps identify multiple small issues that combine to lower pressure.
Here’s a proven sequence to follow:
1. Check the Water Source First
Attach a pressure gauge directly to the campground spigot. Ideal readings fall between 50 and 60 PSI.
If the pressure is already low, the issue lies outside your RV, and no internal fix will help until the source improves.
2. Inspect the Hose and Connections
Kinks or pinhole leaks in the hose can mimic major plumbing issues. Straighten the hose and ensure it’s fully seated on the connection.
If you see moisture or bubbles forming under pressure, replace the hose immediately.
3. Bypass the Filter Temporarily
Disconnect the water filter and reconnect the hose directly to the RV. If the flow improves, replace or clean the filter element.
Filters should typically be replaced every 3–6 months, depending on water quality and usage.
4. Test the Regulator
Use an adjustable regulator with a gauge to confirm output PSI. Fixed regulators often limit flow more than necessary.
Set the regulator to 55 PSI for optimal performance without risking pipe damage.
5. Switch Between City Water and Pump
If pressure is fine on city water but weak on pump mode, the issue is likely a failing pump or internal leak.
If both sources show low pressure, focus on filters, regulators, or clogged plumbing lines.
Quick Answers
What tool measures water pressure in an RV?
A simple water pressure gauge that attaches to the spigot.
How often should filters be replaced?
Every 3–6 months or sooner in hard-water areas.
What’s a safe PSI range for RV plumbing?
40–60 PSI is ideal; anything higher risks line damage.
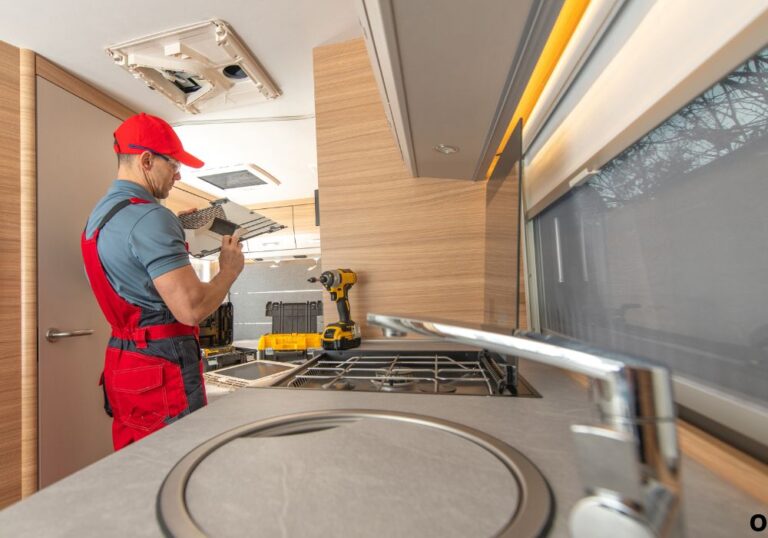
Step-by-Step Fixes for Low Water Pressure in an RV
Once you’ve identified the issue, it’s time to restore proper flow. These fixes address the most common causes and are safe for DIY repair.
1. Replace or Clean the Water Filter
Turn off the water supply, unscrew the filter housing, and inspect the cartridge. If it’s discolored or full of debris, it’s due for replacement.
Consider a high-flow or dual-stage filter system if you frequently camp in areas with poor water quality.
2. Adjust or Replace the Pressure Regulator
Use a regulator with a built-in gauge. Set pressure between 50–60 PSI for the best results.
If your old regulator is fixed or corroded, upgrading to a brass adjustable model will dramatically improve water consistency.
3. Flush the Water Lines
Sediment buildup in your RV pipes can silently restrict flow. Connect the water supply and run faucets at full pressure for several minutes.
If you notice cloudy or brown water, continue flushing until it runs clear.
4. Clean Faucets and Showerheads
Remove aerators and showerheads, soak them in a vinegar-water mix, and rinse thoroughly.
This simple step can restore up to 30% more flow at your taps.
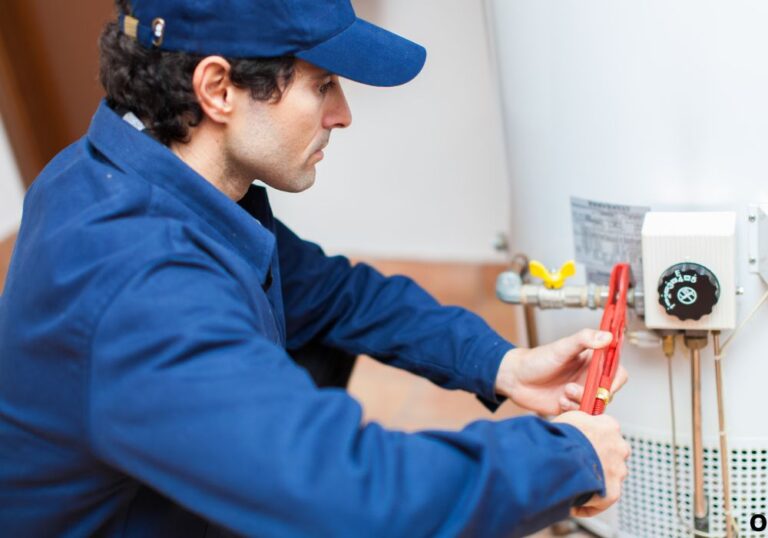
5. Service or Replace the Water Pump
If the pump cycles rapidly or fails to maintain pressure, check the screen filter for clogs first. Clean or replace it as needed.
If performance doesn’t improve, replacing the pump is the most reliable solution. Choose one rated between 45–60 PSI for optimal flow.
Quick Answers
Can low battery voltage affect pump pressure?
Yes. Weak batteries can cause pumps to run slower and reduce output.
Should I use a different regulator for boondocking?
No, but you can adjust PSI slightly higher when using the onboard pump.
Is flushing lines safe for all RV types?
Yes, as long as you don’t exceed 60 PSI during the flush.
Preventing Future Low Water Pressure Problems

Regular maintenance prevents most pressure issues and keeps your system reliable year-round. Small habits go a long way toward avoiding costly repairs.
1. Replace Filters on Schedule
Even if water looks clean, invisible minerals and bacteria accumulate over time. Replace filters every 3–6 months or sooner if pressure drops.
Mark replacement dates on your calendar or maintenance app.
2. Drain and Sanitize the Freshwater Tank
Once every season, flush and sanitize your tank using a mixture of water and bleach (¼ cup per 15 gallons).
This prevents bacterial buildup that can affect both water taste and pressure.
3. Check Fittings and Hoses Regularly
Inspect hoses and fittings before every trip. A single crack or loose clamp can lead to leaks that waste water and lower pressure.
Upgrading to reinforced drinking-water-safe hoses ensures reliability on long hauls.
4. Maintain the Pump and Regulator
Run your pump dry only when absolutely necessary—it shortens its lifespan. Test your regulator output regularly and replace it if it corrodes or sticks.
A well-maintained setup saves both water and energy.
5. Store Components Properly
During winter storage, drain all water lines to prevent freezing. Frozen pipes can crack and drastically reduce pressure once thawed.
Always use RV antifreeze if storing your vehicle in freezing temperatures.
Quick Answers
How often should I sanitize my RV water system?
Every 6 months or after long storage periods.
Does hard water damage RV plumbing?
Yes, minerals can clog filters and restrict flow.
What’s the best PSI for consistent shower flow?
Around 55 PSI for most RV plumbing setups.
When to Seek Professional Help
If you’ve followed all troubleshooting steps and still face weak water flow, the problem might be more complex.
Hidden leaks behind walls, faulty check valves, or damaged plumbing lines may require professional diagnostics.
Mobile RV technicians can test flow rates and inspect components without dismantling your rig. In some cases, they may recommend a pump upgrade or PEX line replacement for long-term performance.
Conclusion
Low water pressure in an RV can turn simple tasks like showering or washing dishes into a headache. Thankfully, most problems stem from minor issues such as clogged filters, weak pumps, or restrictive regulators—and these are easy to fix once you understand how your system works.
By regularly maintaining your filters, hoses, and pressure regulators, you can ensure consistent water flow on every trip. Whether you’re camping off-grid or hooked to city water, knowing how to fix low water pressure in your RV keeps your adventures running smoothly and your RV plumbing system in top shape.
I’m David R. Coleman, the founder, lead writer, and lifelong tool enthusiast behind GarageToolPro.com. With years of experience in automotive repair, woodworking, and home DIY projects, I created this platform to share practical tips, detailed tool reviews, and step-by-step guides that help mechanics, hobbyists, and homeowners get the job done right the first time.