Why Is My RV AC Leaking Water Inside?
The first sign is often subtle — a faint drip near the ceiling vent or a damp patch spreading across the interior wall. What begins as a few drops quickly becomes a stream, threatening the furniture, flooring, and comfort of your RV trip. For many travelers, the question arrives in frustration: why is my RV AC leaking water inside?
Water leaking from a rooftop air conditioner may seem like a minor annoyance, but it signals that something is wrong within the cooling system. When ignored, that trickle can lead to ceiling stains, mold growth, and costly interior damage. According to the RV Industry Association, more than 10 million RVs are currently on the road across North America, and each relies heavily on its rooftop air conditioning during peak summer months (RV Industry Association).
Maintenance experts estimate that roughly 40 % of RV AC service requests are caused by drainage or condensation issues (RVshare Tech Report). That means nearly half of the problems owners face stem not from mechanical failure but from water mismanagement. Understanding the science behind condensation — and how it escapes or overflows — is key to preventing these frustrating leaks.
Every drop that forms inside the air conditioner is meant to drain safely through a condensate line or pan. When that flow becomes blocked, or when the AC unit shifts slightly out of level, the water finds another route — straight into the RV interior. Gasket wear, dirty filters, or extreme humidity can all accelerate the problem.
This guide breaks down each possible cause, showing step-by-step inspection methods, simple DIY repairs, and long-term maintenance habits that stop leaks before they start. By the end, readers will know exactly how to diagnose and fix their RV AC leak confidently, keeping every trip cool, dry, and worry-free.
Understanding the Issue: Why Is My RV AC Leaking Water Inside?
A leaking RV AC isn’t just about a broken part — it’s about how air, moisture, and temperature interact inside a confined cooling system. When warm air hits the cold evaporator coils, condensation forms, but if that water doesn’t drain properly, it finds its way into the RV interior instead.
This process is normal in all air conditioners, but RV units face added challenges from vibration, leveling, and tight roof spaces. Even a slight tilt can redirect water toward the ceiling vent instead of the outside drain. Over time, this small imbalance creates big problems during humid weather or long travel days.
According to HVAC data, condensation issues account for nearly 35 % of water-related AC complaints in RVs and compact cooling systems (Energy.gov). That means the leak you see is often a symptom of blocked airflow, poor drainage, or pressure imbalance rather than a single broken part.
When water drips inside, it’s essential to understand where it starts: the evaporator coil and drain tray above the ceiling panel. These components work continuously to collect and remove moisture — but once the drain line or gasket fails, that moisture follows gravity straight into your living space.
What does “leaking water inside” really mean for an RV AC?
It means condensation that should exit through the drain system is instead seeping into the RV interior due to blockage or misdirection.
Is every drip a serious problem?
No — light condensation near vents can be normal during high humidity, but steady dripping indicates a drainage or seal issue.
Why do rooftop RV AC units leak more often than window or home units?
They sit horizontally on the roof and rely on perfect leveling and gasket pressure, which are affected by travel vibrations and roof flexing.
Can temperature changes cause sudden leaks inside the RV?
Yes — rapid shifts between cold air and hot exterior temps cause extra condensation, and if drainage isn’t efficient, water collects inside.
When should an RV AC leak be considered an emergency?
If water reaches electrical components, lighting panels, or insulation layers, immediate shutdown and inspection are required to prevent damage.
Common Causes of RV AC Water Leaks
Most leaks inside the cabin come from a few predictable causes. Recognizing them early helps prevent structural or electrical damage.
One of the most frequent issues is a clogged condensate drain line. Over time, dust, algae, or debris build up in the hose, stopping the water from exiting. Instead, the pan fills until it overflows into the interior.
Another culprit is a worn or compressed roof gasket. The gasket seals the air-conditioner base to the roof opening, but after years of vibration or overtightening, it cracks and allows rainwater or condensation to slip through.
A frozen evaporator coil also leads to leaks once the ice melts. Insufficient airflow from dirty filters or low refrigerant causes the coil to freeze; when thawed, water bypasses the drain tray.
Lastly, improper leveling is often overlooked. If the RV sits tilted forward or to one side, condensation naturally flows to the lowest point — sometimes directly toward the interior vent.
Why does a clogged condensate drain line cause inside leaks?
Because trapped water can’t exit the tray, it rises and spills into the cabin. (JustAnswer)
How can a poor gasket or seal lead to leaking?
When the rubber compresses unevenly or cracks, rain and condensate seep between the roof and unit. (AirForums)
Can frozen coils cause water to leak inside?
Yes — once the ice melts, excess water overwhelms the drip tray. (iRV2)
Does an unlevel RV contribute to leaks?
Absolutely — drainage depends on gravity; even a 1-inch tilt can redirect flow inward. (iRV2)
How does humidity affect leak risk?
High humidity increases condensation volume and can overflow a slightly obstructed drain.
Step-by-Step Inspection Checklist
Before calling a technician, inspect the system to find the true cause.
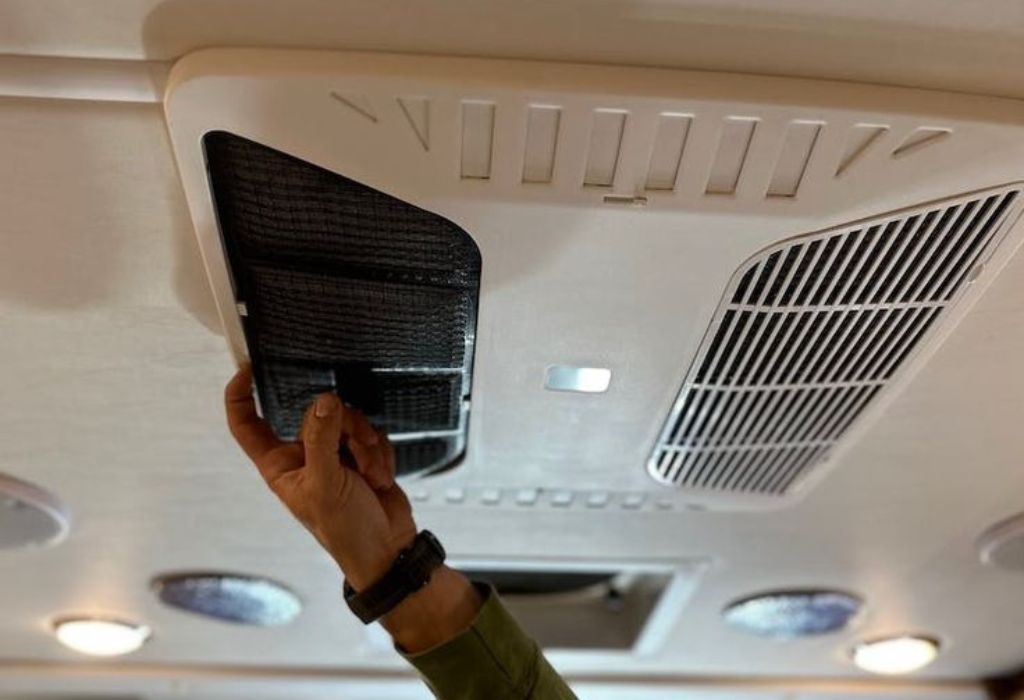
Start Inside the RV. Remove the AC cover, check filters for dust, and inspect for damp spots or rust around vents.
Move to the Roof. Examine the shroud, gasket, and bolts for looseness or cracks.
Check the Drain Line. Look for clogs using a small wire or compressed air.
Confirm Leveling. Use a bubble level; even minor tilts cause drainage problems.
Where should the inspection begin?
Begin inside the RV at the ceiling unit — moisture there reveals how far the problem has spread.
What roof components need attention?
The gasket, mounting bolts, and drip channels.
How can a blocked drain be confirmed?
If water remains in the pan after shutdown, or if suction from a wet-dry vacuum draws debris, the line is clogged. (Reddit RVLiving)
How to test the unit’s level?
Place a bubble level on the AC tray or on the floor directly beneath; if slanted, adjust the stabilizers.
What safety precautions are vital?
Disconnect electrical power and ensure stable ladder footing before roof access.
Proven Fixes and Maintenance to Stop Leaks
Once the cause is known, apply targeted fixes.
For a clogged drain line, clear the obstruction using a wet-dry vacuum or gentle compressed air. Flush the line with vinegar to remove algae.
If the gasket seal is damaged, loosen the mounting bolts, replace the seal, and re-torque evenly. Check again after 24 hours for leaks.
Frozen coils require improved airflow — replace filters, keep vents open, and operate on high fan mode in humid weather.
For unlevel setups, adjust stabilizing jacks until condensation drains outward.
How to clear a clogged drain?
Use a wet-dry vacuum to suck debris from the outlet. (Blue Compass RV)
When should the gasket be replaced?
If it’s brittle, cracked, or compressed thinner than ½ inch.
How can airflow be improved?
Clean or replace filters every 30 days during summer. (iRV2)
Does re-leveling fix most leaks?
Yes — ensuring proper tilt away from the vent often resolves minor overflow issues.
When to call a professional?
If refrigerant, electrical, or structural problems are suspected.
Preventive Maintenance & Best Practices
Prevention is the cheapest form of repair.
Regular cleaning and inspections reduce 80 % of leak-related issues. Create a seasonal checklist that includes gasket tightening, drain cleaning, and coil washing.
Install a drip rail or gutter kit to guide water off the roof, especially useful in humid or coastal regions.
Keep air filters clean and replace them as needed — restricted airflow directly leads to coil freezing and overflow.
What should be done monthly?
Clean filters and check drain outlets for blockages.
How often should the gasket be checked?
At least once a year, or before long cross-country trips.
Do accessories help prevent leaks?
Yes — add aftermarket drain spouts and drip trays.
How to handle leaks on the road?
Turn off the AC, dry affected areas, and temporarily block the drain until permanent repair.
What bad habits increase risk?
Running the AC with blocked filters or ignoring roof debris buildup.
When Leaks Persist Despite Fixes
Sometimes the water returns even after basic maintenance.
Persistent leaks usually point to hidden issues: warped roof structures, cracked drip pans, or improper factory installation.
In such cases, professional diagnostic tools like UV dye or pressure testing may be required.
What if the leak continues after all repairs?
Inspect for cracks in the unit housing or roof seams.
Can duct design cause internal leaks?
Yes — poor airflow between supply and return ducts creates condensation inside the plenum. (Forest River Forums)
Could installation error be the culprit?
Definitely — misaligned drip trays or improper bolt torque often redirect water inside. (Good Sam Community)
How to manage mold after repeated leaks?
Remove damp insulation, dry thoroughly, and treat with antimicrobial spray.
Should corrosion protection be added for coastal travel?
Yes — use anti-corrosion coatings and inspect every 3 months in salt-air environments.
Conclusion
A leaking RV air conditioner is more than an inconvenience — it’s an early warning that your system needs attention. By understanding why your RV AC is leaking water inside, owners can diagnose, fix, and prevent costly damage with basic tools and regular maintenance.
Addressing the problem early prevents structural issues, mold, and electrical risks. Regular inspections, filter cleaning, and gasket checks keep the cooling system efficient and your RV comfortable on every trip.
I’m David R. Coleman, the founder, lead writer, and lifelong tool enthusiast behind GarageToolPro.com. With years of experience in automotive repair, woodworking, and home DIY projects, I created this platform to share practical tips, detailed tool reviews, and step-by-step guides that help mechanics, hobbyists, and homeowners get the job done right the first time.