How to Repair RV Wall Water Damage Correctly
A soft spot in an RV wall may look harmless, but it’s often the beginning of a much bigger problem. Imagine preparing for a relaxing trip only to discover that hidden moisture has been slowly destroying your RV’s walls for months.
According to RVShare, water damage is among the most common and costly issues faced by RV owners every year. What begins as a small leak can quickly escalate into thousands of dollars in repairs.
Learning how to repair RV wall water damage correctly saves not only money but also your RV’s structural integrity and resale value. When water seeps into the wall layers, it can cause rot, mold, and delamination that spread invisibly until it’s too late.
This guide walks you through everything—from identifying early warning signs and assessing internal damage to performing full repairs and preventing future leaks. By the end, you’ll know exactly how to protect your RV from moisture and keep it road-ready for years to come.
1. Understanding the Causes of RV Wall Water Damage
RV walls combine wood, insulation, and fiberglass—materials that react poorly to long-term exposure to moisture. When seals around roof vents, windows, or slide-outs break down, water finds its way inside, causing damage over time.
According to RVTravel, over 60 percent of RV maintenance problems trace back to water intrusion. Understanding where leaks begin is key to learning how to repair RV wall water damage effectively.
Once inside, water travels through insulation and plywood, weakening adhesive layers and creating soft spots. Eventually, this leads to wall bubbling, discoloration, or mold growth that threatens both structure and health.
Why do RV walls get water damage?
Most leaks start at roof seams, windows, or joints where sealant cracks due to age or vibration.
Can condensation cause damage?
Yes. Poor airflow during cold or humid conditions can cause condensation that collects inside walls.
How long before water damage becomes serious?
Even a few weeks of trapped moisture can lead to permanent rot in wooden framing.
Is water damage common in older RVs?
Absolutely. Aging sealants and worn roof membranes make older models far more vulnerable.
What areas should be checked most often?
Inspect roof seams, slide-outs, window edges, and underbody storage for leaks or water stains.
2. Identifying the Extent of Damage
Detecting the full scope of water damage requires more than just visual checks. Most damage hides behind wall panels or under flooring.
Use a moisture meter to test wall areas and corners. If readings stay above 15 percent, moisture is trapped within. According to Mortons on the Move, early detection can reduce repair costs by up to 70 percent.
Gently press the wall surface to locate soft or spongy spots. Look for delamination where the outer layer starts separating from the inner wall.
How can hidden moisture be detected?
Use an infrared thermometer or moisture meter to find cool or damp spots behind panels.
What are signs of structural damage?
Warped paneling, peeling wallpaper, and persistent odors often indicate deep internal rot.
Should mold be a concern?
Yes. Black mold can spread quickly inside enclosed walls, creating health risks.
Can insulation be reused after water exposure?
No. Wet insulation loses efficiency and must be replaced during the repair process.
How long should inspection take?
Spend at least an hour checking all corners, ceiling joints, and window seams to locate the true leak source.
3. Preparing for Repair Work
Before beginning any repair, disconnect electrical systems and ensure the RV is on stable ground. Remove furniture or panels near the affected wall to expose the inner frame.
Dry the area completely using fans or a dehumidifier for at least 24 hours. Moisture trapped during repairs can cause recurring damage later.
What tools are needed for wall repair?
A moisture meter, utility knife, caulking gun, drill, sealant, adhesive, and replacement plywood are essential.
Should the RV remain outdoors during repair?
No. Perform repairs under a covered area to prevent new moisture from entering.
Can regular home sealants be used?
Avoid them. Always use RV-specific sealants designed to flex with vibration and temperature changes.
How important is safety gear?
Always wear gloves, a mask, and goggles—especially if mold or fiberglass insulation is involved.
Should wall panels be removed completely?
Yes, if they show any softness or discoloration. Partial repairs often hide deeper damage.
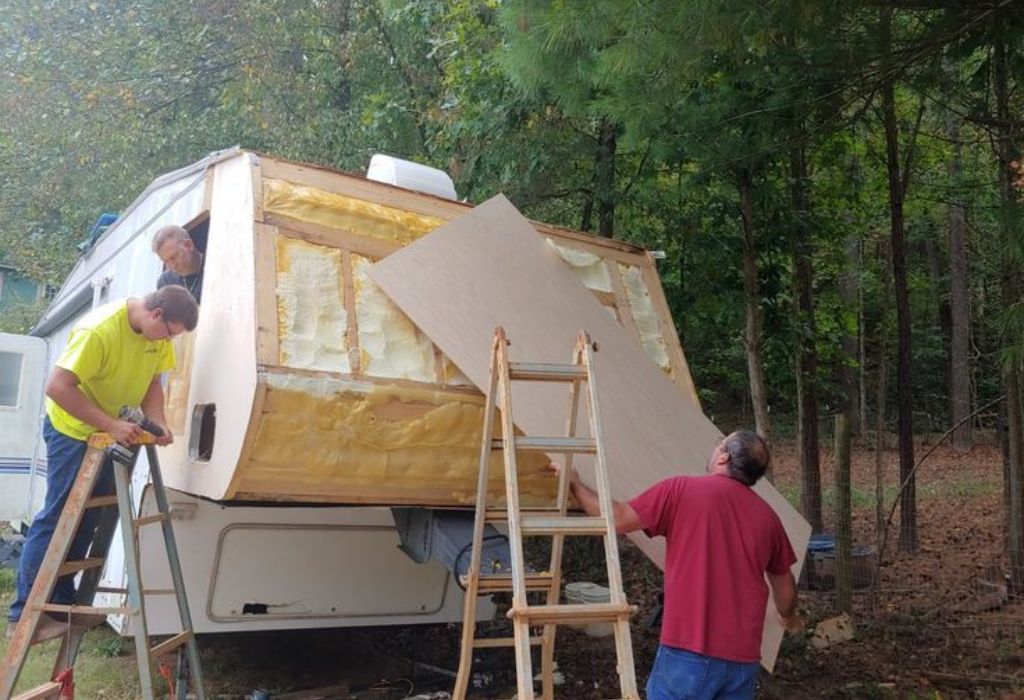
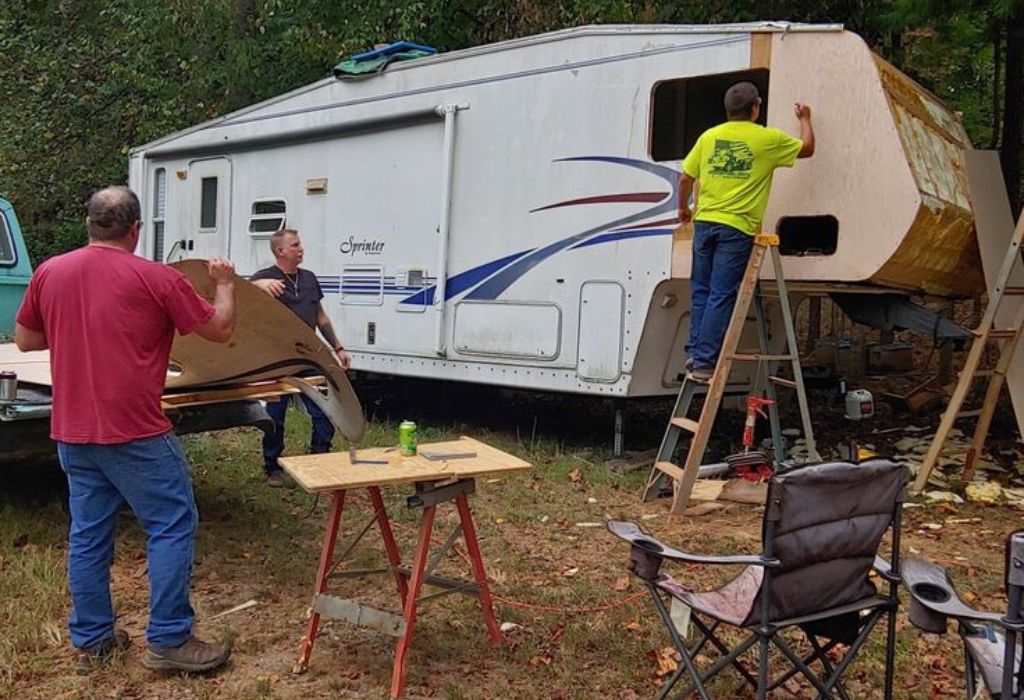
4. Step-by-Step: How to Repair RV Wall Water Damage
Once the source and extent of damage are known, the real work begins. Carefully remove damaged materials layer by layer, ensuring surrounding dry areas are protected.
Replace any rotted wood or soaked insulation. Clean the area with a mold-killing solution such as diluted bleach or vinegar, then allow it to dry completely.
Apply new plywood and fiberglass panels with waterproof adhesive, sealing every joint and seam with high-grade RV sealant. Re-caulk around windows, lights, and roof edges for maximum protection.
How long should walls dry before rebuilding?
At least 24–48 hours, depending on humidity levels. Complete dryness is critical for bonding.
Can aluminum-framed RVs be repaired the same way?
Yes, but use rust-resistant screws and epoxy adhesives for metal surfaces.
Should you paint or coat new panels?
Apply waterproof RV-grade coating or paint to prevent future moisture absorption.
Can repairs be done without removing furniture?
In small areas, yes—but for full wall repairs, complete access ensures lasting results.
How long does a typical repair take?
Most DIY jobs take two to three days including drying and curing time.
5. Preventing Future Water Damage
Prevention is far easier than repair. Regularly inspect all seals and joints, especially after long trips or storms.
Apply UV-resistant sealant every 12 months, and wash your RV roof frequently to remove debris that traps water. According to Camper Report, proactive maintenance can reduce future damage risk by over 80 percent.
What’s the most vulnerable area of an RV?
The roof—most leaks begin at vent seals, skylights, or antenna bases.
Can waterproof sprays protect walls?
Yes, but they should complement—not replace—proper sealant maintenance.
How can temperature changes affect sealants?
Extreme heat and cold cause sealants to crack, allowing water to enter unnoticed.
When should you replace roof membranes?
Every 7–10 years, depending on manufacturer recommendations and UV exposure.
Is it worth professional inspection?
Yes. Annual check-ups by an RV technician can catch micro-leaks invisible to the naked eye.
6. Cost of Repairing RV Wall Water Damage
Repair costs vary depending on severity. Minor DIY fixes can cost around $100–$300, while extensive structural repairs may exceed $3,000.
RepairPal notes that labor often doubles the material cost, so doing the repair yourself can cut expenses dramatically.
Does insurance cover RV water damage?
Only if the policy includes water intrusion or comprehensive coverage. Check for exclusions.
Can small leaks cause major expenses?
Yes. Even small, slow leaks can cause rot that requires full wall replacement.
What if the damage reaches the floor?
Floor rot means structural compromise—both wall and subfloor must be rebuilt.
Should you document the repair?
Yes. Keeping photos of each stage can help with resale or future insurance claims.
Is professional repair ever mandatory?
For large Class A or fiberglass-shell RVs, yes—special tools are needed to rebuild wall sections safely.
7. Maintaining Your RV After Repairs
After learning how to repair RV wall water damage, keeping it dry becomes a lifelong habit. Inspect caulking every few months and touch up weak spots immediately.
Store your RV under cover during off-season and use a breathable cover that prevents condensation buildup.
How often should sealant be checked?
Every 3–4 months or after long drives on rough roads.
Can washing help spot leaks?
Yes. Spray water on seams and inspect from inside for dampness or drips.
Are dehumidifiers useful inside RVs?
Definitely. They prevent interior condensation that can mimic leak symptoms.
Should RVs be ventilated during storage?
Yes. Slightly open roof vents to allow airflow and prevent trapped humidity.
Is routine maintenance worth the effort?
It’s the best protection for your investment—saving thousands in potential repair bills.
Conclusion
Water damage inside an RV wall is more than a cosmetic problem—it’s a structural and financial risk. Left unchecked, it spreads quietly until it weakens your vehicle’s frame, insulation, and resale value.
Understanding how to repair RV wall water damage correctly allows owners to detect problems early, perform effective repairs, and prevent future leaks. A few hours of routine inspection and sealing each season can keep your RV solid, dry, and ready for adventure.
Stay proactive, invest in quality sealants, and treat every small damp patch as a warning sign. Your vigilance today ensures every future journey stays dry, safe, and worry-free.
I’m David R. Coleman, the founder, lead writer, and lifelong tool enthusiast behind GarageToolPro.com. With years of experience in automotive repair, woodworking, and home DIY projects, I created this platform to share practical tips, detailed tool reviews, and step-by-step guides that help mechanics, hobbyists, and homeowners get the job done right the first time.