How to Hook Up RV Water Filter & Pressure Regulator
Nothing spoils an RV trip faster than contaminated water or burst hoses. Properly hooking up a water filter and pressure regulator protects your plumbing and ensures clean, safe water.
Many RV owners underestimate the importance of installation. According to industry data, improperly installed filters or regulators contribute to 20% of RV water system failures (source).
This guide explains how to hook up RV water filter and pressure regulator step by step, including preparation, installation, maintenance, and troubleshooting. By following these steps, you ensure a safe, efficient water system for your travels.
Understanding RV Water Filters and Pressure Regulators

A water filter removes sediment, chlorine, and debris from city water or fresh sources. It keeps your RV plumbing and appliances clean while protecting your health.
A pressure regulator prevents excessive city water pressure from damaging pipes, hoses, and fixtures. Combining both protects your system from contamination and high-pressure damage simultaneously.
What is the purpose of a water filter in an RV?
It removes sediment, chlorine, and impurities before water enters the plumbing system.
Why is a pressure regulator needed?
It ensures city water pressure does not exceed the RV plumbing’s safe limit.
Can you use one without the other?
Yes, but this increases the risk of either contamination or plumbing damage.
What PSI range is typical for RV regulators?
Most regulators maintain 40–50 PSI for safe operation.
How often should the filter be replaced?
Every 3–6 months or per manufacturer recommendation.
Preparing Your RV and Tools
Before installation, gather tools and accessories: hoses, adapters, wrench, Teflon tape, and filter housing. Inspect the water inlet and hoses for wear or leaks.
Turn off the water supply and relieve any pressure in the system. Confirm that your pressure regulator is rated for your RV’s plumbing and incoming water pressure.
Do I need special tools?
Basic tools like a wrench and Teflon tape are sufficient.
Should the RV water pump be off?
Yes, to avoid pressure buildup during installation.
Is hose condition important?
Absolutely. Leaky hoses can cause damage and contamination.
Can adapters affect installation?
Yes, ensure they fit your hose and inlet properly.
Is safety gear needed?
Gloves are recommended to avoid cuts or scrapes.
Step-by-Step Installation of Water Filter
Locate the RV’s water inlet connection. Attach the inline filter housing using the appropriate adapters.
Apply Teflon tape on threaded connections to prevent leaks. Follow the flow direction indicated on the filter and tighten connections securely.
Where should the filter be installed?
Between the city water connection and the RV inlet.
Does flow direction matter?
Yes, most filters have arrows indicating proper water flow.
Should connections be hand-tight or wrench-tight?
Hand-tight, then a slight turn with a wrench to prevent leaks.
Can filters be installed vertically or horizontally?
Both orientations work; follow manufacturer instructions.
How do I test for leaks?
Turn on water slowly and inspect all connections.
Installing the Pressure Regulator

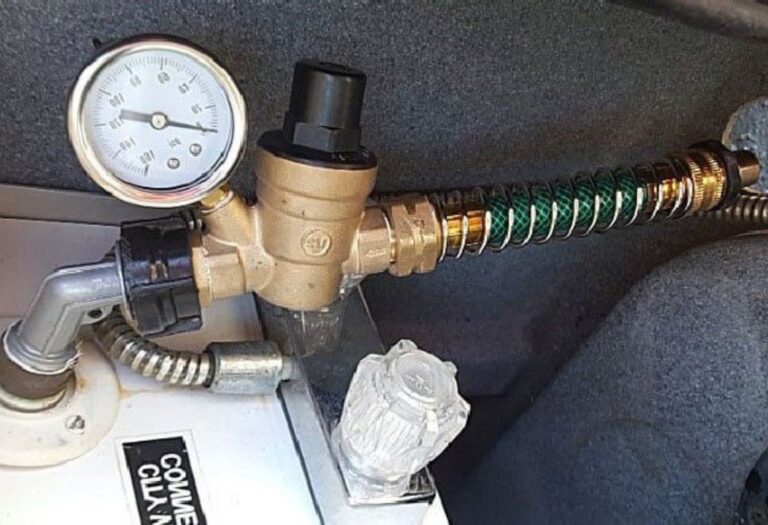
Attach the regulator directly to the city water supply. Confirm the PSI rating is correct, typically 40–50 PSI. Connect your RV hose to the regulator outlet and tighten connections.
Do I need a pressure regulator if the campground has low pressure?
It’s still recommended to protect against sudden spikes.
Can the regulator be installed before or after the filter?
Typically before, to reduce pressure entering the RV plumbing.
What if the regulator leaks?
Check fittings and ensure Teflon tape is applied correctly.
Does regulator orientation matter?
No, it functions correctly in any orientation.
Should I check the pressure after installation?
Yes, use a gauge to confirm correct PSI.
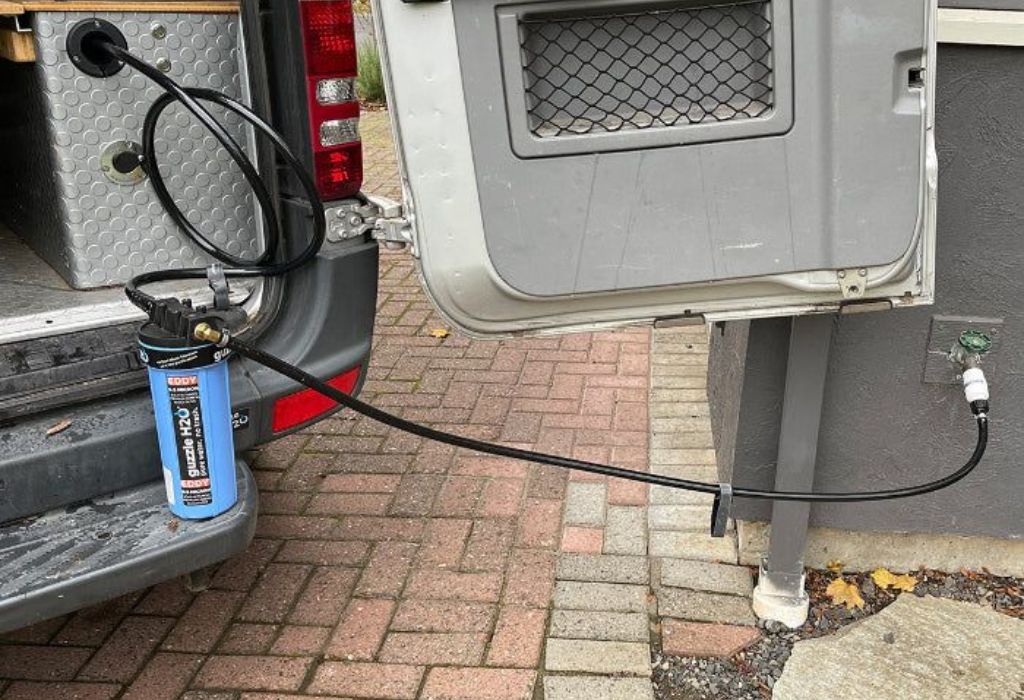
Connecting Hoses and Ensuring Proper Flow
Attach hoses to both the filter and regulator. Verify that all connections are tight and secure. Turn on the water slowly to prevent sudden pressure spikes.
Can I use any hose?
Use hoses rated for potable water.
How do I prevent kinks?
Route hoses carefully, avoiding sharp bends.
Should I flush the system before use?
Yes, to remove debris from hoses and the filter.
How do I know if flow is restricted?
Slow flow may indicate a clogged filter or misaligned regulator.
Can I use multiple filters?
Yes, for additional filtration, but monitor flow rate.
Maintenance and Replacement
Replace filters every 3–6 months or according to manufacturer instructions. Inspect the regulator annually for wear or leaks. Clean hoses and fittings periodically to prevent buildup and contamination.
How often should I replace the filter?
Every 3–6 months or as specified by the manufacturer.
Does the regulator need maintenance?
Check annually or if pressure readings fluctuate.
Can filters be cleaned instead of replaced?
Some filters allow cleaning, but most should be replaced for safety.
How do I avoid mold or bacteria in hoses?
Flush hoses regularly and store dry when not in use.
Are replacement parts easy to find?
Yes, most RV stores and online suppliers carry compatible filters and regulators.
Troubleshooting Common Issues
Leaks, low pressure, and poor water flow are the most common problems. Check all connections, inspect hoses for kinks, and ensure the filter and regulator are installed correctly.
Why is water leaking from the filter?
Connections may be loose or missing Teflon tape.
Why is water flow low?
The filter may be clogged or hoses may be kinked.
Can pressure spikes still occur?
Yes, ensure the regulator is functioning properly.
What if water tastes bad?
Replace the filter and flush hoses thoroughly.
How do I prevent recurring issues?
Regular maintenance and proper installation are essential.
Best Practices and Tips
Always use potable-rated hoses and fittings. Label filter installation dates to track replacements. Carry spare filters and Teflon tape on trips.
Should I label the filter installation date?
Yes, it helps maintain a proper replacement schedule.
Can I install multiple regulators?
Typically, one regulator per water source is sufficient.
Is it necessary to flush before each trip?
Yes, to ensure clean water and remove debris.
Can I upgrade to a higher PSI regulator?
Only if the RV plumbing supports it.
Are inline pressure gauges recommended?
Yes, they help monitor system performance and safety.
Conclusion
Proper installation of your RV water filter and pressure regulator ensures safe, clean water and protects your plumbing. Maintaining the system regularly prevents leaks, improves water quality, and reduces maintenance issues.
Follow these steps to enjoy a worry-free RV experience with consistent water flow and safe, potable water on every trip.
I’m David R. Coleman, the founder, lead writer, and lifelong tool enthusiast behind GarageToolPro.com. With years of experience in automotive repair, woodworking, and home DIY projects, I created this platform to share practical tips, detailed tool reviews, and step-by-step guides that help mechanics, hobbyists, and homeowners get the job done right the first time.