How to Adjust an RV Water Pressure Regulator
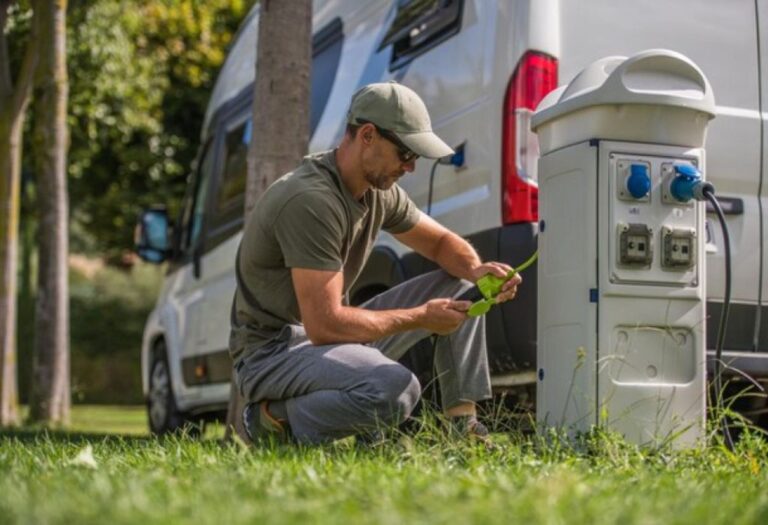
You pull into a new campground after a long drive, hook up the water hose, and suddenly hear a hiss from inside the RV.
The kitchen faucet sputters, and the shower turns into a pressure surge. Within seconds, what was supposed to be a relaxing stop turns into a plumbing nightmare.
This happens more often than many RV owners realize. Some campground spigots deliver water pressure as high as 100–120 PSI, while most RV plumbing systems are designed for 40–60 PSI at most.
That excess force can easily damage pipes, fittings, and water heaters, leading to leaks or costly repairs.
A simple device — the RV water pressure regulator — protects your system by limiting incoming pressure. Yet many travelers install it once and forget it, unaware that incorrect adjustment can cause either weak water flow or dangerous overpressure.
According to Go RVing Research, over 11 million households in North America own an RV, with 65% using city water hookups regularly.
That means millions of rigs depend on properly adjusted regulators every year to keep water systems safe and efficient.
Adjusting a regulator may seem complicated, but it’s actually a quick, step-by-step process once you understand how pressure and flow interact.
With the right gauge, tools, and a few careful turns of the adjustment screw, you can fine-tune your RV’s water system for both comfort and protection.
This guide explains exactly how to adjust an RV water pressure regulator safely — including the tools you’ll need, the correct PSI range, and expert troubleshooting tips every RV owner should know.
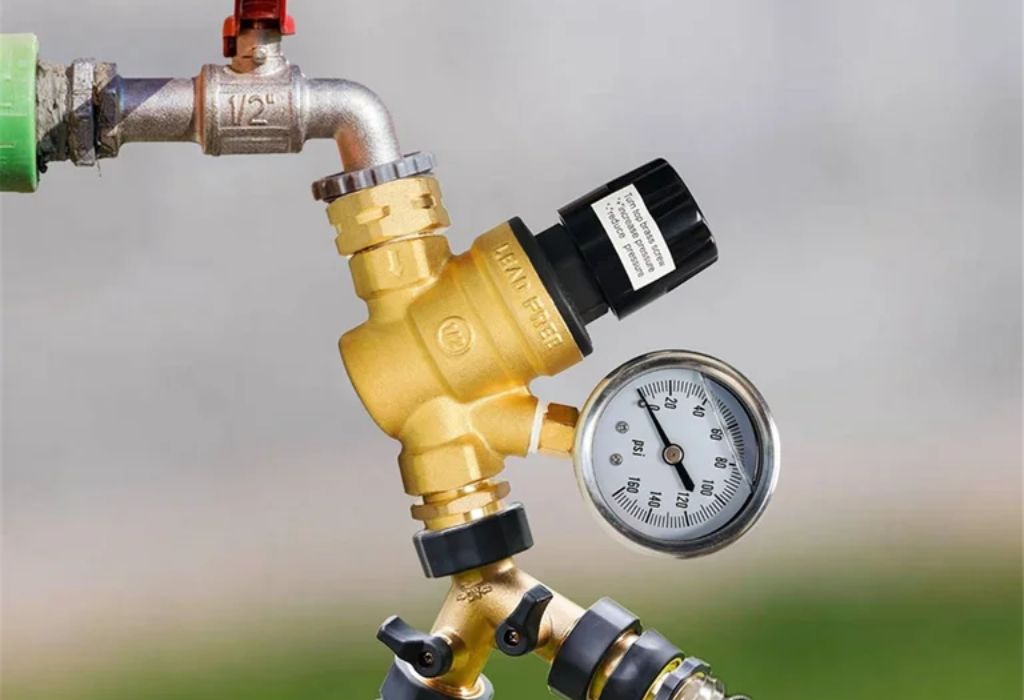
What Is an RV Water Pressure Regulator & Why It Matters
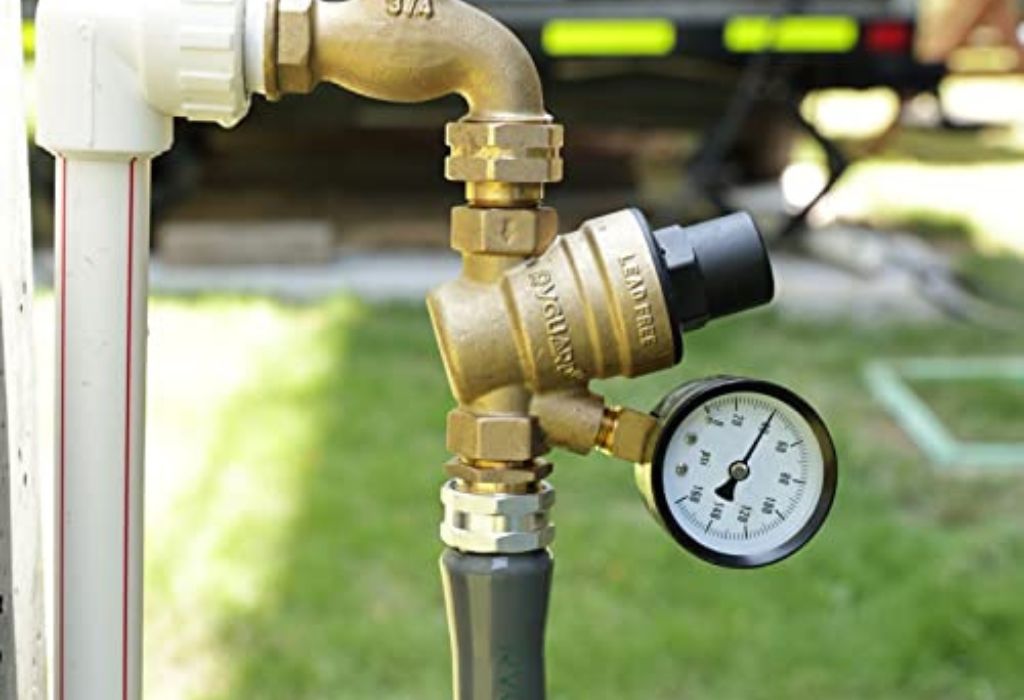
An RV water pressure regulator is a small but essential device that protects your RV’s plumbing system from excessive pressure supplied by campground water hookups. It reduces the incoming PSI to a safe, steady level, ensuring your pipes, faucets, and appliances aren’t overwhelmed by sudden surges.
Many campgrounds have inconsistent water systems, with some delivering mild 40 PSI while others exceed 100 PSI — far above what most RV plumbing can handle. Without a regulator, that kind of pressure can blow seals, crack plastic fittings, or cause leaks hidden behind walls that only show up later.
The regulator acts as a safety buffer between the campground spigot and your RV’s internal water system. It maintains consistent flow, even when external pressure fluctuates throughout the day. This makes it one of the most critical — and underrated — tools for RV maintenance and safety.
What does a water pressure regulator do?
It limits high water pressure from campground hookups to a safe level for RV plumbing.
Fixed vs adjustable regulator — what’s the difference?
Fixed regulators have a preset PSI, while adjustable models allow you to fine-tune pressure using a screw or knob.
At what pressure is RV plumbing safe?
Most RV systems are safe between 40–60 PSI, though some newer rigs can handle slightly more.
Does every RV need a regulator?
Yes. Even if you trust the campground system, sudden pressure spikes can happen anytime.
Can the regulator improve water flow?
Not directly — it ensures safety, but adjusting it correctly can balance flow and protection.
Types & Features of RV Water Pressure Regulators
RV regulators come in two main categories — fixed and adjustable — each serving slightly different purposes.
A fixed regulator has a preset limit, usually 40–50 PSI, making it simple for occasional campers who just want basic protection. In contrast, an adjustable regulator allows you to change the pressure output depending on your RV’s system or personal preference.
Modern regulators may include built-in gauges, lead-free brass bodies, stainless filters, or locking caps for secure adjustments. Choosing a durable regulator with an integrated gauge saves time and prevents guesswork.
What is a fixed regulator?
It’s a non-adjustable device that maintains a constant output PSI.
What is an adjustable regulator?
It lets you manually set the water pressure for your RV.
Do regulators with gauges cost more?
Yes, but they provide real-time pressure readings.
Are all regulators lead-free?
Quality ones are; cheap imports may not be.
Can you replace parts inside the regulator?
Some premium models offer replacement springs or seals.
Safe Pressure Ranges & Recommended PSI for RVs
Most RVs operate best within 40–60 PSI, depending on the brand and plumbing materials. Exceeding 70 PSI can stress fittings and cause leaks.
Campgrounds may have drastically different supply pressures — some barely reach 35 PSI, while others exceed 100 PSI. Adjustable regulators help balance safety and comfort by letting you tweak the output.
For instance, many RV enthusiasts prefer 45–50 PSI for everyday use to ensure smooth showers without stressing the system.
What is the ideal PSI setting?
Between 45–60 PSI for most rigs.
Can you set it to 80 PSI?
It’s risky; most plumbing isn’t rated for that.
Do all fittings survive high pressure?
No, flexible hoses and plastic joints fail first.
Do campgrounds really reach 100 PSI?
Yes — some city hookups exceed 100 PSI at peak times.
Is flow affected by low settings?
Yes, too low a setting reduces pressure at faucets and showers.
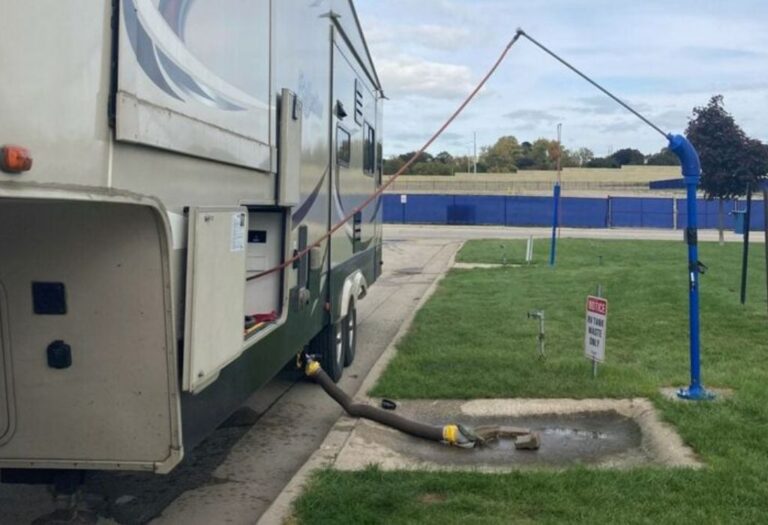
How to Adjust RV Water Pressure Regulator: Step-by-Step
Adjusting an RV water pressure regulator is simple once you understand the mechanics. You’ll need a pressure gauge, a screwdriver or wrench, and a steady water source.
Step 1 – Connect the regulator
Attach it between the water supply spigot and your RV hose.
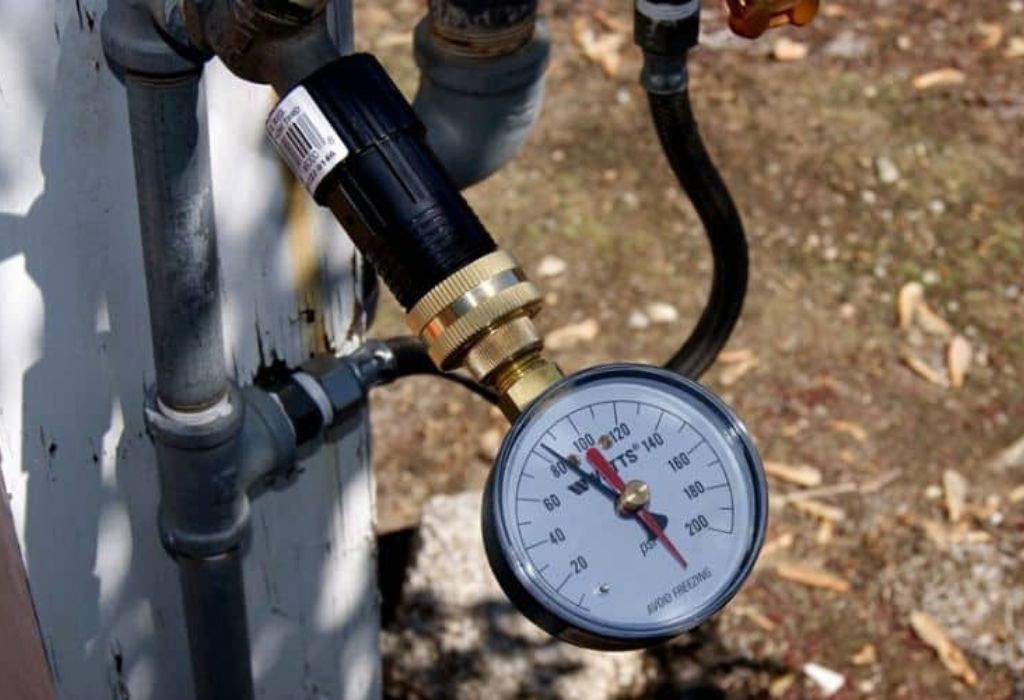
Step 2 – Install a gauge
Add an inline or faucet-mounted gauge to monitor PSI.
Step 3 – Turn on water slowly
Open the campground spigot gradually to avoid surges.
Step 4 – Adjust pressure
Use the screw or knob to increase (clockwise) or decrease (counterclockwise) pressure.
Step 5 – Test under flow
Open a faucet inside the RV and observe gauge readings.
Step 6 – Lock in the setting
Once you reach 45–50 PSI, stop turning and secure the adjustment.
Should water be running while adjusting?
Yes, this gives accurate under-load readings.
Which way to turn for more PSI?
Clockwise increases spring tension, raising pressure.
What if regulator doesn’t respond?
Check for sediment or stuck springs inside.
How much to adjust at once?
Make small changes — about 5 PSI per turn.
When to stop adjusting?
Once flow feels consistent and gauge stabilizes.
Tools & Equipment Needed for Adjustment
Having the right tools ensures precision and prevents leaks during setup.
The essential items include:
- Pressure gauge (inline or screw-on)
- Wrench or pliers
- Teflon tape or thread sealant
- Bucket for draining water
- Clean cloth or brush for debris removal
Is a gauge required?
Yes — without it, you’re guessing at PSI.
Can you use a built-in RV gauge?
Only if recently calibrated.
Do you need Teflon tape?
Yes, to seal threaded connections.
Should you carry a spare regulator?
Absolutely, for backup in case of failure.
Can household tools work?
Yes, as long as they fit snugly and avoid overtightening.
Testing & Verifying the Pressure Setting
Testing ensures your adjustment is accurate and consistent across all fixtures.
Once the regulator is set, open multiple faucets in the RV and watch the gauge. The reading should remain steady between 45–60 PSI. If it drops sharply, the regulator may be undersized or partially blocked.
For added assurance, perform a flow test — turn on both the shower and kitchen sink. The pressure should remain stable with minor fluctuations.
How to confirm accuracy?
Compare your gauge reading before and after adjustment.
What if pressure drops under flow?
Your regulator may be clogged or faulty.
Should you test every trip?
Yes, especially at new campgrounds.
Can pressure rise overnight?
Yes, due to temperature expansion or line spikes.
What if pressure creeps higher later?
Disassemble and clean the spring mechanism.
Common Issues & How to Troubleshoot
Even the best regulators can develop issues over time, especially with mineral-heavy water.
Sediment, rust, and calcium buildup often clog internal parts, causing pressure spikes or drops. Leaks at joints or fluctuating gauge readings also indicate wear.
If the adjustment knob is stuck, some models require a “pull-up-then-turn” motion before it moves freely.
Why won’t the adjustment knob turn?
It might be locked or corroded.
What if pressure keeps changing?
The spring or diaphragm could be failing.
Can debris block the regulator?
Yes, small particles reduce flow capacity.
Why are there leaks after adjustment?
Loose threads or damaged washers are the cause.
When should the regulator be replaced?
If it no longer holds pressure or leaks continuously.
Maintenance & Care Tips for Regulators
Proper maintenance ensures your regulator lasts for years and stays accurate.
Flush it occasionally to clear sediment and store it in a dry place when not in use. Avoid freezing temperatures, which can crack internal seals.
Lubricate moving parts lightly with food-safe silicone grease if your model allows disassembly.
How often should you clean it?
At least once every camping season.
Can you disassemble a regulator?
Some adjustable types allow internal access.
Does freezing damage it?
Yes — always drain before storage.
Should you replace seals?
Yes, whenever leaks or stiffness appear.
How long do regulators last?
Typically 3–5 years with regular care.
When to Replace or Upgrade Your Regulator
Even durable regulators eventually wear out due to pressure cycling and debris buildup.
Signs of failure include unstable PSI, constant leaking, or difficulty maintaining adjustments. When that happens, consider upgrading to a high-flow, stainless, or gauge-equipped model.
Premium regulators provide better durability and finer control, especially if you camp frequently or full-time.
When to replace regulator?
If pressure varies or leaks persist.
Is upgrading worth it?
Yes, for improved reliability and control.
Do gauge models last longer?
They tend to, because they’re better sealed.
Should you invest in stainless models?
Yes, they resist corrosion in hard-water areas.
How to extend lifespan?
Flush and test the regulator regularly.
Real-World Examples & User Tips
Many RV owners share practical tips from experience.
Most users prefer keeping their regulators around 45–50 PSI for ideal shower flow and safety. On forums like Reddit, seasoned campers recommend adjusting slowly and testing under load.
If the knob seems stuck, try the “pull-up-and-turn” motion — common with locking models. Always bleed pressure before adjusting, and never make changes under full water flow.
What PSI do most RVers use?
Around 45–50 PSI for balanced comfort.
What if regulator is hard to turn?
Lift before rotating — some have locking knobs.
Should you note starting PSI?
Yes, to restore settings quickly later.
Do pressure changes occur overnight?
Yes, minor fluctuations are normal.
Can you skip adjustment entirely?
Not advisable — each campsite’s water supply differs.
Conclusion
Adjusting your RV water pressure regulator may seem like a small task, but it’s one of the best ways to protect your plumbing and ensure a comfortable trip. By fine-tuning pressure to a safe 45–60 PSI, you’ll prevent leaks, preserve fittings, and maintain steady flow throughout your RV.
Use a quality adjustable regulator with a gauge, make small changes, and test under actual water flow. Keep the unit clean, check for leaks, and replace it when signs of wear appear.
A well-set regulator not only saves your plumbing from damage but also gives you the perfect balance of water flow and peace of mind at every campground.
I’m David R. Coleman, the founder, lead writer, and lifelong tool enthusiast behind GarageToolPro.com. With years of experience in automotive repair, woodworking, and home DIY projects, I created this platform to share practical tips, detailed tool reviews, and step-by-step guides that help mechanics, hobbyists, and homeowners get the job done right the first time.