How to Increase Water Pressure in an RV Shower
The sound of water trickling weakly from an RV showerhead can turn a relaxing trip into a frustrating experience.
Many RV owners step in expecting a steady stream but instead face a disappointing drizzle.
Whether you’re camping off-grid or hooked up to city water, low shower pressure is one of the most common problems faced on the road.
According to a RVTravel.com survey, over 70% of RV owners have reported issues with low water pressure during their trips.
This not only affects comfort but also wastes time and water, especially when your tank supply is limited.
The problem can stem from several hidden factors — a clogged showerhead, a weak pump, or a restrictive pressure regulator.
Understanding which one is to blame is the first step toward a solution.
Imagine finishing a long day of driving, ready to unwind with a warm shower, only to find that the water barely rinses off the soap.
The good news is that this issue doesn’t require an expensive service visit.
With a few easy checks and upgrades, you can significantly boost your RV’s shower performance.
In this complete guide, you’ll learn how to increase water pressure in your RV shower safely and effectively.
From inspecting your pressure regulator to cleaning filters and optimizing your water pump, we’ll cover every step in detail.
By the end, your RV shower will deliver a strong, consistent flow — no matter where you park.
1. Understand the Basics of RV Water Pressure
Before diving into repairs or upgrades, it’s essential to understand how your RV’s water system works. Unlike a home plumbing setup, an RV relies on a compact system with limited capacity. Water flows from either a city water connection or your freshwater tank, regulated by a pump that maintains consistent pressure throughout the system.
In most RVs, the ideal water pressure ranges between 40 and 50 PSI. Exceeding 60 PSI can damage pipes, fittings, and fixtures, while anything below 30 PSI often results in weak shower performance. When you connect to campground water, external pressure can vary significantly — sometimes too low for comfort or too high for safety.
This is why understanding the balance between pressure and flow rate is crucial. A low flow rate can make your shower feel weak, even if the PSI seems normal. Factors such as clogged filters, restricted hoses, or faulty regulators can all contribute to inconsistent water flow.
2. Check the Campground Water Source
The most overlooked cause of low water pressure often comes from the campground itself. Many campgrounds operate on shared water systems, meaning pressure drops when multiple RVs use water simultaneously.
To check the source, attach a water pressure gauge directly to the campground spigot before connecting your hose. Readings under 30 PSI indicate weak supply, while anything above 80 PSI could be dangerously high for your RV’s plumbing.
If the source pressure is too high, you’ll need a regulator. If it’s too low, you may rely more on your RV’s water pump to maintain adequate pressure. Some campgrounds in hot climates also experience reduced flow due to increased water demand.
A simple way to stabilize inconsistent pressure is by installing an adjustable brass pressure regulator. Models from brands like Camco or Renator let you control PSI manually, ensuring consistent flow without risking pipe damage.
3. Inspect the RV Water Pressure Regulator
Every RV should have a water pressure regulator to prevent high external pressure from damaging the internal system. However, not all regulators are created equal. Factory-installed versions are often preset to a conservative 40 PSI, which may be too low for a satisfying shower.
If your water pressure feels weak, check whether your regulator is adjustable. A high-quality brass regulator with a gauge allows you to fine-tune the PSI for optimal balance between safety and comfort. The best setting is typically 50–55 PSI, depending on your RV’s specifications.
You can also remove and clean the regulator periodically, as sediment buildup can restrict flow. If it’s still underperforming, replace it with a durable adjustable model rated for higher flow capacity.
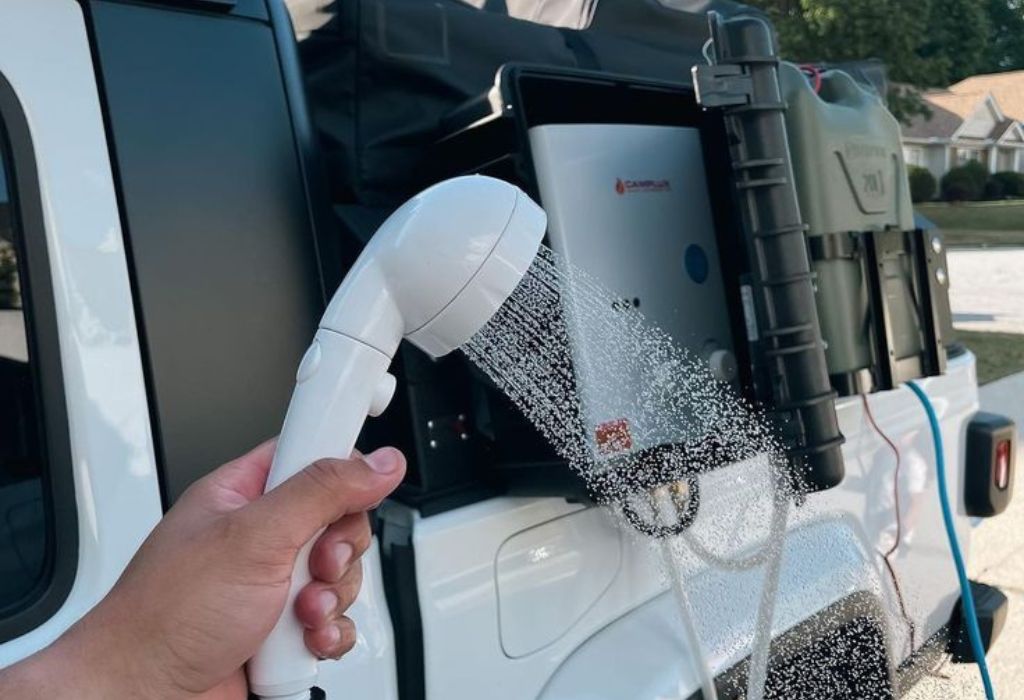
4. Examine the RV Showerhead
Even with perfect pressure at the source, a clogged or restrictive showerhead can sabotage performance. Many RVs come with low-flow showerheads designed to save water, but they often limit comfort too.
Remove your showerhead and check for mineral buildup or internal blockages. Soak it in vinegar for 30–60 minutes to dissolve calcium deposits. If that doesn’t help, upgrading to a high-performance RV showerhead can make a major difference.
Models like Oxygenics Fury, ETL Storm, or Dura Faucet high-pressure heads use aeration technology to amplify flow while conserving water. This creates a stronger, spa-like stream without increasing water usage.
A new showerhead is one of the easiest and most affordable ways to increase your RV’s shower pressure instantly.
5. Check for Clogged or Kinked Hoses
Water hoses are another common culprit behind poor water flow. Over time, hoses can kink, flatten, or collect sediment that restricts water movement.
Inspect the hose from the campground spigot to your RV’s inlet. Look for sharp bends or soft spots that collapse under pressure. If you find any, replace the hose with a reinforced, kink-free model made from high-quality materials.
Additionally, flush your hose with warm water or a mild vinegar solution to remove buildup. A clear, flexible, and properly sized hose ensures maximum flow and maintains consistent water pressure throughout your system.
6. Inspect the RV Water Filter
Most RVs are equipped with a water filtration system that removes sediment, chlorine, and bacteria. However, filters can clog over time, reducing flow dramatically.
If you notice a gradual decrease in water pressure, try removing the filter and testing the pressure without it. If the flow improves, it’s time to clean or replace the cartridge.
For best results, replace your RV water filter every 3–6 months, depending on usage and water quality. Consider upgrading to a dual-stage filter that includes both sediment and carbon filtration. These maintain strong flow rates while improving taste and purity.
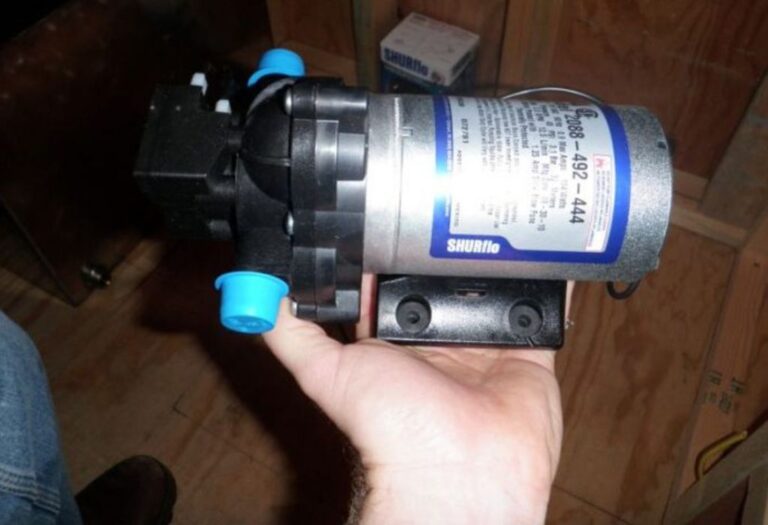
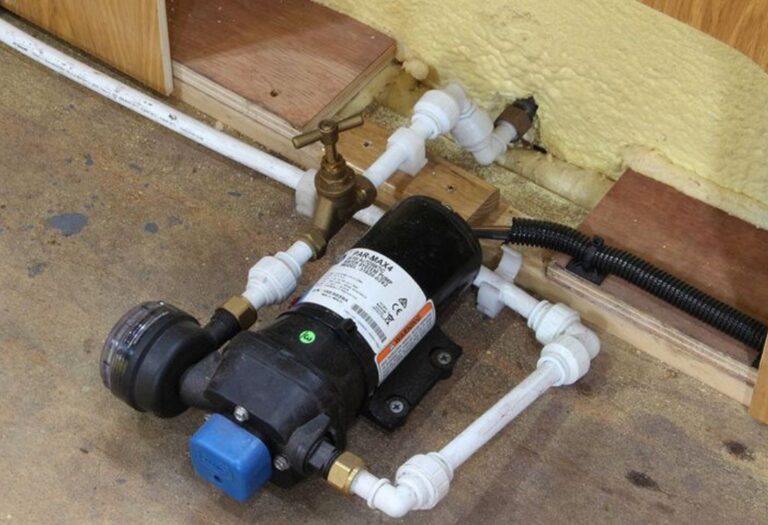
7. Adjust or Replace the RV Water Pump
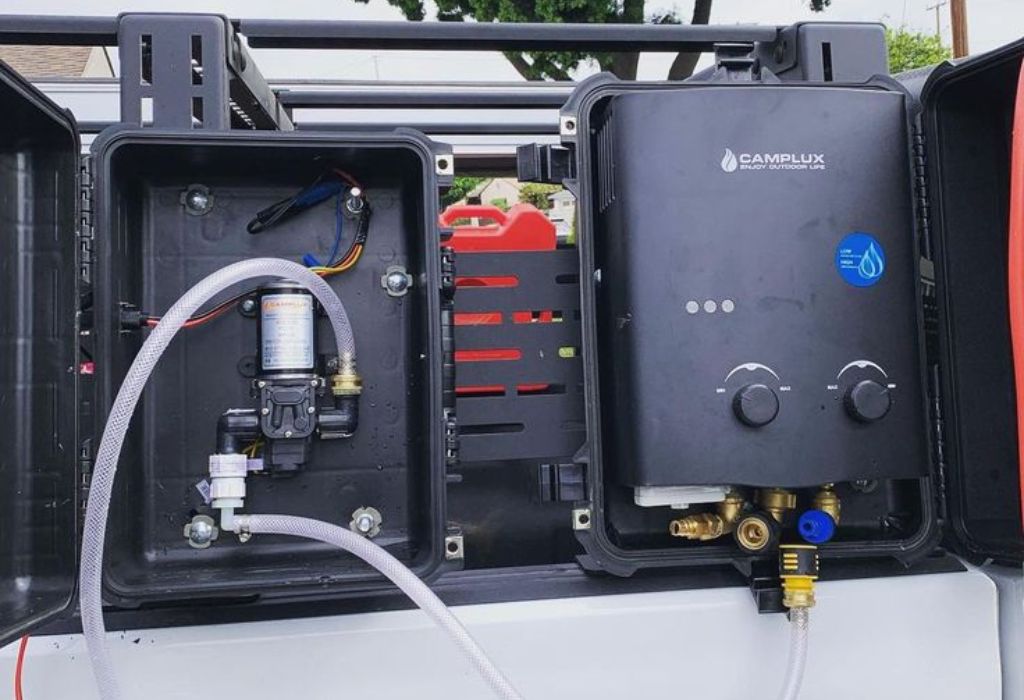
When you’re not connected to city water, your RV’s onboard water pump takes over to pressurize the system. Most pumps are rated for 40–55 PSI, but older or failing units may struggle to maintain steady flow.
To test your pump, attach a gauge to the output line and observe pressure levels during use. If the reading drops significantly, check for air leaks or worn seals. Many RV pumps also feature an adjustable pressure switch that allows you to increase PSI slightly for stronger output.
If adjustments don’t help, upgrading to a newer model like Shurflo 4008 or Seaflo 55-Series can restore strong, consistent performance. Look for pumps with higher flow rates (3–5 gallons per minute) for the best shower experience.
8. Check for Leaks in the Plumbing System
Even small leaks in your RV’s plumbing can lead to significant pressure loss. Leaks often occur at hose fittings, joints, or around faucets where seals wear out over time.
Inspect all visible connections, including under sinks and near the shower area. Use a flashlight and a dry cloth or tissue to detect moisture. If you find a leak, tighten fittings gently or replace damaged O-rings.
For hidden leaks behind walls or panels, listen for hissing sounds or use a water dye test. Fixing these small issues can instantly restore steady pressure and prevent long-term damage to your RV’s water system.
9. Flush the RV Water Lines
Sediment, algae, or mineral buildup can accumulate in your RV’s plumbing lines, restricting flow. Flushing the lines twice a year helps maintain consistent pressure and water quality.
To do this, disconnect the water supply and open all faucets, including the shower, to drain the system. Then, flush with clean water or a mild vinegar solution to dissolve deposits.
You can also use specialized RV line flush adapters for faster cleaning. Keeping your water lines clear not only boosts pressure but also extends the lifespan of your water pump and valves.
10. Upgrade the Shower Mixing Valve
The mixing valve controls the blend of hot and cold water in your RV shower. Older or cheap valves often restrict flow, especially when set for warm temperatures.
Upgrading to a modern high-flow mixing valve ensures better pressure balance and smoother temperature control. Look for models with PEX-compatible fittings for easy installation.
This small change can make your shower water feel stronger and more consistent, particularly when using both hot and cold lines together.
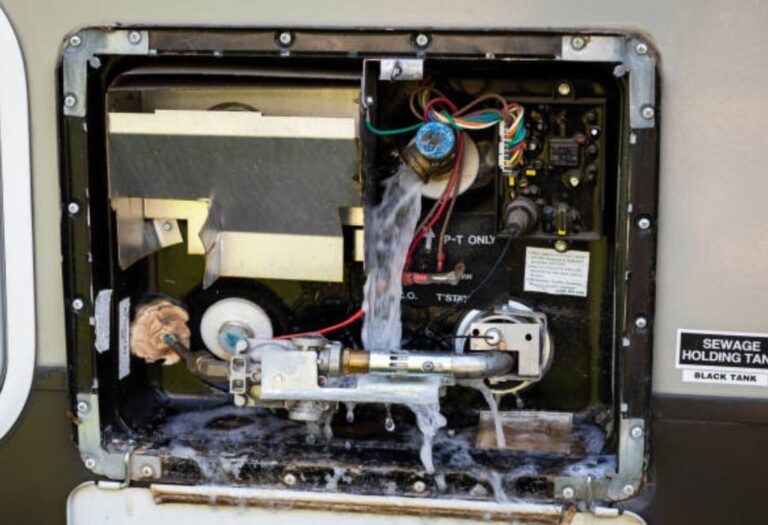
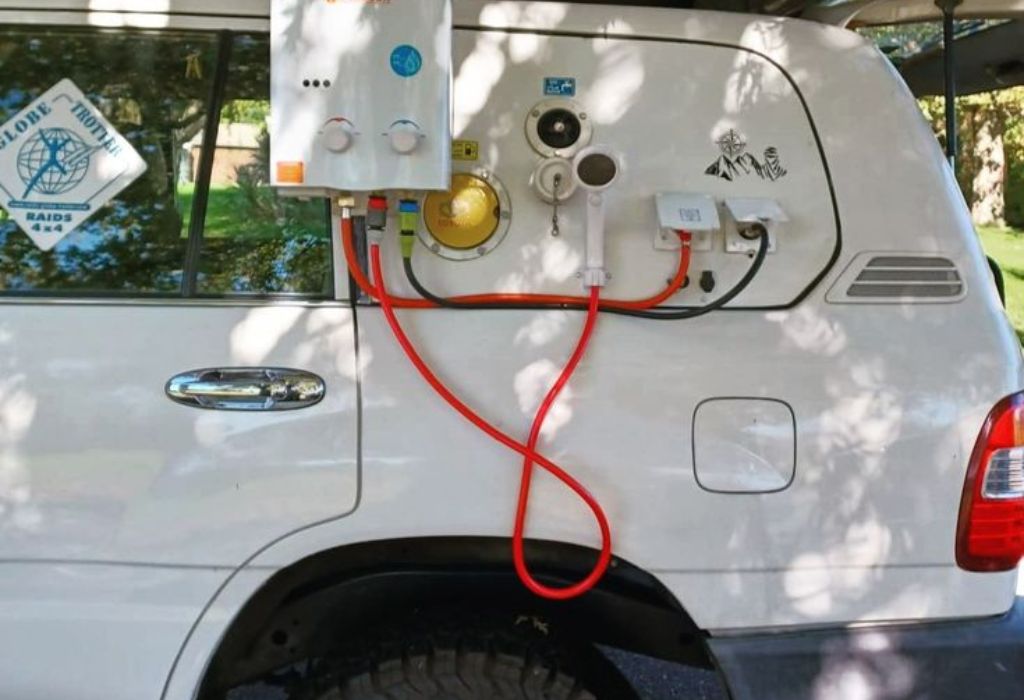
11. Optimize the Hot Water System
Low hot water flow can reduce overall shower pressure, especially in systems with tankless water heaters. These units require a specific flow rate to activate heating, and if the pressure is too low, they may fail to ignite properly.
Ensure your heater’s flow sensor is clean and free from debris. Check for kinks in the inlet hose and maintain adequate tank pressure if using a traditional water heater. Adjusting your water temperature slightly higher can also improve flow performance.
Running your RV water pump while connected to city water can help stabilize pressure when using hot water, creating a smoother and stronger shower experience.
12. Use Water Pressure Boosting Accessories
If you’ve tried all standard fixes and still experience low shower flow, consider installing pressure-boosting accessories.
An inline water booster pump increases PSI without stressing your main system. These compact, easy-to-install units are perfect for RVs connected to weak campground supplies.
You can also use 90-degree brass elbows, high-flow connectors, or Y-splitters to reduce resistance in the water line. Each of these accessories helps optimize flow and minimize pressure drop, especially in longer hose setups.
13. Routine Maintenance for Strong Pressure
Consistent maintenance is the key to long-term pressure performance. Follow this simple checklist to keep your RV water system at its best:
- Clean showerheads monthly with vinegar.
- Replace filters every 3–6 months.
- Flush water lines twice a year.
- Check your regulator settings before each trip.
- Store hoses without tight bends to prevent kinks.
- Inspect your water pump annually for wear.
Preventive care ensures that low water pressure never surprises you again while traveling.
14. Common Mistakes to Avoid
- Over-tightening fittings: This can crack connectors and cause leaks.
- Running the pump dry: Doing so damages internal seals.
- Ignoring sediment buildup: Leads to pressure drops and contamination.
- Using cheap regulators: Restrict flow excessively.
- Skipping filter replacements: Causes gradual performance decline.
Avoiding these mistakes will keep your system efficient and extend its lifespan.
15. When to Seek Professional Help
If water pressure remains weak after checking all the above areas, there may be deeper issues within your RV’s plumbing system. Hidden leaks, damaged pipes, or a malfunctioning pressure switch could require expert repair.
Certified RV service centers can perform full pressure tests to locate internal leaks or blockages. Typical diagnostic services range between $100 and $250, depending on complexity.
Getting professional help ensures long-term safety and performance, especially for older or full-time RVs.
Conclusion
A weak RV shower doesn’t have to be an ongoing problem. Most low-pressure issues can be fixed with a little inspection, cleaning, and a few smart upgrades.
Start with the basics: test the campground supply, check your regulator, and clean your showerhead. Then, move on to your pump, filters, and plumbing for deeper improvements.
With regular maintenance and the right components, you’ll enjoy powerful, consistent water flow wherever you travel. A well-tuned RV shower system transforms every stop into a comfortable, home-like experience — proof that small adjustments can make a big difference on the road.
I’m David R. Coleman, the founder, lead writer, and lifelong tool enthusiast behind GarageToolPro.com. With years of experience in automotive repair, woodworking, and home DIY projects, I created this platform to share practical tips, detailed tool reviews, and step-by-step guides that help mechanics, hobbyists, and homeowners get the job done right the first time.