How to Reset an RV Water Pump Quickly
Few things are more frustrating for RV owners than turning on the faucet after a long drive only to find that no water comes out.
The lights are on, the tank is full, yet the RV water pump seems to have gone silent.
This common scenario leaves travelers wondering if the pump has failed or if it simply needs a quick reset to restore normal operation.
Knowing how to reset an RV water pump can save your trip, prevent costly repairs, and get your plumbing system running again in minutes.
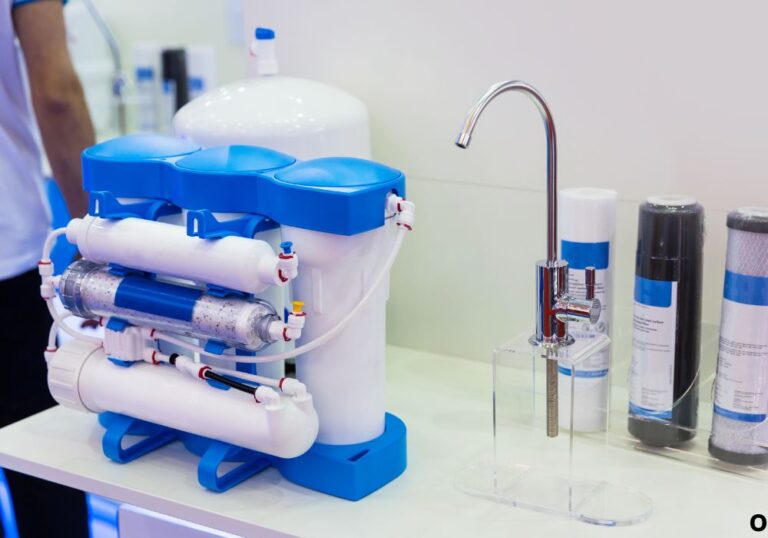
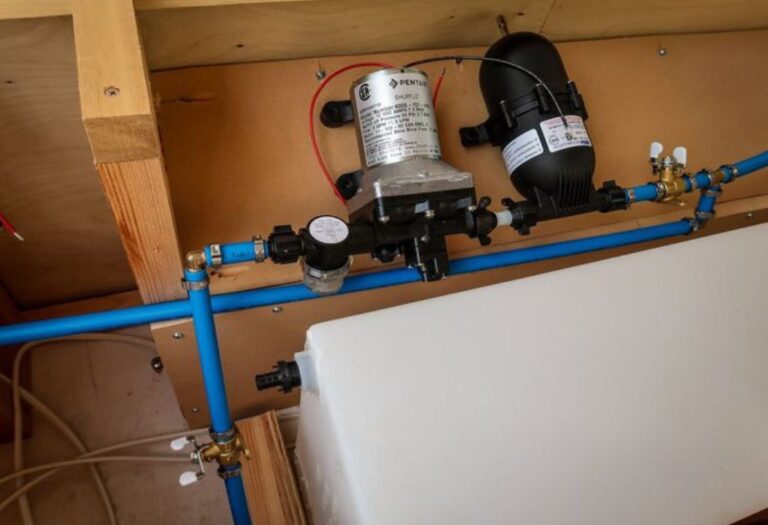
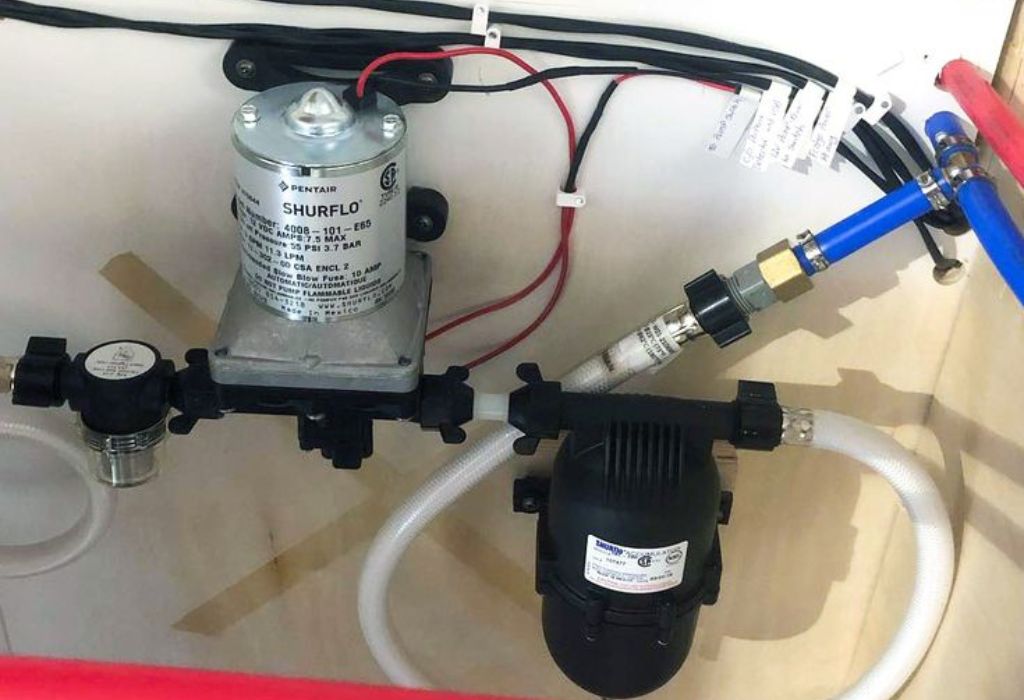
An RV’s water pump is the heart of its freshwater system, ensuring water flows from the storage tank to faucets, showers, and toilets.
When it stops working, it can disrupt your entire routine. According to RV Life Magazine, over 60% of water flow issues in RVs are caused by electrical faults or air locks rather than pump failure .
This means that a simple reset often solves the problem without the need for replacement parts or professional repair.
Resetting a pump usually involves checking power connections, replacing blown fuses, clearing trapped air, and cycling the system to restore pressure.
While some modern RV pumps come with built-in reset buttons, many rely on manual troubleshooting steps to bring them back to life.
Understanding this process not only fixes immediate issues but also helps diagnose deeper plumbing or electrical problems before they worsen.
In this guide, you’ll learn step-by-step how to reset an RV water pump quickly and safely, along with the common causes of pump failure, troubleshooting tips, and preventive maintenance practices. Whether you’re a weekend camper or a full-time traveler, these expert insights will help keep your RV’s water system reliable, efficient, and ready for any adventure.
What Does “Resetting” an RV Water Pump Mean?
Resetting an RV water pump doesn’t always mean pressing a single button. In most cases, it’s a sequence of simple steps that restore power, remove air locks, and reestablish system pressure.
It’s the process of restarting the electrical and mechanical functions of the pump to make it run again after it stops working due to a fault or power interruption.
What is a reset on an RV water pump?
A reset is the act of cutting power, inspecting components, and reenergizing the system to restore flow and pressure.
Does every RV water pump have a reset button?
No. Only certain newer pumps include a small reset switch; most older or standard models must be manually reset through troubleshooting.
When should a reset be attempted?
If the pump stops running suddenly, makes no noise, or runs continuously without building pressure.
Is resetting the same as replacing the pump?
No — resetting restores function temporarily; replacement is needed when internal parts like the diaphragm or motor are damaged.
Common Reasons an RV Water Pump Needs Resetting
An RV water pump can fail or lose pressure for several reasons, but most are minor. Understanding these causes helps you determine when a simple reset will solve the issue versus when deeper repair is required.
Why does my RV water pump stop working unexpectedly?
Power interruptions, blown fuses, tripped breakers, or disconnected wiring are the most common causes.
Can air locks or dry runs disrupt pump function?
Yes. Air trapped in the line prevents the pump from priming and can stop water from reaching your faucets.
Do leaks or backflow affect pump behavior?
Absolutely. A leaky pipe or faulty check valve causes pressure drops, forcing the pump to cycle constantly or fail to shut off.
What role does the pressure switch play?
The internal pressure switch turns the pump on and off automatically. If it fails, the pump may not activate even when the water system is empty.
Can winterization affect my pump?
Yes. If bypass valves or low-point drains remain open after winter storage, the pump won’t build pressure properly.
How to Reset an RV Water Pump — Step-by-Step
Resetting your RV’s water pump doesn’t require special tools. With patience and the right process, you can restore normal function in a few minutes.
Step 1: Turn Off the Pump and Disconnect Power
Always start by turning off the pump switch on your control panel. Then disconnect the 12-volt power source or remove the inline fuse. Wait 30–60 seconds to let the circuit discharge fully before restoring power.
Why is this important?
It prevents electrical surges and gives the pump’s internal relay time to reset.
Step 2: Check the Fuse or Breaker
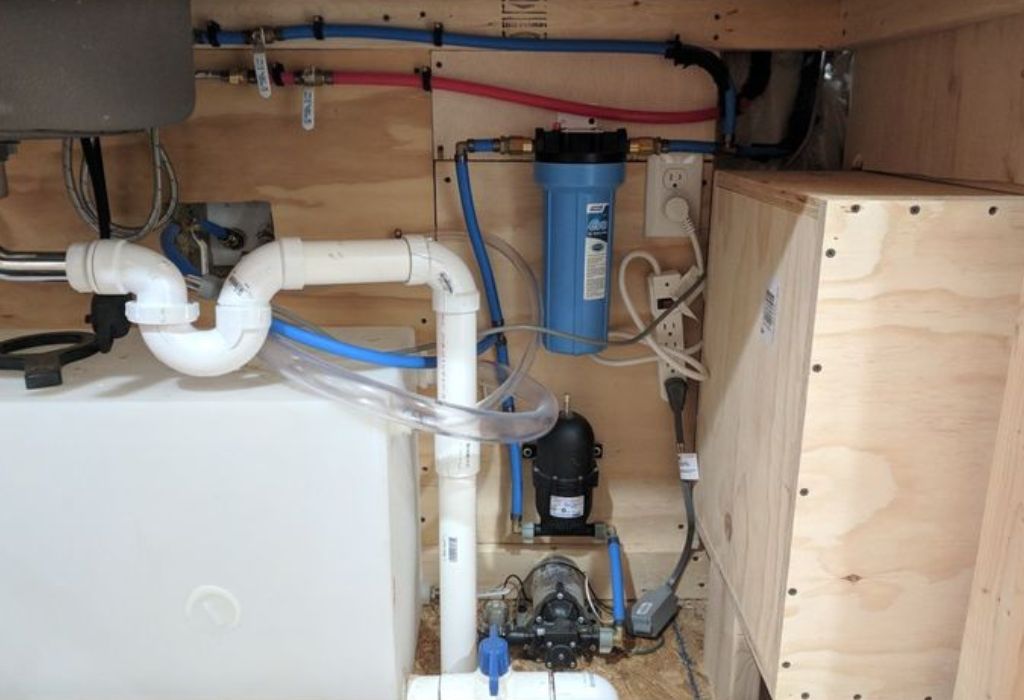
Locate the fuse box, usually near your converter or under the sink. Find the fuse labeled “Water Pump.” Remove and inspect it for a broken filament or discoloration. Replace it with the same amperage rating if blown.
Tip: Keep spare fuses on hand for road emergencies.
Step 3: Inspect Electrical Connections
Follow the wiring from the pump to its power source. Look for loose connectors, corrosion, or broken wires. Gently tighten any loose terminals and clean oxidized metal using a small brush.
How do I test voltage at the pump?
Use a multimeter to confirm 12 V DC is reaching the pump terminals.
What if no power is present?
Check the control switch and inline fuse; they might have tripped or disconnected.
Step 4: Bleed Air and Re-prime the System
After restoring power, open all faucets and run water until air stops sputtering. Air pockets inside the lines can prevent the pump from creating suction. If your pump has a manual prime port, open it and pour water into the inlet until full.
Why does priming matter?
Without water in the system, the pump can overheat or fail to build pressure.
How long should priming take?
Usually under one minute if lines are properly sealed.
Step 5: Test the Pump Operation
Once the system is full of water, switch the pump back on. Listen for humming or vibration. Water should begin flowing steadily from faucets within seconds. Observe the pump’s behavior—steady running followed by automatic shutoff indicates success.
What if the pump still doesn’t run?
Check the ground wire connection and re-inspect fuses.
What if it runs continuously?
You likely have a small leak or air entering the suction side.
What if it turns on and off rapidly?
This is a sign of pressure switch miscalibration or trapped air pockets.
Troubleshooting When Reset Doesn’t Work
Sometimes, even after a reset, the pump may still refuse to cooperate. In such cases, focus on mechanical inspection and advanced diagnostics.
Why might a water pump still not run after reset?
The motor may be burnt out or the internal pressure switch damaged.
What if the pump runs but delivers no water?
Look for blockages in the inlet hose, closed valves, or a clogged strainer.
Why does the pump keep cycling on and off?
Leaks, backflow, or faulty check valves are common causes.
Why is the pump noisy or vibrating excessively?
Air in the system or loose mounts could be the reason. Tighten mounting bolts and bleed the lines again.
Example Scenarios from Real RV Situations
1. Post-Winter Storage Reset
Many RV owners forget to switch off the winterization bypass valve. As a result, water bypasses the pump instead of entering it. Closing the bypass and bleeding the air solves the issue instantly.
2. Air Lock After Freshwater Tank Fill
When refilling a dry tank, air often gets trapped in the suction line. Opening all faucets and running the pump for 30 seconds releases the trapped air and restores pressure.
3. Blown Fuse on the Road
A common scenario occurs when running multiple 12V devices at once. The surge trips the pump’s fuse. Replacing it with the correct amperage rating resets the pump immediately.
4. Clogged Pump Strainer
A small strainer sits between the tank and pump to trap debris. When clogged, it starves the pump of water. Cleaning the mesh filter restores suction and stops the pump from cycling endlessly.
Maintenance Tips to Avoid Future Resets
Keeping your pump in good condition ensures you won’t need to reset it often. Preventive care is the best solution.
How often should I flush the system?
At least twice per year to remove debris and mineral buildup.
Should I lubricate or oil the pump?
No — most RV water pumps are self-lubricating diaphragm types.
How to prevent freezing?
Drain lines, blow out water, or use RV antifreeze before winter storage.
When should filters or strainers be replaced?
Every 3–6 months depending on water quality.
What are signs of early pump failure?
Slow flow, inconsistent cycling, or leaks around the housing.
When to Call a Professional Technician
While DIY troubleshooting fixes most problems, some cases need expert help. Electrical shorts, burnt motors, and cracked pump heads require specialized tools.
When is resetting not enough?
If you’ve verified power and pressure but the pump remains silent.
Can I replace internal parts myself?
Only if you’re comfortable with mechanical repairs and warranty terms allow it.
Is it safe to ignore minor leaks?
No. Leaks cause corrosion, short circuits, and water damage over time.
When should you upgrade your pump?
If it’s more than 5 years old or fails frequently, upgrading to a modern Shurflo or Flojet model improves reliability.
Pro Tips for Reliable RV Pump Performance
- Keep a spare fuse and strainer in your toolkit.
- Use Teflon tape when reconnecting fittings to prevent leaks.
- Regularly inspect hoses and clamps for cracks.
- Check voltage output monthly to ensure consistent 12V supply.
- Never let your pump run dry — it can overheat and seize.
Following these small habits extends the lifespan of your RV’s plumbing system and reduces unexpected breakdowns on the road.
Conclusion
Understanding how to reset an RV water pump is one of the most valuable skills an RV owner can learn. It saves time, prevents expensive repairs, and ensures that your water system remains dependable wherever you travel.
A reset typically involves cutting power, inspecting fuses and wiring, bleeding air, and verifying proper pressure — simple steps anyone can perform. If problems persist, they often point to leaks, electrical faults, or mechanical wear that require further attention.
By following the steps and maintenance tips in this guide, you can confidently troubleshoot water pump issues and keep your RV’s plumbing running smoothly. The next time your faucets fall silent, you’ll know exactly what to do — no panic, no waiting, just a quick and effective reset.
I’m David R. Coleman, the founder, lead writer, and lifelong tool enthusiast behind GarageToolPro.com. With years of experience in automotive repair, woodworking, and home DIY projects, I created this platform to share practical tips, detailed tool reviews, and step-by-step guides that help mechanics, hobbyists, and homeowners get the job done right the first time.