Where Is Water Pump Located in RV and How to Find It
For many RV owners—especially first-timers—nothing is more confusing than tracing where the water pump actually lives. You can hear it humming somewhere deep inside your rig, but when it’s time to prime, clean, or replace it, the pump suddenly turns into a mystery.
That small humming box is, in fact, the heart of your RV’s water system. It’s what allows you to enjoy running water, take hot showers, and wash dishes even when you’re off-grid. Knowing where the water pump is located in your RV isn’t just helpful—it’s essential for proper maintenance, winterization, and troubleshooting.
In this comprehensive guide, you’ll learn:
- How the RV water pump works
- Every common location where manufacturers hide it
- Step-by-step methods to find yours
- How to access, inspect, and maintain it safely
- Plus, professional tips to make it quieter and more efficient
Whether you own a Class A motorhome, fifth wheel, or compact camper van, this expanded guide will help you master one of your RV’s most important systems.
Understanding the RV Water Pump’s Role in the Plumbing System
An RV’s water system is designed to give you the same comfort as home while being completely mobile. The water pump is what makes that possible—it pressurizes water from your freshwater tank so it flows through your faucets, shower, and toilet even when you’re miles away from a hookup.
How It Works
- Power Supply: The pump runs on your RV’s 12-volt DC battery system, so it works whether you’re connected to shore power or boondocking.
- Pressure Activation: When you open a faucet, the drop in line pressure triggers the pump to start. When you close the faucet, pressure builds again and the pump stops automatically.
- Performance Range: Most pumps deliver 3–5 GPM (gallons per minute) at 40–55 PSI (pounds per square inch)—enough to mimic a home-like water flow.
- Self-Priming Design: The diaphragm pump can pull water several feet vertically from the freshwater tank, meaning it can be installed below or beside the tank.
When the system runs correctly, you’ll barely notice it. But if your faucets sputter, the pump keeps cycling, or water pressure drops suddenly—you’ll need to reach it quickly.
Why Knowing Its Location Matters
Understanding where the water pump is located helps you:
- Prime the system after winterizing or emptying the tank.
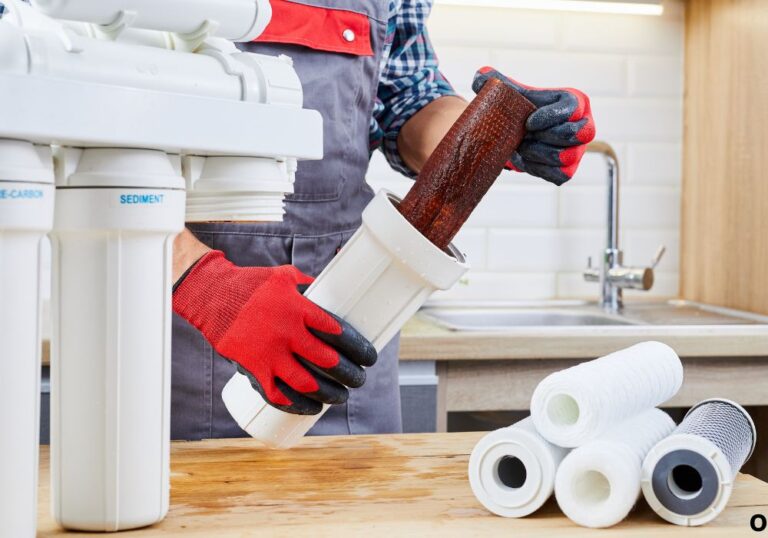
- Flush or replace the inlet strainer to restore pressure.
- Inspect for leaks when you hear the pump cycling with no water running.
- Repair wiring or fuses if it stops working altogether.
- Winterize efficiently by adding antifreeze directly through the pump.
- Reduce noise by adjusting the mounting position.
In short, it’s the first place you’ll need to access anytime you notice strange sounds, poor flow, or electrical issues in your RV’s water system.
Typical Water Pump Locations in RVs
Every RV model places components slightly differently depending on floor plan and plumbing layout. However, the pump must always be close to the freshwater tank to ensure proper suction and minimize cavitation (air entering the lines).
Here’s where you’re most likely to find it:
1. Under the Bed
This is the most common location in travel trailers and smaller fifth wheels.
- The freshwater tank often sits beneath or behind the bed platform.
- The pump is mounted beside the tank on a wooden base or directly on the floor.
- Access is usually through a lift-up bed panel or small screwed cover.
Pro Tip: Listen for the pump hum near the head of the bed—it’s a dead giveaway.
2. Inside Kitchen or Bathroom Cabinets
Many lightweight trailers and camper vans hide the pump in a cabinet base under the sink.
- It’s often behind a removable wooden panel held by screws or staples.
- The pump will share space with the water lines and sometimes the water heater.
- You may see a strainer or inline filter attached to the inlet hose.
This spot keeps plumbing short and central but can make the noise more noticeable during nighttime use.
3. Beneath Dinette Seating or Storage Benches
To save space, some manufacturers tuck the pump under dinette bench seats or storage boxes.
- You might hear a rhythmic vibration under the seat when water runs.
- A small access hatch or Velcro panel typically conceals it.
This design offers easy access but little sound insulation.
4. Utility or Service Bay (External Compartment)
Larger Class A and Class C motorhomes often group all plumbing systems in an external utility bay.
- The pump sits alongside the city water connection, filter, valves, and drain points.
- It’s accessible from outside, making maintenance easier without entering the living area.
- The compartment is usually heated or insulated to prevent freezing.
This setup is the easiest to service but may require kneeling to reach connections.
5. Near the Freshwater Tank in Rear or Underfloor Storage
Some rigs—especially toy haulers and premium fifth wheels—place the tank low in the chassis for weight distribution.
- The pump is installed within two to four feet of the tank outlet.
- It may be under a rear cargo hatch or utility bay cover.
Follow the plastic PEX line running out of your tank—it always leads straight to the pump.
6. Hidden Compartments Behind Panels
If you’ve checked everywhere and still can’t find it, it’s likely behind a false wall or panel near the tank.
- Look for small vents, access screws, or seams in cabinetry.
- Some panels are stapled instead of screwed—pry gently to reveal the pump.
- Always replace insulation afterward to reduce noise.
Locating Your RV Water Pump Step by Step
Here’s a proven step-by-step process to find your pump quickly and safely:
Step 1: Turn Off Power and Water Pressure
Before exploring, switch off the 12 V water-pump switch and disconnect city water. This prevents accidental activation or leaks.
Step 2: Listen for the Humming Sound
Turn the pump switch on and briefly open a faucet. Follow the faint mechanical hum—it’s your best clue.
Step 3: Trace the Freshwater Line
Find your freshwater tank (typically visible through an exterior panel or under a bed). Follow the blue or clear hose leading from the tank—it ends at the pump.
Step 4: Check Cabinets, Benches, and Compartments
Look inside kitchen and bathroom base cabinets, behind removable panels, and beneath dinette seating.
Step 5: Use a Flashlight
If it’s dark or tight, a flashlight helps you spot the pump housing or wiring harness.
Step 6: Confirm You’ve Found It
Once located, you’ll see a small 12 V unit with two hoses and an inline strainer. It may have a label such as Shurflo 4008 or Flojet 03526.
What the RV Water Pump Looks Like
Most RV water pumps share these traits:
- Size: roughly 6–8 inches long and 4–5 inches wide.
- Shape: cylindrical with flat mounting base.
- Connections: one inlet hose (from tank), one outlet hose (to plumbing).
- Strainer: clear or white plastic cap on inlet side.
- Wiring: red (+) and black (–) 12 V leads.
- Mounting: four screws with rubber grommets to absorb vibration.
If your RV has an accumulator tank, you’ll see a small round reservoir next to it—this smooths out water flow and pressure.
Why Manufacturers Hide the Pump
It may seem inconvenient, but there are several smart reasons:
- Noise Control: Direct contact with walls or flooring amplifies vibration. Enclosing it muffles the hum.
- Protection: Pumps can be damaged by luggage, pets, or cleaning equipment. Hidden placement prevents bumps and spills.
- Space Efficiency: Compact plumbing layouts save room and reduce hose lengths, improving water pressure.
- Temperature Management: Enclosed spaces protect the pump from freezing or overheating.
- Aesthetics: No one wants a noisy black box in plain sight—concealment keeps interiors sleek.
Accessing the Water Pump for Inspection or Service
Once you’ve found the pump, proper access is key for maintenance.
1. Clear the Area
Remove stored gear or items around the compartment to expose the panel.
2. Remove Screws or Clips
Use a Phillips screwdriver or drill to take off the access panel. Keep screws in a labeled bag for easy reassembly.
3. Shut Off Power
Switch off the 12 V pump and disconnect the battery if working on wiring.
4. Prepare for Water Spillage
Lay towels under fittings—some water will leak when loosening hoses.
5. Label Hoses
Use masking tape to mark inlet vs. outlet before disconnecting to avoid confusion later.
6. Reassemble Securely
After inspection or repair, reattach the panel firmly to prevent vibration noise while driving.
Routine Maintenance Tasks
With access achieved, you can now keep your pump performing smoothly year-round.
Clean the Inlet Strainer
Unscrew the clear cap and rinse the fine mesh screen. Even a few grains of sand can restrict flow or make the pump cycle rapidly.
Check for Leaks
Inspect hose clamps, joints, and fittings for moisture or white mineral streaks. Tighten gently.
Test for Smooth Cycling
Turn on the pump and open a faucet. It should run evenly, not pulse or chatter excessively.
Prime After Storage
After winterization or draining, run the pump until water flows steadily to remove air pockets.
Inspect Electrical Connections
Make sure terminals are tight and corrosion-free. Spray with dielectric grease if necessary.
Flush the Freshwater System
Once or twice a season, sanitize your lines with diluted bleach and rinse thoroughly to prevent bacterial growth.
Safety Tips When Working on the Pump
- Always turn off electricity before disconnecting hoses or wires.
- Relieve water pressure by opening a faucet first.
- Avoid overtightening plastic fittings—they crack easily.
- Use P-clamps or cable ties to secure hoses away from sharp edges.
- Never run the pump dry—it can overheat the diaphragm in seconds.
How to Quiet a Noisy Water Pump
Even if perfectly functional, many pumps create a vibration that echoes through cabinetry. Here’s how to silence it:
- Rubber Mounts: Replace rigid screws with rubber or silicone dampeners.
- Flexible Tubing: Add short 12-inch loops of soft PEX or braided vinyl hose on both inlet and outlet.
- Accumulator Tank: Install a 0.5-gallon mini tank to absorb pulsation and reduce on/off cycling.
- Foam Insulation: Line the compartment walls with acoustic foam or carpet padding.
- Check for Rattling Panels: Secure any loose boards around the pump.
A well-insulated pump can drop perceived noise by 40% or more.
Troubleshooting Common Pump Issues
Finding the pump is only half the battle—understanding what its behavior means saves frustration.
Pump Runs but No Water
- Freshwater tank empty.
- Air lock in lines. Open faucets until steady flow returns.
- Clogged strainer or kinked hose. Clean or straighten lines.
Pump Won’t Turn On
- Check 12 V fuse or breaker.
- Ensure pump switch is on.
- Test wiring for loose or corroded connectors.
Pump Runs Constantly
- Leak somewhere in plumbing (look for drips under sinks).
- Faulty check valve letting water flow backward to tank.
Pressure Too Low
- Dirty filter or sediment buildup.
- Weak diaphragm from wear.
- Battery voltage below 11 V.
Excessive Pulsing or Sputtering
- Air trapped in lines.
- Overly long suction hose between tank and pump.
- Consider adding an accumulator to stabilize pressure.
When in doubt, consult your RV’s manual for fuse location, voltage specs, and pump model.
RV Type-Specific Locations
Because designs vary, here’s what to expect by RV category:
Travel Trailers
Usually under the bed or dinette near the rear. The freshwater tank sits low, and the pump is mounted on a plywood floor.
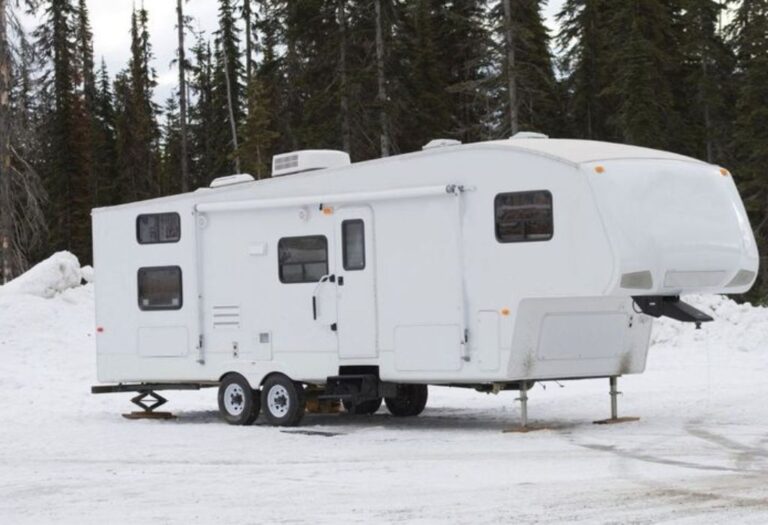
Fifth Wheels
Often installed in the basement utility bay with the water heater and bypass valves. Easy to access through exterior hatch.
Class A Motorhomes
In a side utility compartment close to the wet bay—clearly labeled and designed for quick service.
Class C Motorhomes
Under the rear bed or bathroom cabinet, reachable via a small screwed panel.
Class B Camper Vans
Located inside lower cabinetry near the sink or toilet due to limited space.
Regardless of type, the golden rule holds: follow the line from your freshwater tank, and you’ll find the pump.
Advanced Maintenance and Upgrades
Once comfortable with your pump’s location, consider these expert practices to extend its life and performance.
Install a Shut-Off Valve
Adding a small valve on the suction line allows you to service or replace the pump without draining the entire freshwater tank.
Upgrade to a Variable-Speed Pump
These models automatically adjust speed to maintain consistent pressure, eliminating cycling noise.
Add a Secondary Filter
Installing a fine sediment filter after the pump keeps particles out of faucets and appliances.
Use Quality Hoses and Fittings
Replace stiff plastic lines with flexible PEX or braided vinyl to reduce vibration transfer.
Regular Sanitization Routine
Flush with a ¼-cup bleach per 15 gallons of water every 3 months to prevent bacterial film.
Monitor Current Draw
A pump drawing more than its rated amperage could indicate internal wear—replace before it fails mid-trip.
Seasonal Tasks – Winterization and Dewinterization
Knowing the pump’s location makes seasonal prep straightforward.
Winterizing
- Turn off power.
- Drain the freshwater tank.
- Open low-point drains and faucets.
- Connect a short hose from antifreeze bottle to the pump’s inlet.
- Turn pump on briefly to push antifreeze through lines.
- Turn off and relieve pressure.
Dewinterizing
- Refill tank with fresh water.
- Run pump to flush antifreeze out.
- Inspect for leaks, especially around fittings disturbed during storage.
Performing these steps confidently means no more guessing which panel hides your pump during the first freeze of the year.
How to Replace or Relocate the Pump
Eventually, every RV water pump wears out—typically after 5–7 years.
Replacement Steps:
- Disconnect power and drain lines.
- Label inlet/outlet hoses.
- Unscrew mounting base.
- Transfer fittings to the new pump.
- Mount securely using rubber pads.
- Reconnect wiring (red = positive, black = negative).
- Prime system and test for leaks.
Relocation Considerations:
Only relocate if noise is excessive or access impossible. Keep the new spot within 4 feet of the freshwater tank and below water level to ensure suction efficiency.
How Long RV Water Pumps Last
- Average lifespan: 5–8 years under regular use.
- Heavy full-timers: replace around every 5 years.
- Occasional weekend campers: may last a decade with care.
Extending lifespan comes down to clean water, secure mounting, and occasional inspection.
Extra Tips from Experienced RV Technicians
- Carry a spare fuse—pump issues often start with blown fuses, not failed motors.
- Use a voltage meter to test power at pump terminals before assuming replacement.
- Label your bypass valves near the pump; it helps during winterization.
- Avoid city-water over-pressurization. Always use a pressure regulator; high city pressure can damage pump check valves.
- Turn off pump when leaving the RV. Prevents flooding if a line bursts while you’re away.
Preventive Maintenance Schedule
| Frequency | Task |
| Every trip | Inspect fittings and listen for leaks |
| Monthly | Clean strainer and run sanitizer |
| Every 6 months | Check electrical connections and pressure valve |
| Yearly | Replace anode (if present) and test flow rate |
| Every 5 years | Consider replacing pump or diaphragm |
A few minutes of attention each season keeps your RV’s plumbing reliable and your travels worry-free.
FAQs – Water Pump Location and Use
1. Why is my water pump under the bed?
That’s where the freshwater tank is. Short plumbing runs reduce strain and noise.
2. Can I access it from outside the RV?
In larger motorhomes yes—look for a labeled utility or “wet” bay.
3. How do I know it’s working?
When the pump switch is on and a faucet opens, you’ll hear a soft hum as water flows.
4. Is the pump on when connected to city water?
No, turn it off—city pressure bypasses the pump entirely.
5. What if it’s constantly running even when taps are closed?
You likely have a small leak or failing check valve.
6. Can I add insulation to make it quieter?
Yes, foam lining or rubber feet work well. Just keep airflow clear for cooling.
7. Should I drain it before winter?
Yes, always drain lines and use RV antifreeze if freezing temperatures are expected.
8. How can I tell if the pump is bad?
It may buzz loudly without pumping, trip fuses, or show water leaks at seals.
9. What brand replacement should I choose?
Stick with Shurflo, Flojet, or Seaflo—they’re industry standards.
10. What’s the cost of replacement?
Most 12V pumps cost $60–$120, depending on flow rate and features.
Conclusion – Know Your Pump, Know Your RV
So, where is the water pump located in an RV?
In nearly every case, it’s near the freshwater tank—often under the bed, inside a cabinet, or in a utility bay. It may be hidden, but once you know the signs—a faint hum, two hoses, a small strainer—you can find it fast.
Understanding where it lives and how it works gives you control over your RV’s most important comfort system: water. From locating and inspecting it, to cleaning, silencing, or even replacing it, mastering your water pump means fewer surprises and smoother travels.
When you know your pump, you know your RV. The next time you hear that gentle hum, you’ll not only know where it is—you’ll know exactly what it’s doing to keep your adventures running clean and comfortable.
I’m David R. Coleman, the founder, lead writer, and lifelong tool enthusiast behind GarageToolPro.com. With years of experience in automotive repair, woodworking, and home DIY projects, I created this platform to share practical tips, detailed tool reviews, and step-by-step guides that help mechanics, hobbyists, and homeowners get the job done right the first time.