How to Flush a Suburban RV Water Heater Properly and Keep It Running Like New
You turn on your RV’s hot water tap, expecting a nice warm flow, but instead, it sputters or smells metallic. The culprit? Sediment and mineral buildup in your Suburban RV water heater.
Over time, hard water deposits form a thick layer inside the tank, reducing efficiency and even damaging the heating element or anode rod. Flushing the water heater regularly keeps it clean, prevents corrosion, and ensures consistent hot water.
Many RV owners forget this simple maintenance task until it’s too late, leading to expensive repairs or replacements. But the good news is, flushing a Suburban RV water heater is easy to do yourself with the right tools and guidance.
In this detailed guide, you’ll learn how to flush a Suburban RV water heater step by step, why it’s important, what tools to use, and how to maintain it for years of trouble-free performance.
Why You Should Flush a Suburban RV Water Heater
Flushing removes sediment, lime scale, and debris that naturally collect inside the water heater tank. Over time, these minerals settle at the bottom and reduce heating efficiency.
If left unchecked, buildup can insulate the water from the heating element, forcing it to work harder and increasing your propane or electricity usage.
Sediment can also clog faucets, produce rotten egg smells, and cause the pressure relief valve to leak.
According to Suburban Manufacturing’s maintenance guidelines, you should flush your RV water heater at least twice a year, or more often if using hard water.
Routine flushing not only restores performance but also extends the lifespan of the tank and anode rod.
Understanding the Suburban RV Water Heater
Suburban water heaters are popular in RVs because of their durability and dual heating options — gas and electric.
They come in various sizes, typically 6 to 12 gallons, and use a steel tank lined with porcelain enamel for corrosion resistance. Unlike Atwood models, Suburban heaters rely on a sacrificial anode rod to prevent rust.
This anode rod attracts minerals and corrosion before they can damage the tank interior. When it becomes heavily corroded, it must be replaced.
Because of these materials and design, regular flushing is essential to remove sediment that settles around the anode and heating element.
Knowing how your Suburban water heater works makes the flushing process easier and safer.
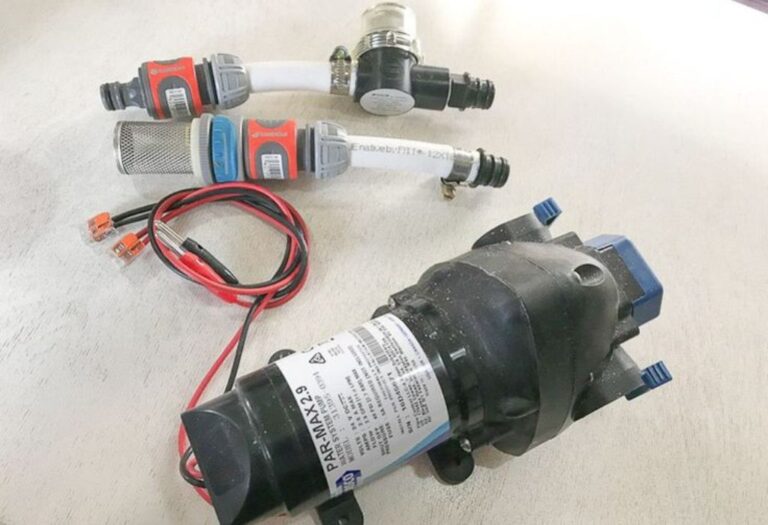
Tools and Supplies You’ll Need
Before you begin, gather all the necessary tools to flush your Suburban RV water heater efficiently.
- Ratchet or 1-1/16” socket for removing the anode rod
- Water heater tank rinser or wand attachment
- Freshwater hose (not the same one used for black tank cleaning)
- Teflon tape for reinstalling the anode rod
- Replacement anode rod (if needed)
- Gloves and safety glasses
- A bucket or towel for water runoff
Optional: white vinegar for deep cleaning and mineral removal.
Having everything ready ensures a smooth, mess-free maintenance process.
Step-by-Step Guide: How to Flush a Suburban RV Water Heater
Step 1: Turn Off Power and Fuel
Before starting, turn off the propane supply and disconnect the electric power to the heater. Flip the breaker switch or unplug the RV’s power cord to avoid accidental heating.
Allow the water inside the heater to cool for at least 30–45 minutes. Hot water under pressure can cause burns or scalding.
Safety should always come first during RV maintenance.
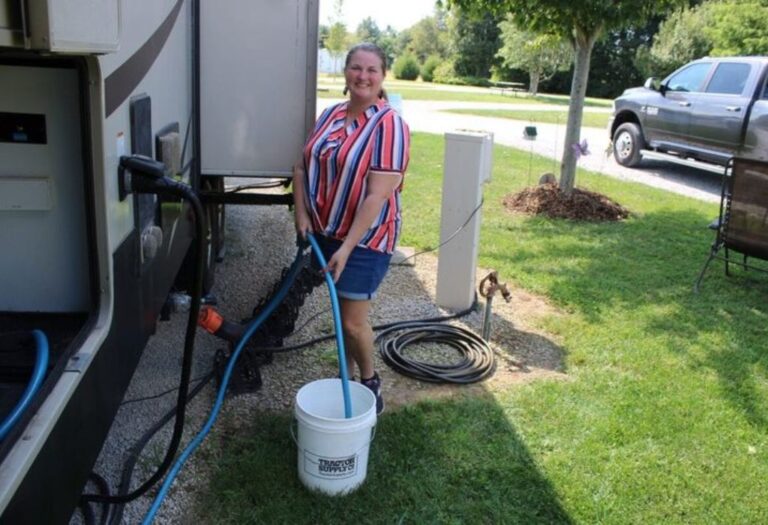
Step 2: Turn Off the Water Supply
Next, shut off the RV’s freshwater supply or pump. Open a hot water faucet inside your RV to relieve pressure in the system.
This step prevents water from spraying out when you remove the drain plug or anode rod.
Once pressure is released, proceed to the water heater’s exterior access panel.
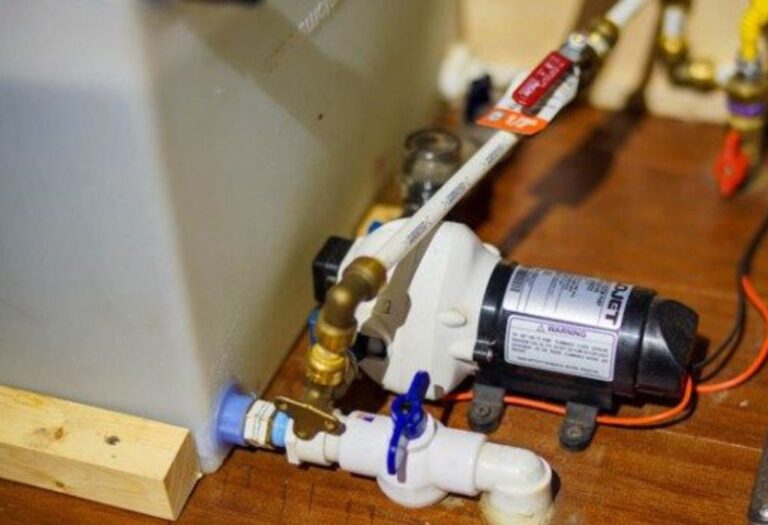
Step 3: Remove the Anode Rod and Drain the Tank
Locate the large hex-head plug at the bottom of the Suburban heater. This is both the anode rod and drain plug.
Place a bucket beneath it and use your 1-1/16” socket wrench to loosen and remove it. Water will rush out forcefully, so stand clear.
Inspect the anode rod. If more than 75% of it is corroded or missing, replace it with a new one.
Allow the tank to drain completely before moving on to the next step.
Step 4: Flush the Inside of the Tank
Attach your tank rinser or cleaning wand to a garden hose. Insert the wand into the drain opening and spray high-pressure water into the tank.
Move the wand in and out to dislodge sediment and mineral flakes. Continue flushing until the water runs clear.
You’ll likely see white or brown chunks coming out — that’s calcium and magnesium buildup.
For deep cleaning, you can pour a 50/50 mix of white vinegar and water into the tank, let it sit for an hour, then rinse again.
A thorough flush keeps your heater efficient and odor-free.
Step 5: Inspect and Clean the Pressure Relief Valve

While the tank drains, inspect the pressure relief valve located at the top.
Lift the small lever to make sure water flows freely and the spring resets properly. If it sticks, replace it with a new one.
Clean around the valve opening with a cloth to remove any residue or buildup.
A properly working pressure valve ensures safe operation and prevents excess pressure inside the tank.
Step 6: Reinstall the Anode Rod
Wrap the threads of your new or cleaned anode rod with Teflon tape to prevent leaks.
Insert it back into the drain opening and tighten snugly using your socket wrench. Do not overtighten — it should be firm but not forced.
Wipe away any remaining water around the drain area.
This step completes the cleaning phase and prepares your heater for refilling.
Step 7: Refill and Test the Water Heater
Close the pressure relief valve and turn your freshwater supply back on. Open a hot water faucet inside the RV to allow air to escape as the tank fills.
Once water flows smoothly, the heater is full. Check around the drain plug and pressure valve for leaks.
Now, restore propane and electricity. Turn on the heater and let it run for 10–15 minutes to ensure it heats properly.
Your Suburban water heater is now clean, efficient, and ready for your next adventure.
How Often You Should Flush Your Suburban RV Water Heater
How often you flush depends on water hardness and usage.
For RVers using campground water with high mineral content, flush every 2–3 months. If using filtered or softened water, every six months is usually enough.
You should also drain and flush the tank before winterizing your RV to prevent freezing and sediment hardening.
If you full-time in your RV, regular flushing is part of seasonal maintenance just like oil changes or roof inspections.
A clean tank not only heats faster but also prevents foul odors and element corrosion.
Common Mistakes to Avoid When Flushing
One of the biggest mistakes RV owners make is skipping the cool-down period before draining — leading to burns and damaged fittings.
Another common error is forgetting to turn off the bypass valve during winterizing or refilling, which can trap air inside the system.
Avoid using high-pressure washers or metal tools inside the tank; they can damage the enamel coating.
Never reuse an old, severely corroded anode rod — it’s cheap to replace and protects your entire system.
Lastly, always use potable water hoses and clean tools to prevent contamination inside your water heater.
Tips to Maintain Your Suburban Water Heater
After flushing, take a few extra steps to keep your system healthy.
Inspect the anode rod every few months and replace it when it’s 75% gone.
Clean the exterior access panel and check for insect nests or debris around the burner assembly.
Once a year, sanitize your entire freshwater system using a diluted bleach solution to prevent bacteria growth.
Keep the area around the water heater dry and free of obstructions to promote airflow and prevent rust.
Consistent care keeps your Suburban heater running efficiently for many seasons.
Troubleshooting Common Issues
If you notice water leaking from the heater’s base after flushing, check the anode rod threads or relief valve for looseness.
No hot water after flushing usually indicates trapped air or a pilot light issue — bleed air from faucets or relight the pilot.
A sulfur smell in hot water means bacteria or sediment still remain; flush again with vinegar or sanitize the tank.
If the heater makes popping sounds, that’s leftover sediment heating unevenly — another flush should solve it.
Persistent problems may signal a damaged heating element or thermostat, which requires professional inspection.
FAQs
1. How long does it take to flush a Suburban RV water heater?
About 45 minutes from draining to refilling, depending on buildup.
2. Can I use vinegar to clean my RV water heater?
Yes, mix 50% white vinegar with 50% water for effective mineral removal.
3. Should I remove the anode rod every time I flush?
Yes, because it serves as the drain plug and allows full cleaning access.
4. What size socket fits the Suburban anode rod?
Use a 1-1/16 inch socket wrench for removal and installation.
5. How often should I replace the anode rod?
Inspect every six months and replace when 75% of the material is gone.
6. Can I flush without a rinser wand?
Yes, but a wand makes it easier to dislodge sediment stuck at the bottom.
7. Is it safe to use a pressure washer?
No, it can damage the enamel lining and internal components.
8. What happens if I never flush the heater?
Sediment buildup will reduce efficiency, cause odors, and eventually ruin the tank.
9. Why does my water smell bad after flushing?
It may be bacteria or residue; flush again with vinegar or bleach mix.
10. Can I flush the heater while connected to city water?
No, always turn off the water supply before draining to prevent high pressure.
11. Should I leave water in the heater during storage?
No, drain it completely to prevent corrosion or freezing damage.
12. How do I remove stubborn anode rods?
Use a breaker bar for leverage, or apply heat to loosen corrosion.
13. Why is my water still cloudy after flushing?
Residual minerals may still be present; repeat the flush once more.
14. Can I use baking soda instead of vinegar?
Baking soda helps with odor but doesn’t dissolve mineral scale effectively.
15. Is flushing covered under RV warranty service?
No, it’s considered routine maintenance and must be done by the owner.
Conclusion
Flushing your Suburban RV water heater is one of the easiest ways to keep it working efficiently and extend its lifespan.
It removes harmful sediment, restores heating performance, and prevents corrosion that could lead to costly replacements.
By following these simple steps and performing regular maintenance, you’ll enjoy clean, consistent hot water every time you camp.
A little attention now saves you from expensive repairs later — and ensures your RV adventures stay warm, comfortable, and worry-free.
I’m David R. Coleman, the founder, lead writer, and lifelong tool enthusiast behind GarageToolPro.com. With years of experience in automotive repair, woodworking, and home DIY projects, I created this platform to share practical tips, detailed tool reviews, and step-by-step guides that help mechanics, hobbyists, and homeowners get the job done right the first time.