How to Install Heat Tape on RV Water Line for Winter Protection
It’s a frosty morning at your campsite, and you’re ready for a hot cup of coffee. But when you turn on the faucet, nothing happens. Your RV water line has frozen overnight, cutting off your water supply completely.
That’s a nightmare scenario many RVers face during cold weather camping. The good news is, it’s completely preventable with one simple upgrade — installing heat tape on your RV water line.
Heat tape keeps your water lines from freezing by providing gentle, consistent warmth even in subzero temperatures. It’s a must-have for winter RV living or traveling through cold climates.
According to RV Life Magazine, frozen water lines are one of the top three causes of winter RV damage, costing owners hundreds of dollars in repairs every year.
In this guide, you’ll learn step-by-step how to install heat tape on an RV water line safely and effectively, plus the best practices to keep your water system flowing all winter long.
Why You Need Heat Tape on RV Water Lines
When temperatures drop below freezing, any exposed water line can freeze solid. Once that happens, pressure builds up inside the pipe and can cause cracks or bursts.
Heat tape works like a small, flexible electric heater that wraps around the pipe and prevents ice from forming.
It maintains a consistent temperature along the line, keeping water flowing smoothly no matter how cold it gets outside.
This simple installation can save you from expensive water damage, leaks, and mid-winter plumbing emergencies.
For full-time RVers or winter travelers, heat tape isn’t just a convenience — it’s essential protection.
Understanding How Heat Tape Works
Heat tape, also called pipe heating cable, is an electrical cable that produces low, controlled heat along its length.
It’s typically wrapped directly around pipes or hoses that carry water. Some models have built-in thermostats that turn on automatically when temperatures approach freezing.
Most RV-friendly heat tapes are self-regulating, meaning they adjust output based on ambient temperature — providing more heat when it’s cold and less when it’s mild.
This smart design ensures energy efficiency while protecting your pipes from freezing.
Knowing how it works helps you choose the right kind for your RV setup.
Tools and Materials You’ll Need
Before starting, gather everything you need for the job.
- Heat tape or self-regulating heat cable (rated for outdoor/RV use)
- Electrical tape or zip ties
- Insulation foam tubing or pipe wrap
- Power extension cord (rated for outdoor use)
- Gloves and scissors
- Cable clips or Velcro straps (optional for neat installation)
Make sure your heat tape matches the diameter and length of your RV’s exposed water lines.
Always check the manufacturer’s temperature and safety ratings before purchase.
Step-by-Step: How to Install Heat Tape on RV Water Line
Step 1: Turn Off the Water Supply
Before installing, shut off the main water supply to your RV and drain any residual water from the lines.
This prevents accidental leaks or electrical contact with water during the process.
Disconnect the hose from the water source and stretch it out flat for easier access.
Step 2: Measure and Prepare the Heat Tape
Unroll the heat tape and lay it alongside your water line. Measure the full length of exposed piping and cut insulation materials accordingly.
Make sure the tape covers all sections that are outdoors or near unheated areas. Avoid wrapping it over itself — this can cause overheating.
If your model has a thermostat, ensure it remains exposed to open air, not covered by insulation or tape.
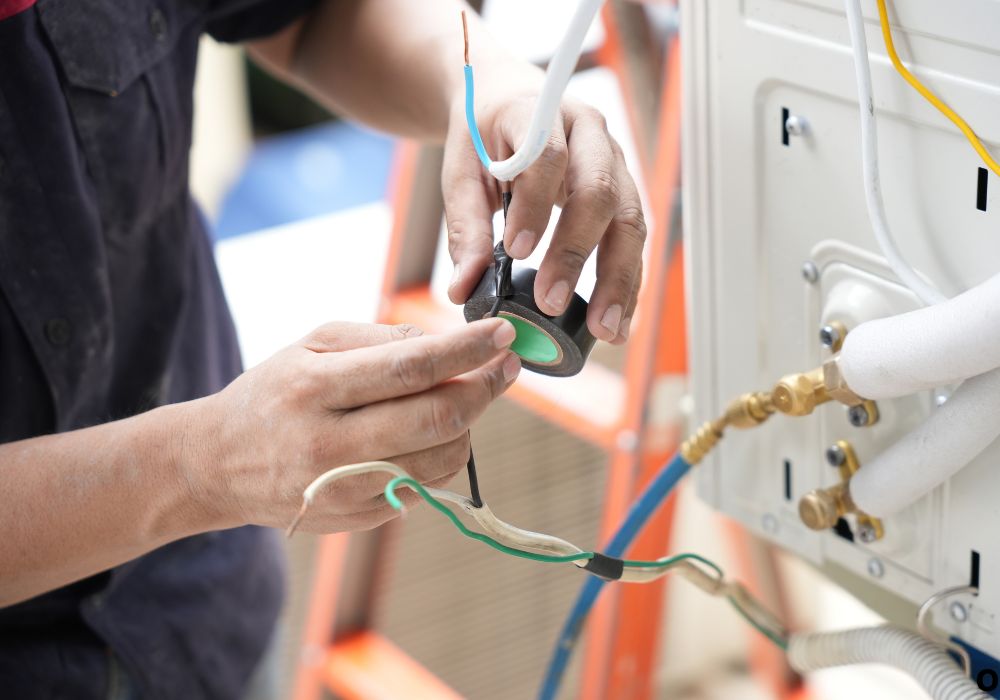
Step 3: Attach the Heat Tape to the Water Line
Wrap the heat tape snugly around the pipe or hose in a spiral pattern, spacing it evenly along the length.
Secure it in place using electrical tape or zip ties every 12 inches. Avoid metal wire or anything that could cut into the insulation.
Keep bends gentle and avoid kinking the cable, as that could damage the internal wires.
Once attached, double-check that the tape sits flat against the pipe surface for consistent heat transfer.
Step 4: Add Insulation Over the Heat Tape
After the heat tape is installed, cover the entire water line with foam pipe insulation or thermal wrap.
This layer traps the warmth from the tape and prevents heat loss to the cold air.
Seal all joints and ends with electrical tape to keep moisture out.
If you’re insulating a hose that connects to a campground spigot, include both ends for maximum protection.
Good insulation ensures your heat tape runs more efficiently and uses less power.
Step 5: Plug In and Test the System
Plug the heat tape into a properly grounded outdoor-rated power outlet. If possible, use a GFCI-protected outlet for safety.
Wait 5–10 minutes, then carefully touch the insulation — it should feel slightly warm to the touch, not hot.
Check the manufacturer’s indicator light or use an infrared thermometer to confirm it’s heating properly.
If the tape isn’t warming up, recheck all connections and make sure power is reaching the cable.
Your RV water line is now protected and ready for winter use.
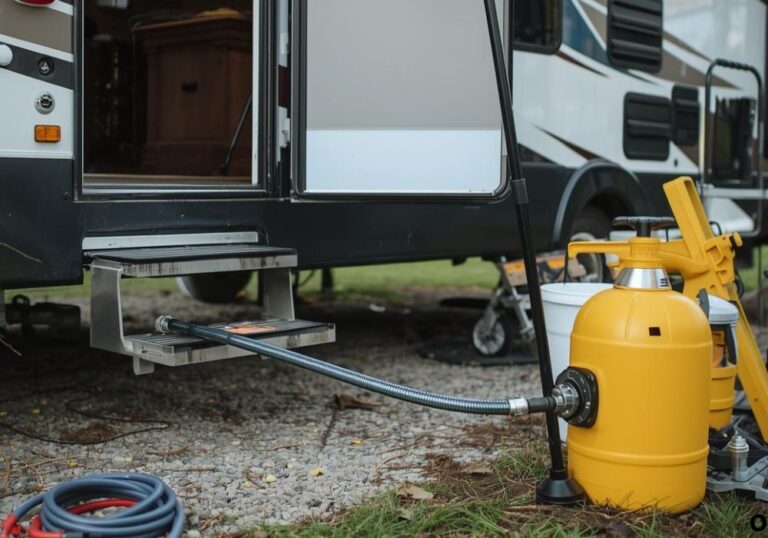
How to Install Heat Tape on a Fresh Water Hose
Your RV’s external fresh water hose is just as vulnerable to freezing as your main supply line.
To protect it, choose a drinking-water-safe heat tape or a preheated RV hose designed for potable water.
Follow the same wrapping process: spiral the heat tape evenly along the hose, keeping the thermostat exposed.
Then cover it with foam insulation and seal the ends.
Finally, plug it into a power source whenever the temperature drops near freezing.
How to Install Heat Tape Under the RV (for Exposed Piping)
If your RV has exposed plumbing underneath, those pipes also need protection.
Crawl under the vehicle (or use a creeper board) and identify all exposed water and drain lines.
Attach the heat tape along these pipes using zip ties, keeping electrical connections clear of debris or wet areas.
Add insulation tubing over the lines and secure it tightly to prevent wind or snow from loosening it.
Ensure cables are routed safely away from sharp edges or moving suspension parts.
Power Safety Tips for Heat Tape Installation
Always use heat tape that’s UL-rated for outdoor or RV use.
Never connect multiple heat tapes end-to-end unless the manufacturer specifically allows it.
Avoid extension cords that aren’t outdoor-rated or properly grounded.
Check for frayed cables before plugging in and replace any damaged sections immediately.
During winter, inspect your setup monthly to make sure the tape is still working and insulation hasn’t shifted.
Common Mistakes to Avoid
Avoid wrapping heat tape over itself — overlapping sections can cause overheating.
Don’t use heat tape designed for metal pipes on plastic ones unless clearly rated safe.
Never bury electrical connections under insulation or near water leaks.
Do not use duct tape to secure the cable; it can dry out and lose adhesion in cold weather.
Lastly, don’t forget to unplug the tape during warmer months to prevent unnecessary energy use.
Maintenance and Seasonal Storage Tips
When spring arrives, remove the heat tape and store it in a dry place.
Wipe it clean and coil it loosely to prevent bending or wire stress.
Inspect for any cracks, nicks, or exposed wiring before reuse.
Store foam insulation separately in a moisture-free area to prevent mildew.
By maintaining your setup, you’ll ensure it’s ready to protect your RV next winter.
Troubleshooting Heat Tape Problems
If your heat tape stops working, start by checking the outlet with another device to confirm power.
Use a multimeter to test the cable’s continuity — if it shows no reading, it may have burned out.
Inspect insulation for moisture, as water contact can cause the tape to short out.
Some self-regulating models only activate below 40°F, so it may appear “off” during mild temperatures.
If the thermostat or plug looks damaged, replace the tape immediately rather than attempting repairs.
Market and Performance Insights
The RV heat tape market has grown rapidly, with sales expected to rise 20 percent by 2030 as more people embrace cold-weather camping.
Most modern heat tapes are rated for -40°F or colder and last 5–10 years with proper maintenance.
Energy-efficient self-regulating cables can cut electricity use by up to 50 percent compared to older constant-wattage versions.
Installing one costs between $40 and $100, but it can prevent thousands in frozen pipe damage.
That small investment guarantees worry-free water access even in extreme winter conditions.
FAQs
1. What type of heat tape is best for RV water lines?
Self-regulating heat tape rated for outdoor and RV use works best for most climates.
2. Can I use regular household heat tape?
No, always use one approved for RVs or potable water lines to ensure safety.
3. Should I wrap the entire hose or just exposed parts?
Wrap all exposed sections, including fittings and connectors, for full protection.
4. Do I need insulation over the heat tape?
Yes, insulation helps retain warmth and improves energy efficiency.
5. Can heat tape overheat plastic pipes?
Only if it’s not rated for plastic. Choose cables marked safe for PVC or PEX.
6. How long does RV heat tape last?
With care, it typically lasts 5 to 10 years before needing replacement.
7. Does heat tape use a lot of power?
Most models draw only 3–7 watts per foot, making them very energy-efficient.
8. Should I unplug the heat tape in summer?
Yes, always disconnect it when not in use to extend lifespan.
9. Can I connect multiple heat tapes together?
Only if the manufacturer states it’s safe — otherwise, use separate outlets.
10. Will heat tape work without insulation?
It will, but it won’t be as effective or efficient in extreme cold.
11. Can I use heat tape on a fresh water hose?
Yes, as long as it’s safe for potable water applications.
12. How do I know if my heat tape is working?
Feel for slight warmth or use an indicator light or infrared thermometer.
13. Is it safe to leave heat tape plugged in overnight?
Yes, self-regulating heat tapes are designed for continuous use.
14. What’s the best insulation to use over heat tape?
Closed-cell foam tubing or high-density pipe wrap works best for RV applications.
15. Can I install heat tape inside the RV?
Only on unheated compartments or near tanks — never near electrical panels or wiring bundles.
Conclusion
Learning how to install heat tape on an RV water line is one of the best ways to protect your plumbing during freezing temperatures.
It keeps your water flowing, prevents costly pipe damage, and lets you enjoy comfortable camping year-round.
With the right materials, safe installation, and a bit of maintenance, you can eliminate the fear of frozen lines for good.
This simple upgrade adds both convenience and peace of mind — ensuring your RV adventures continue no matter how cold it gets outside.
I’m David R. Coleman, the founder, lead writer, and lifelong tool enthusiast behind GarageToolPro.com. With years of experience in automotive repair, woodworking, and home DIY projects, I created this platform to share practical tips, detailed tool reviews, and step-by-step guides that help mechanics, hobbyists, and homeowners get the job done right the first time.