How to Add Water to an RV Battery Safely and Correctly
Imagine you’re getting ready for your next RV trip, everything packed and ready, but your battery won’t hold a charge. You pop open the compartment and realize the water level inside the battery cells is almost gone.
That’s one of the most common issues RV owners face, especially with lead-acid batteries. Adding water seems simple, but doing it incorrectly can shorten the battery’s life or even damage it.
A properly watered RV battery lasts longer, charges more efficiently, and keeps your lights, fridge, and electronics running smoothly on the road.
According to RV maintenance experts, most deep-cycle batteries fail early because of neglecting water levels rather than electrical issues.
In this guide, you’ll learn exactly how to add water to your RV battery, when to do it, what type of water to use, and how to maintain it for reliable performance year-round.
Understanding Why RV Batteries Need Water
Most RVs use lead-acid batteries, also known as flooded or wet-cell batteries. These contain electrolyte fluid made of sulfuric acid and water that allows electrical current to flow between the plates.
Over time, the water portion of this electrolyte evaporates, especially during charging or in hot weather. If the water level drops too low, the exposed lead plates can corrode, reducing capacity and lifespan.
Adding water restores the electrolyte balance, ensuring consistent power output and preventing permanent damage.
It’s a routine but essential maintenance task every RV owner should know how to perform safely.
Knowing how your RV battery works helps you understand why this simple step makes such a big difference.
When You Should Add Water to Your RV Battery
Checking the water level regularly is key to preventing battery failure. As a rule, inspect it once a month during active use and every few months during storage.
You should add water if the electrolyte level falls below the top of the lead plates inside the battery cells. Ideally, it should cover the plates completely but stop about half an inch below the vent well.
Never fill before charging a battery that’s low; always charge first, then top off afterward. Charging expands the electrolyte, and overfilling before charging can cause overflow.
If you notice frequent low levels, it could indicate overcharging or high ambient temperatures.
Regular checks take only a few minutes and can save hundreds of dollars in premature battery replacements.
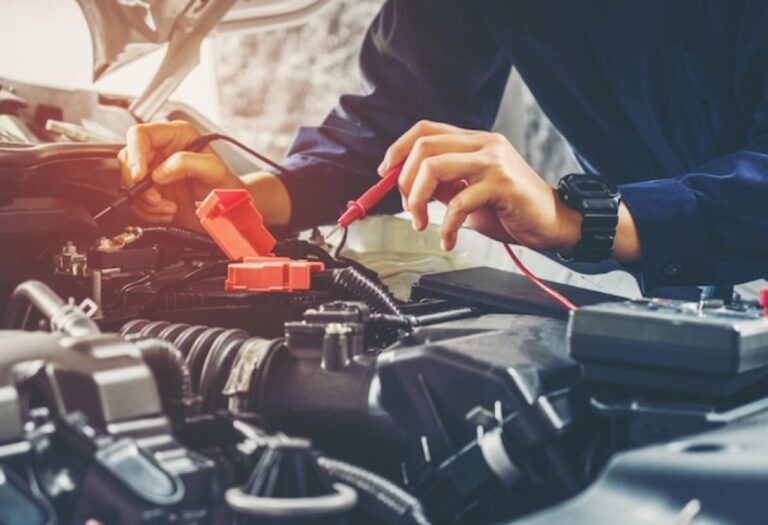
Tools and Safety Equipment You’ll Need
Before starting, gather the right tools to stay safe and avoid battery acid contact.
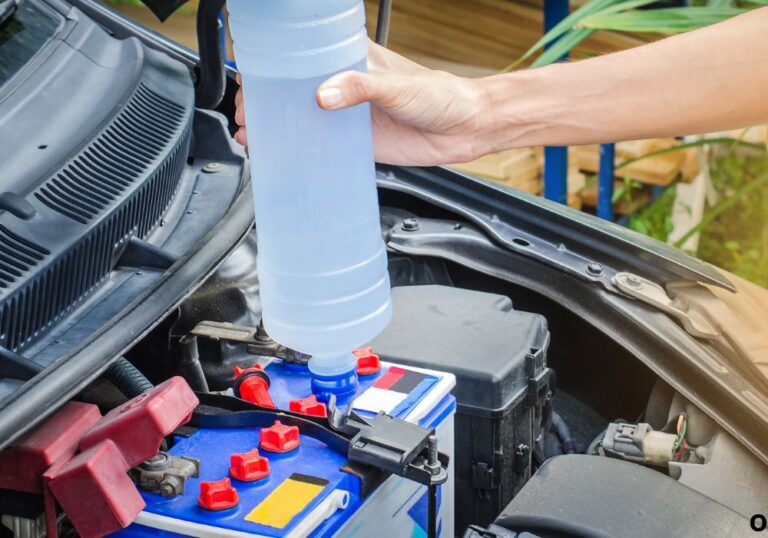
You’ll need distilled water, a battery filler bottle or funnel, rubber gloves, safety goggles, and a clean cloth.
Distilled water is essential because tap water contains minerals that can react with battery acid and cause scaling or internal damage.
Always wear gloves and goggles to protect your skin and eyes from acid splashes. Even a tiny drop can burn or corrode metal surfaces nearby.
Having a flashlight handy helps you see the fluid level clearly in low light conditions.
Step-by-Step Guide: How to Add Water to an RV Battery
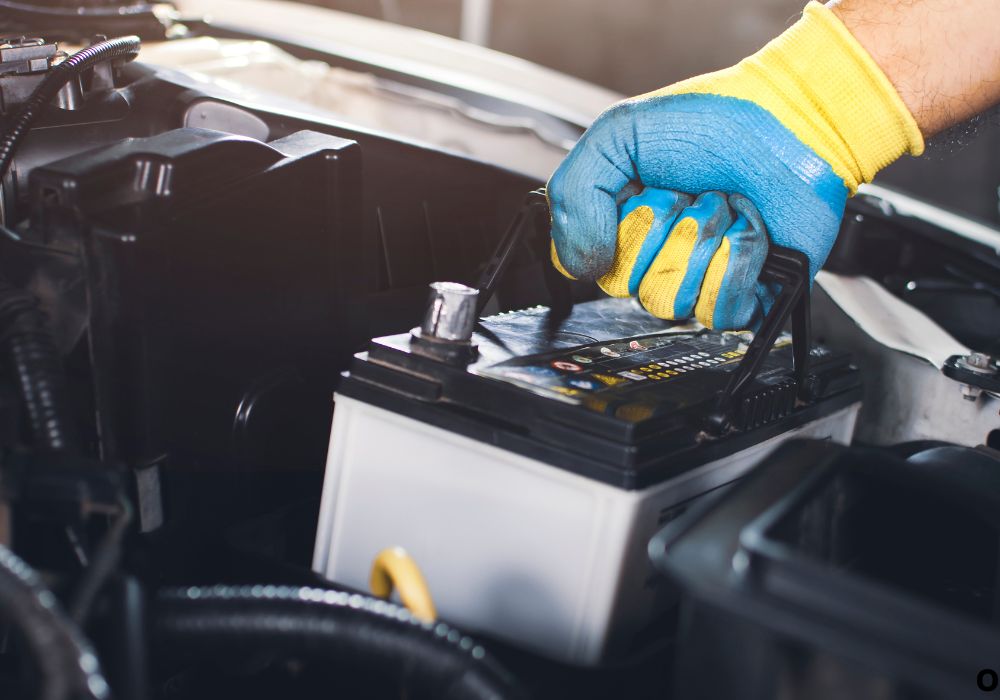
- Turn Off All Power Sources
Disconnect your RV from shore power and switch off all electronics. Safety comes first. - Access the Battery Compartment
Open the battery box or panel carefully. Most RV batteries are located near the tongue of travel trailers or under the chassis of motorhomes. - Remove the Vent Caps
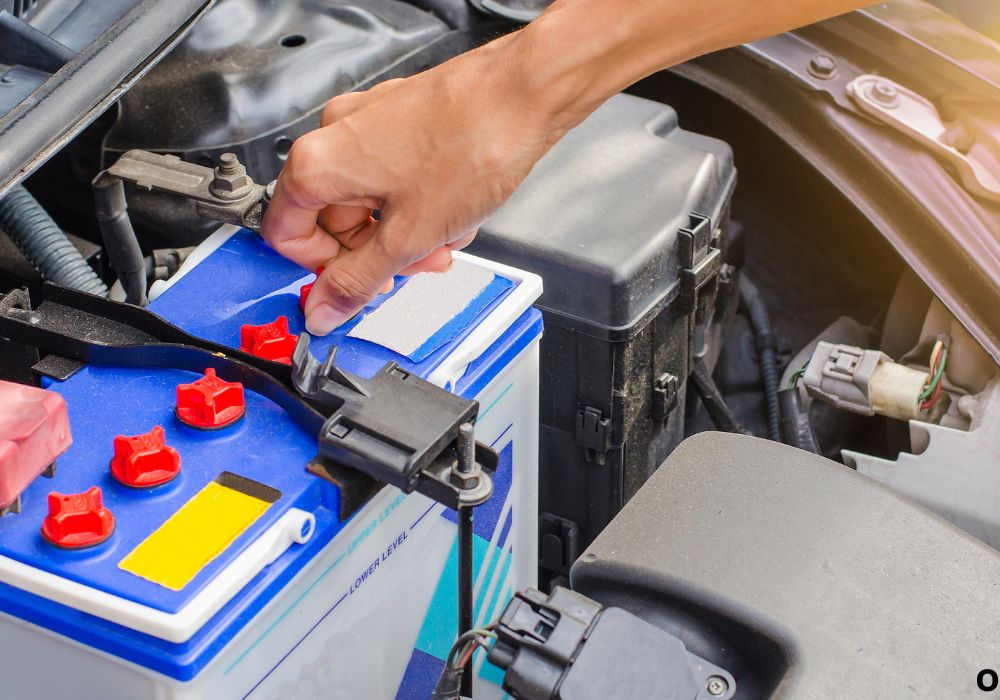
Each cell has a small vent cap or cover. Remove them gently with a flat screwdriver if needed and set them aside safely. - Inspect the Fluid Level
Look inside each cell with a flashlight. The fluid should cover the top of the lead plates but not touch the vent tube. - Add Distilled Water Slowly
Using a filler bottle or funnel, slowly pour distilled water into each cell until it reaches about half an inch below the vent well. Avoid overfilling. - Clean and Close Everything
Wipe off any spills, replace vent caps securely, and ensure no residue remains on the terminals. - Reconnect Power and Test
Reconnect the battery cables and test your RV systems to confirm the battery is functioning properly.
Taking your time ensures both safety and longevity for your battery.
Choosing the Right Type of Water
Always use distilled water when topping off your RV battery. It’s free of minerals, salts, and impurities that can react with sulfuric acid.
Using tap or bottled water might seem harmless, but over time, minerals build up inside the battery, reducing performance.
Distilled water prevents scaling, corrosion, and chemical imbalance in the electrolyte solution.
You can find it at grocery stores, pharmacies, or automotive supply shops.
If you’re storing your RV long-term, consider keeping a small jug of distilled water on hand for maintenance checks.
How Often Should You Check and Add Water
The frequency depends on your battery usage and climate. In hot or dry areas, water evaporates faster, requiring checks every two to four weeks.
During cooler months or when the RV is in storage, once every two to three months is usually enough.
For full-time RV users who frequently run appliances, check the water level before every long trip.
If you notice your battery consuming water more often than usual, check your charger’s voltage — overcharging can boil off the electrolyte.
Consistency is the secret to keeping your RV battery healthy for years.
What Happens If You Overfill or Underfill
Both overfilling and underfilling can harm your battery.
Overfilling causes electrolyte overflow during charging, leading to acid spills that corrode terminals and nearby metal.
Underfilling exposes the lead plates to air, causing irreversible sulfation and loss of capacity.
The correct level is slightly below the vent well and just enough to cover the plates completely.
Use a battery filler bottle with an automatic shutoff feature to prevent accidents if possible.
Signs Your RV Battery Needs Water
You can tell your RV battery needs water if you notice any of these symptoms:
- The battery doesn’t hold a charge as long as usual.
- It emits a strong sulfur or rotten egg smell.
- The sides of the battery case feel warm or bulged.
- The electrolyte level is visibly below the top of the plates.
- Your RV lights flicker or dim unexpectedly.
Ignoring these warning signs can lead to permanent battery failure and expensive replacements.
Regular maintenance keeps these problems from happening in the first place.
Safety Tips When Adding Water
Never smoke or create sparks near a battery — hydrogen gas from charging can ignite easily.
Always work in a well-ventilated area to avoid inhaling fumes.
If you spill any electrolyte, neutralize it immediately with baking soda and rinse with water.
Use only plastic tools near the terminals to avoid accidental short circuits.
Wear protective gear throughout the process, even for quick checks or refills.
How to Maintain Battery Health After Adding Water
After topping off your RV battery, keeping it healthy ensures your effort pays off.
Charge it fully at least once a month, even during off-season storage. A charged battery resists sulfation and holds water longer.
Clean terminals with a mix of baking soda and water to remove corrosion and improve conductivity.
Apply a thin coat of dielectric grease to the terminals to prevent oxidation.
Finally, always store your battery in a cool, dry place when not in use.
Storing Your RV Battery Correctly
If you’re storing your RV for winter or several months, remove the battery completely.
Clean it thoroughly, check water levels, and charge it to 100 percent before storage.
Store it on a wooden shelf or rubber mat — never directly on concrete, which can drain charge and cause condensation.
Check water levels every two months and recharge as needed to maintain health.
Proper storage can extend your battery’s lifespan by several years.
Troubleshooting Common Problems
If your battery still loses charge quickly after adding water, you may have a deeper issue.
Corroded terminals, sulfated plates, or overcharging can cause poor performance.
Use a multimeter to check voltage; a healthy 12-volt battery should read around 12.6 to 12.8 volts when fully charged.
If it’s below 12 volts even after charging, consider testing or replacing the battery.
Maintaining a healthy charge cycle is just as important as adding water.
Market Facts and Maintenance Insights
The U.S. RV battery market is projected to exceed $1.5 billion by 2030, driven by rising demand for off-grid camping and solar-ready rigs.
Around 80 percent of RV owners still rely on flooded lead-acid batteries, meaning regular watering remains essential.
Studies show that properly maintained batteries last two to three times longer than neglected ones.
With regular watering and charging, an RV battery can easily last five to seven years instead of just two or three.
That simple maintenance task directly saves hundreds of dollars in replacement costs.
FAQs
1. Can I use tap water for my RV battery?
No, always use distilled water to avoid mineral buildup inside the cells.
2. How often should I check the battery water?
Check once a month or more frequently in hot climates or heavy usage.
3. Should I add water before or after charging?
Always charge first, then add water to prevent overflow.
4. What happens if I overfill the battery?
It may leak acid during charging, causing corrosion or damage.
5. How do I know how much water to add?
Fill until the fluid sits about half an inch below the vent well.
6. Can I add bottled drinking water?
No, only distilled water is recommended for battery maintenance.
7. Why does my RV battery need water so often?
Overcharging or high heat can cause excessive water loss.
8. Can I add water to a sealed AGM or gel battery?
No, those types are maintenance-free and don’t require water.
9. What should I do if acid spills during refilling?
Neutralize immediately with baking soda and rinse the area with water.
10. Is it safe to open the battery caps myself?
Yes, as long as you wear gloves and goggles and avoid spilling fluid.
11. How long should an RV battery last?
With proper maintenance, it can last five to seven years.
12. Can I use rainwater or filtered water instead of distilled?
No, impurities can still damage the battery’s internal chemistry.
13. Should I disconnect the battery while adding water?
Yes, always disconnect it from power before performing maintenance.
14. Why does my battery bubble when charging?
It’s normal during charging, but excessive bubbling may indicate overcharging.
15. What’s the best time to check water levels?
After charging, when the electrolyte has stabilized and cooled.
Conclusion
Knowing how to add water to your RV battery is one of the simplest yet most important maintenance skills an RV owner can learn.
It protects the battery from damage, extends its lifespan, and ensures your adventures go smoothly without electrical problems.
With just a few precautions, a jug of distilled water, and regular care, you can keep your power system reliable for years to come.
A well-maintained RV battery doesn’t just save money — it gives you peace of mind every time you hit the road.
I’m David R. Coleman, the founder, lead writer, and lifelong tool enthusiast behind GarageToolPro.com. With years of experience in automotive repair, woodworking, and home DIY projects, I created this platform to share practical tips, detailed tool reviews, and step-by-step guides that help mechanics, hobbyists, and homeowners get the job done right the first time.